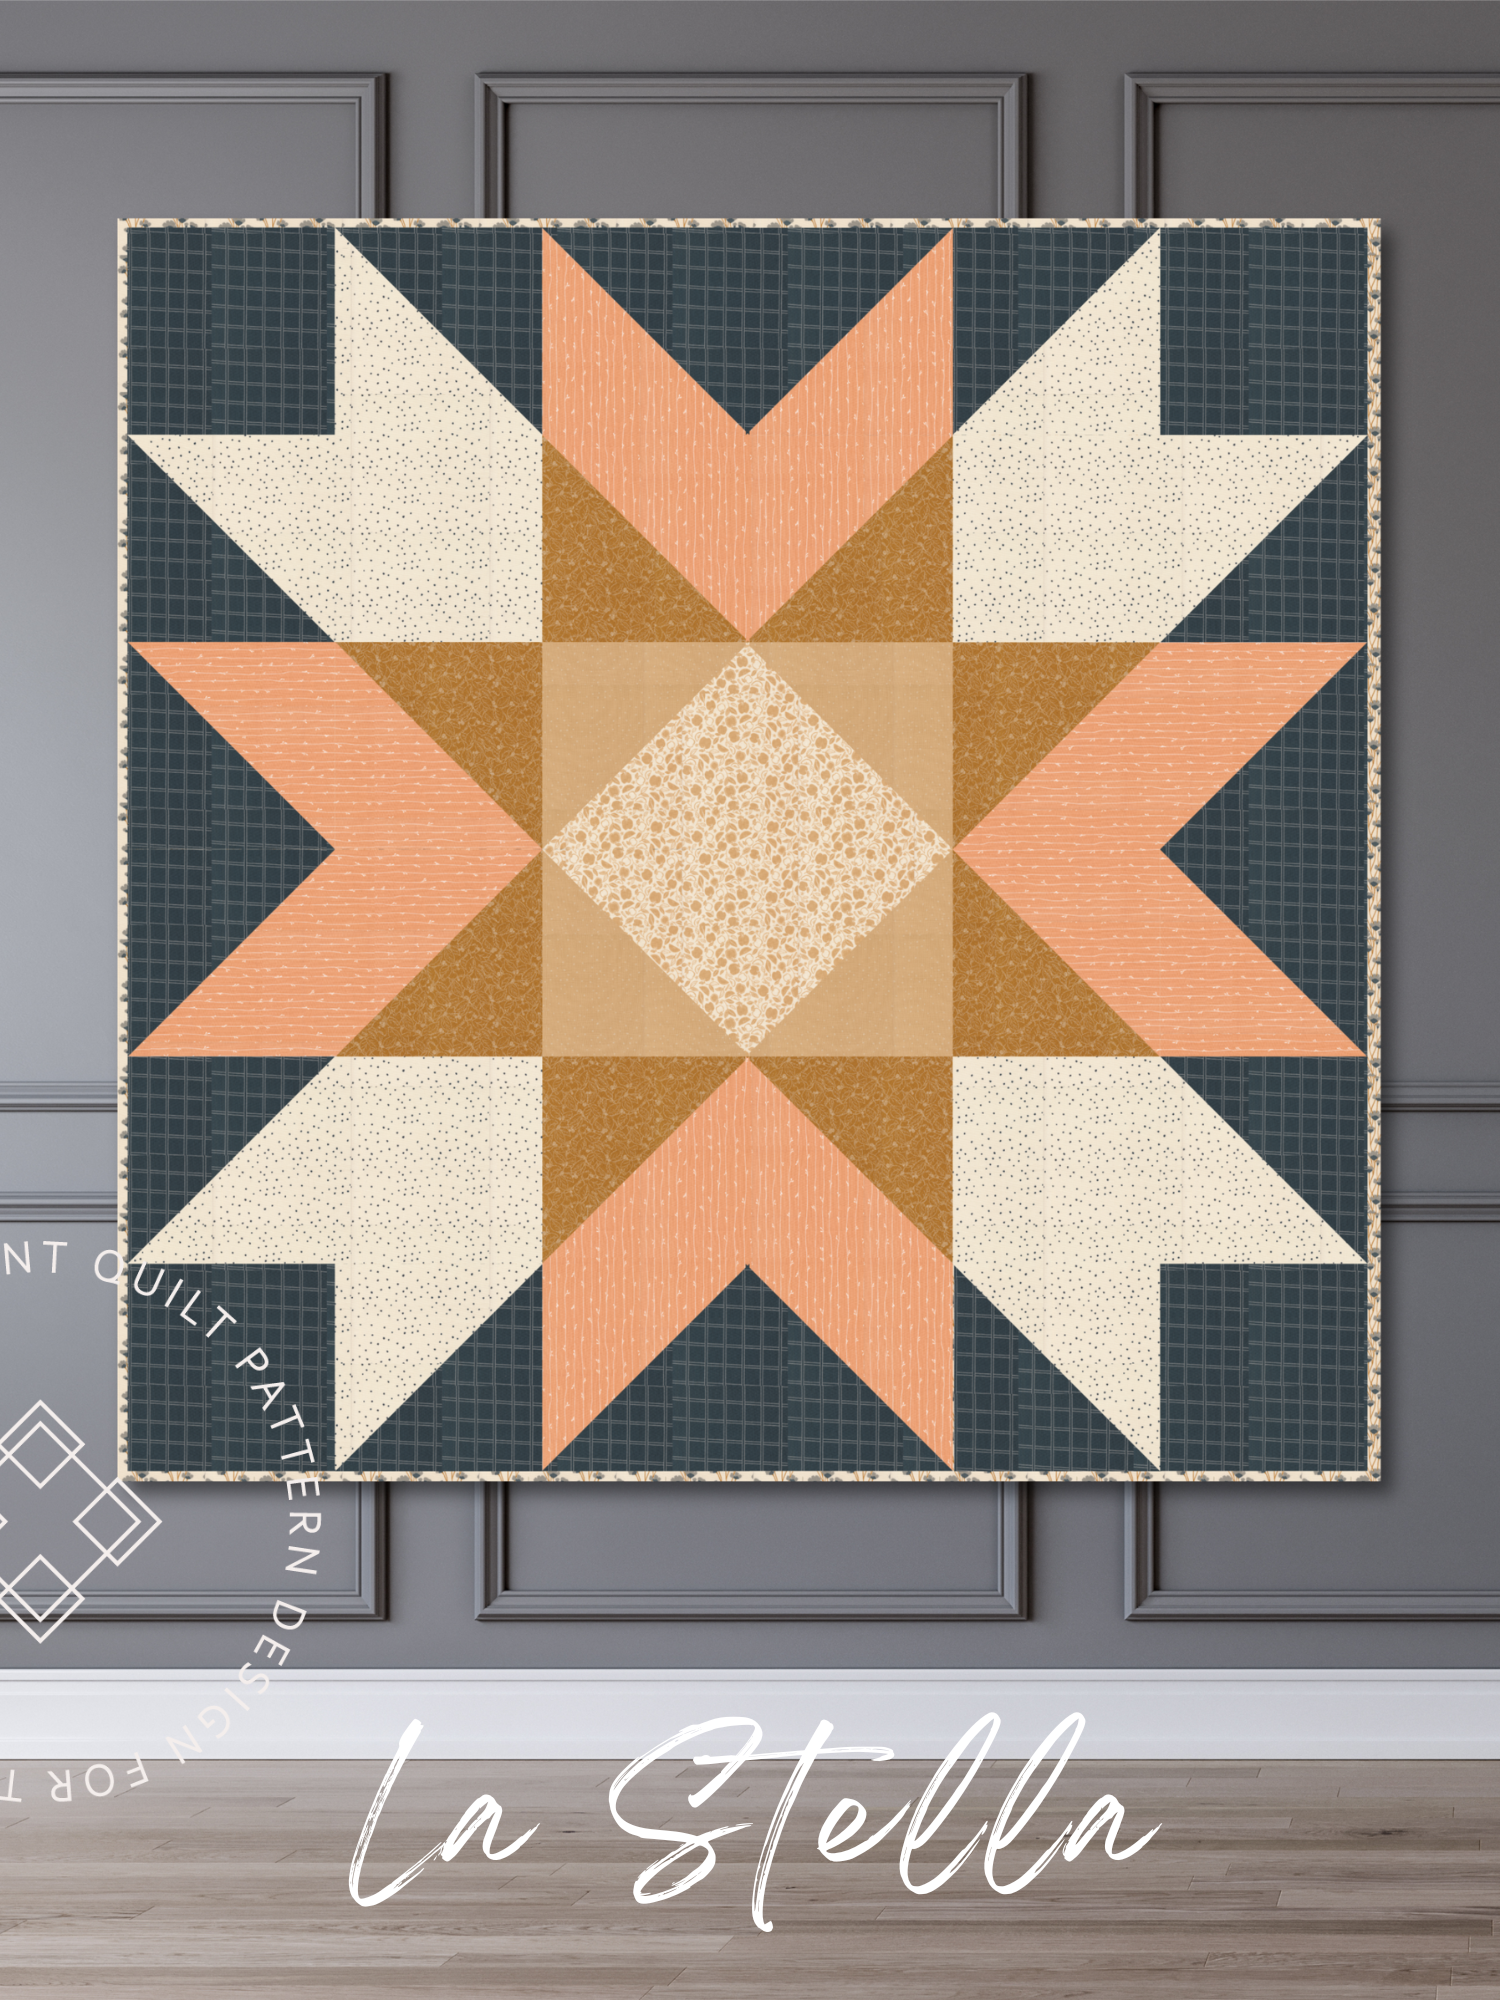
Round Trip Quilted Duffel Bag Pattern ft. Peachy Fabrics
May 21, 2025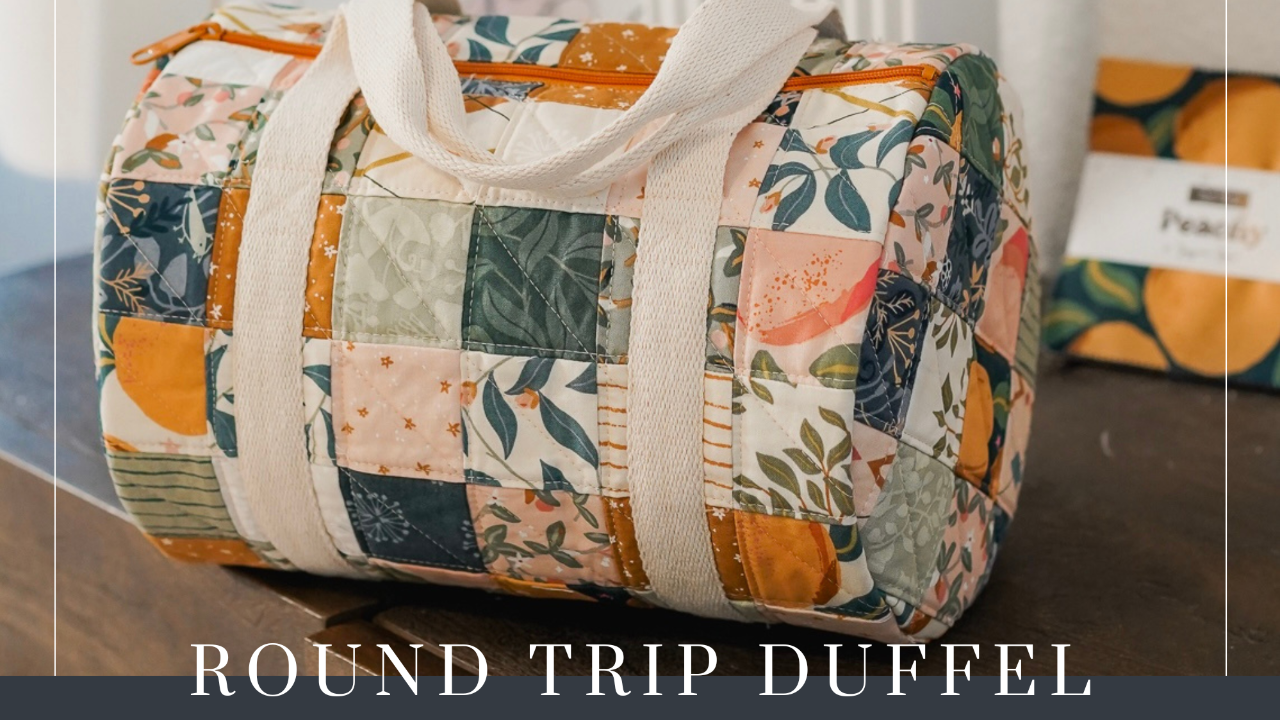
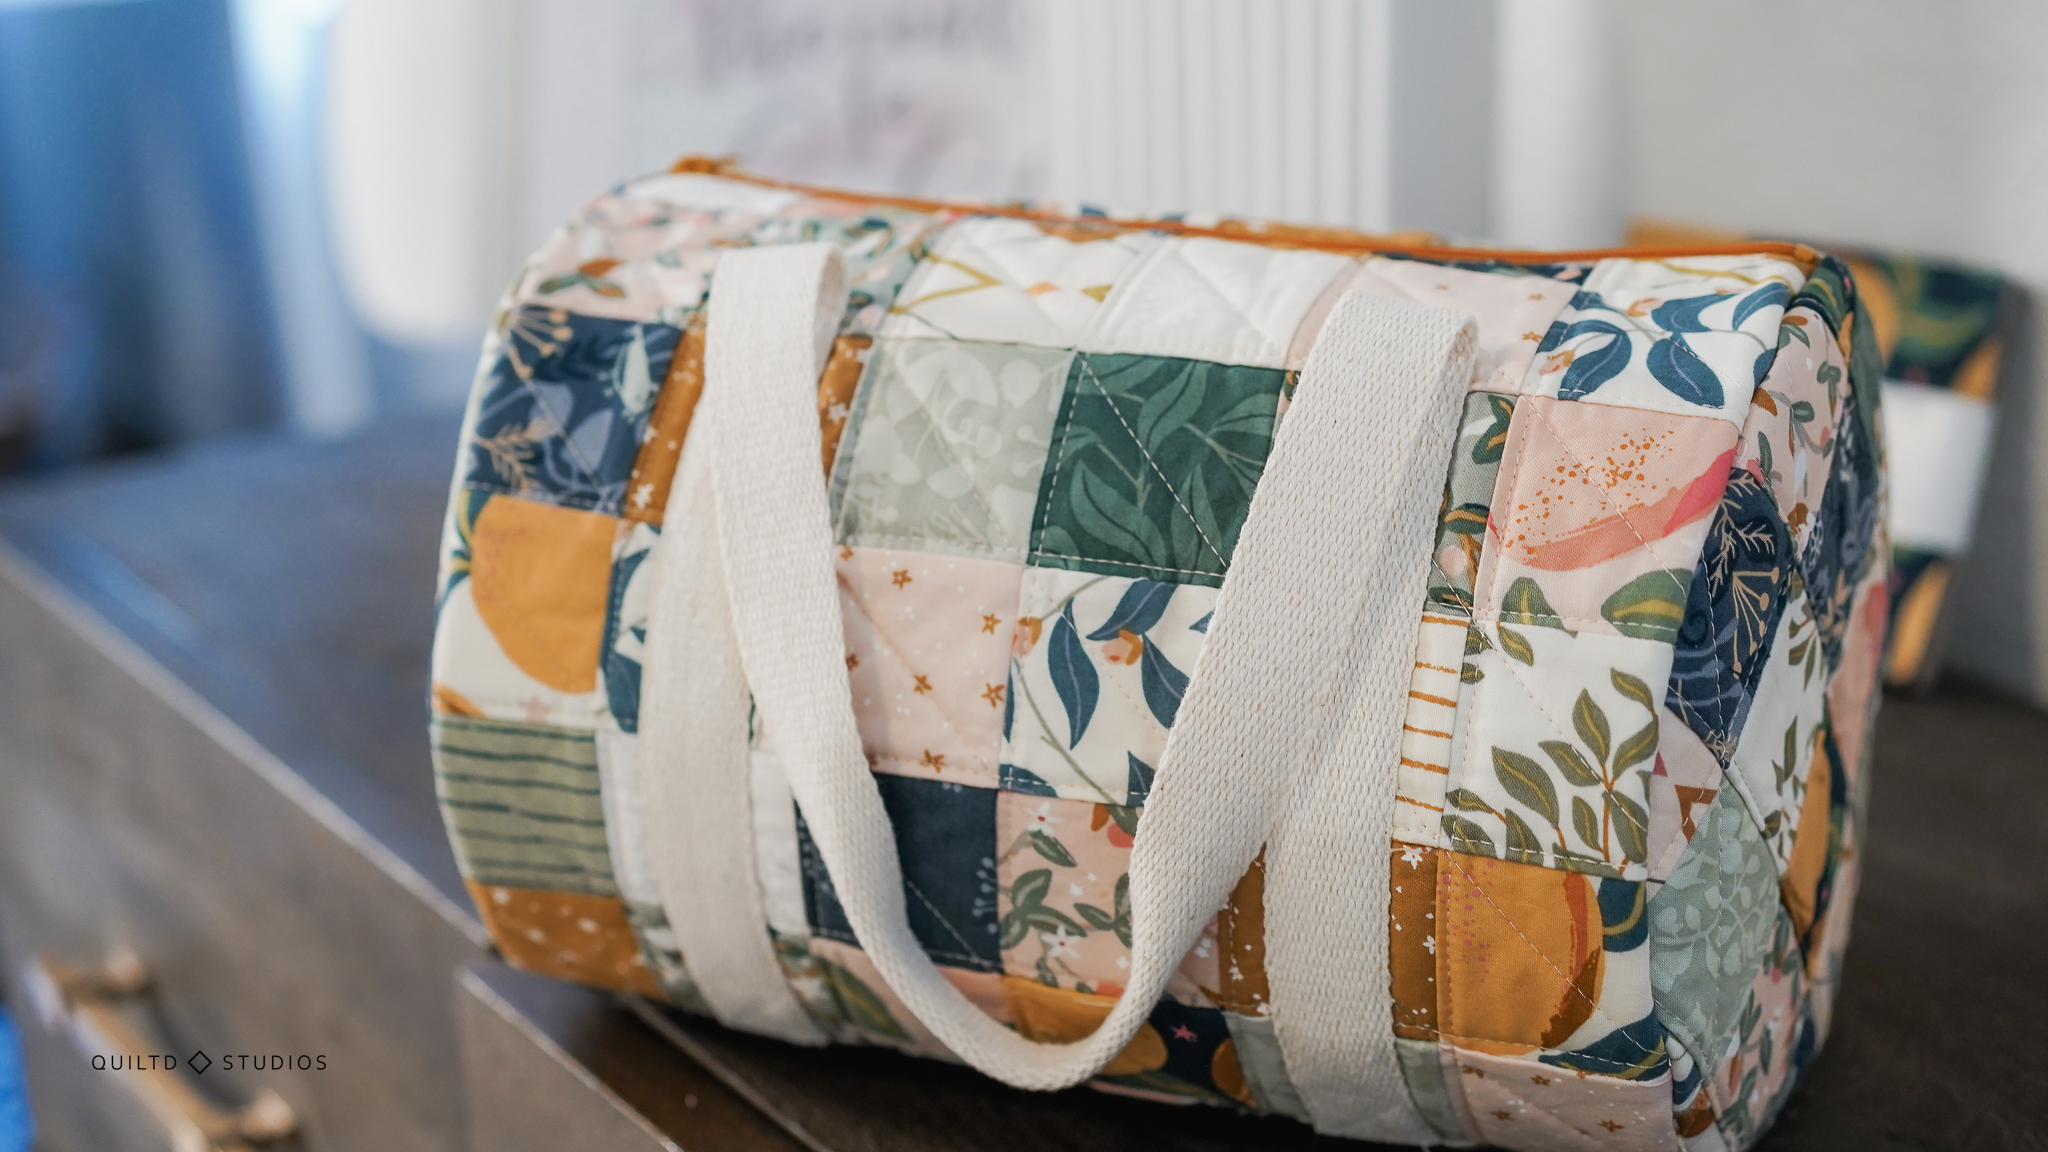
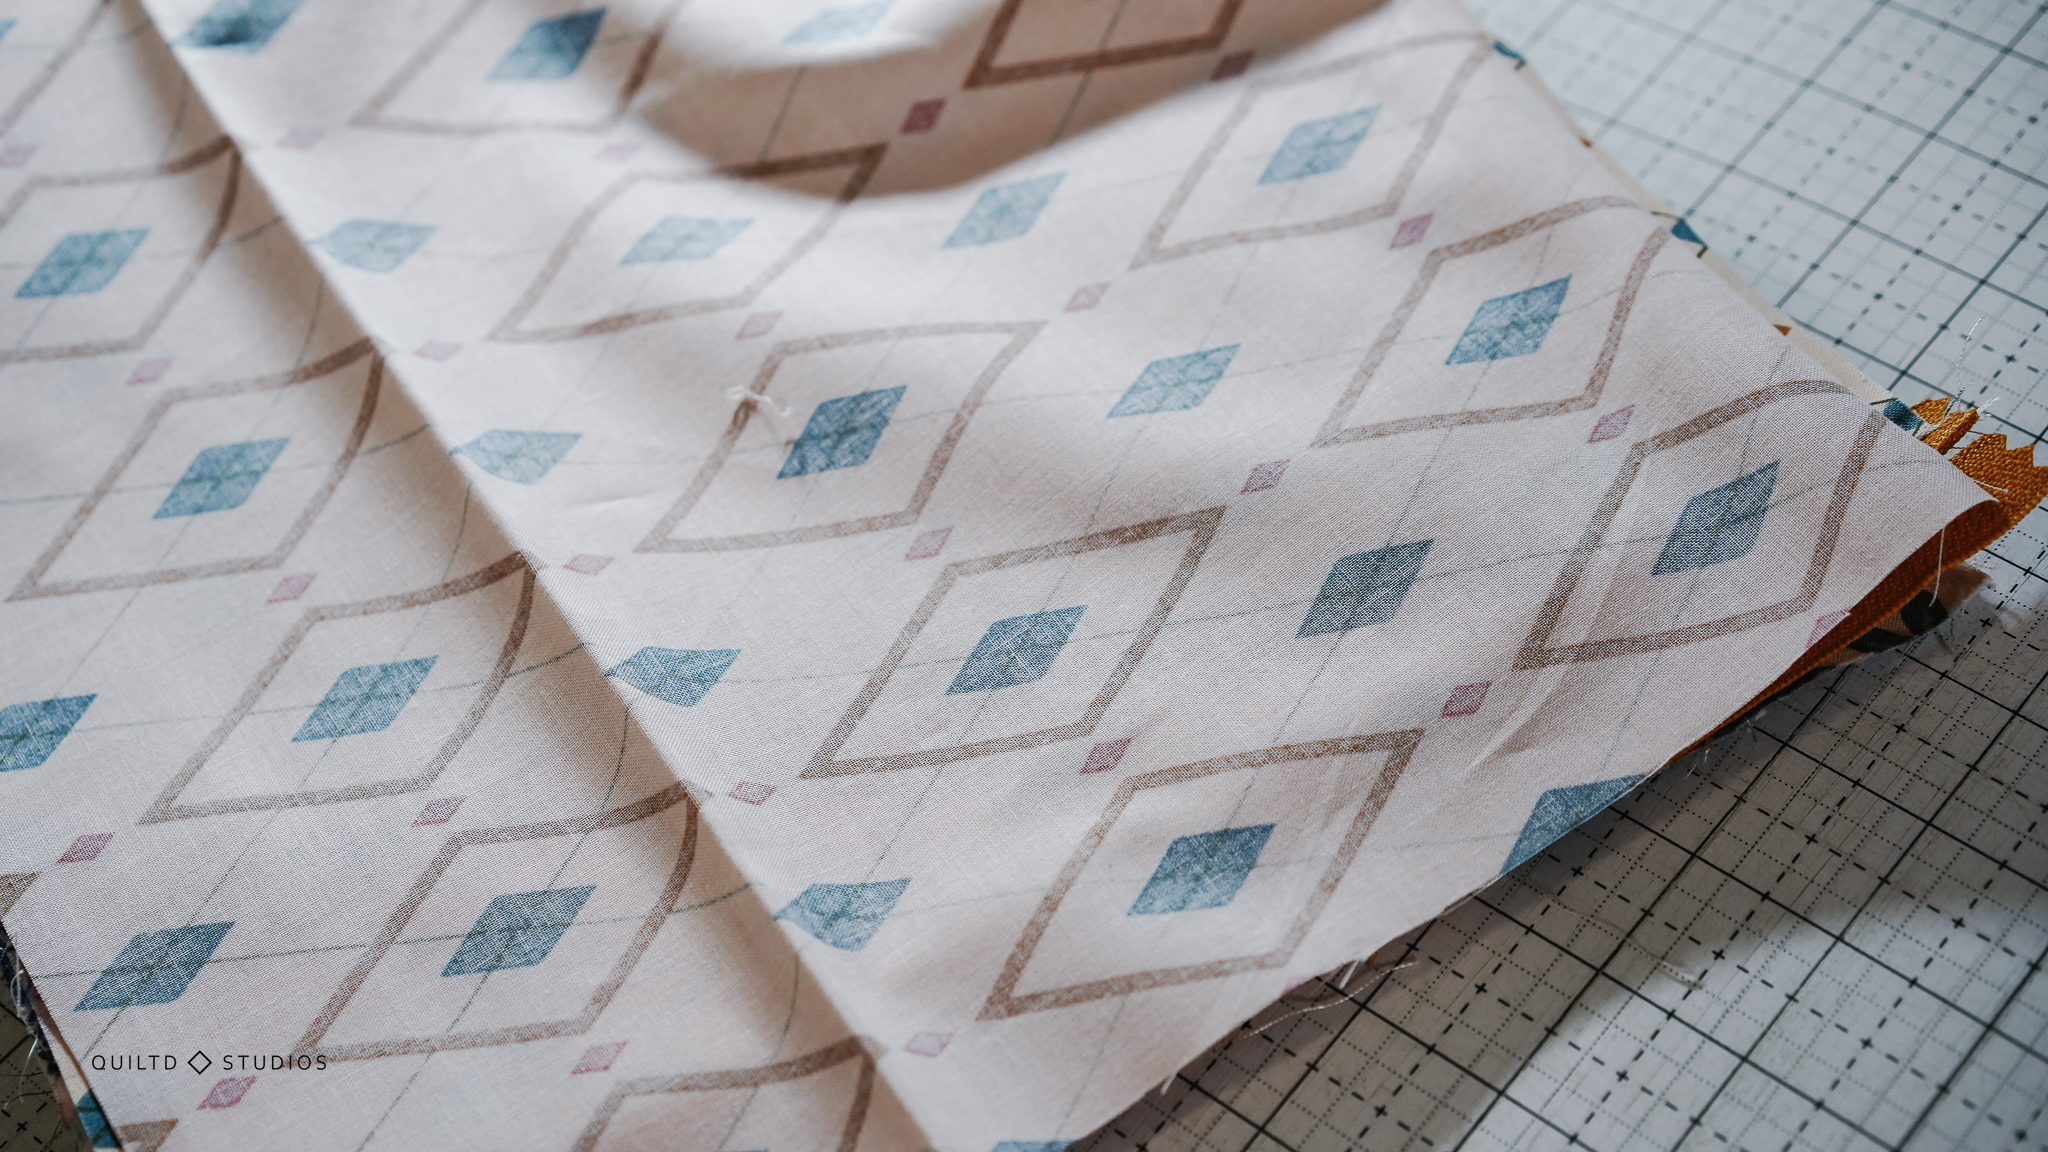
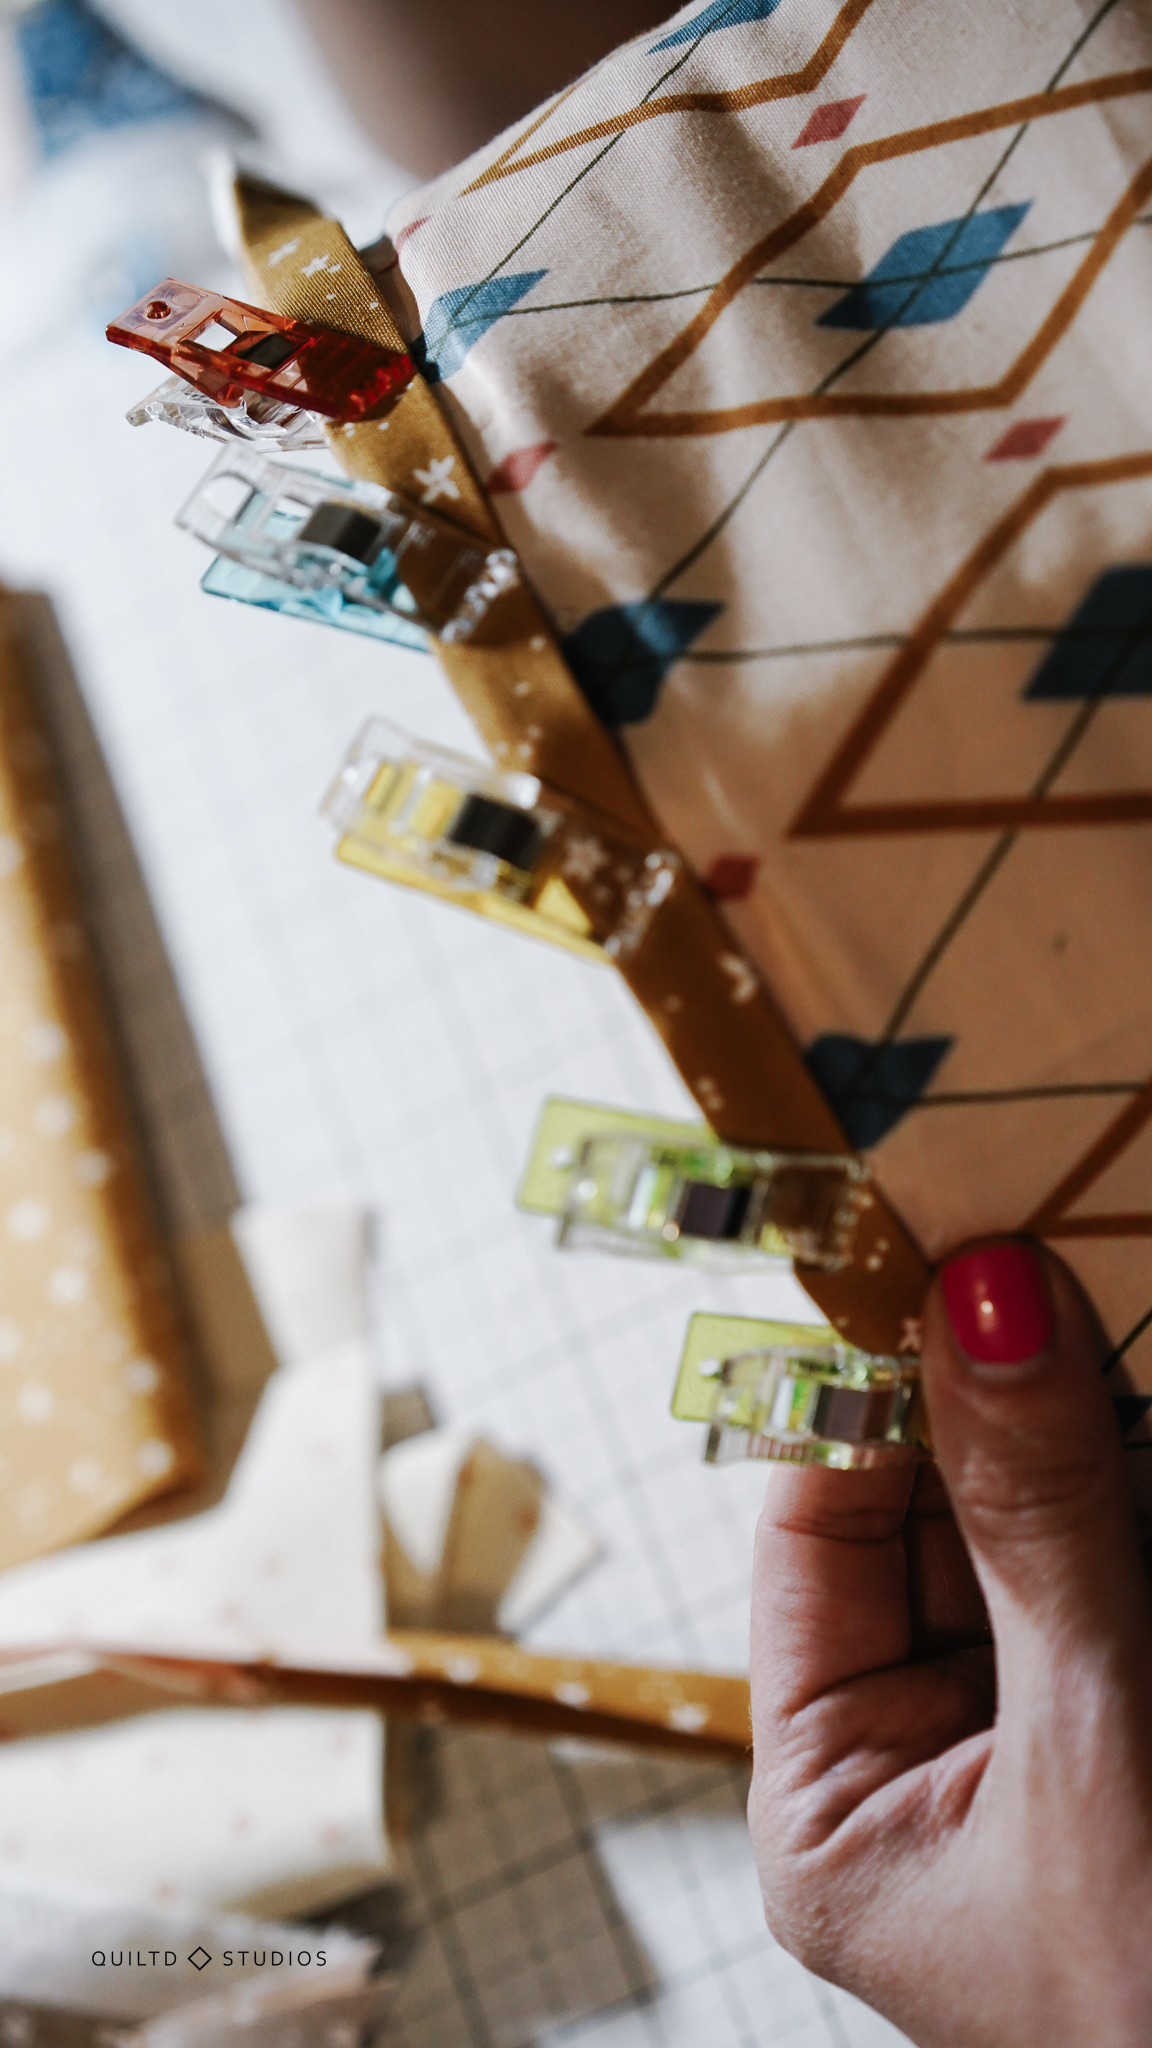
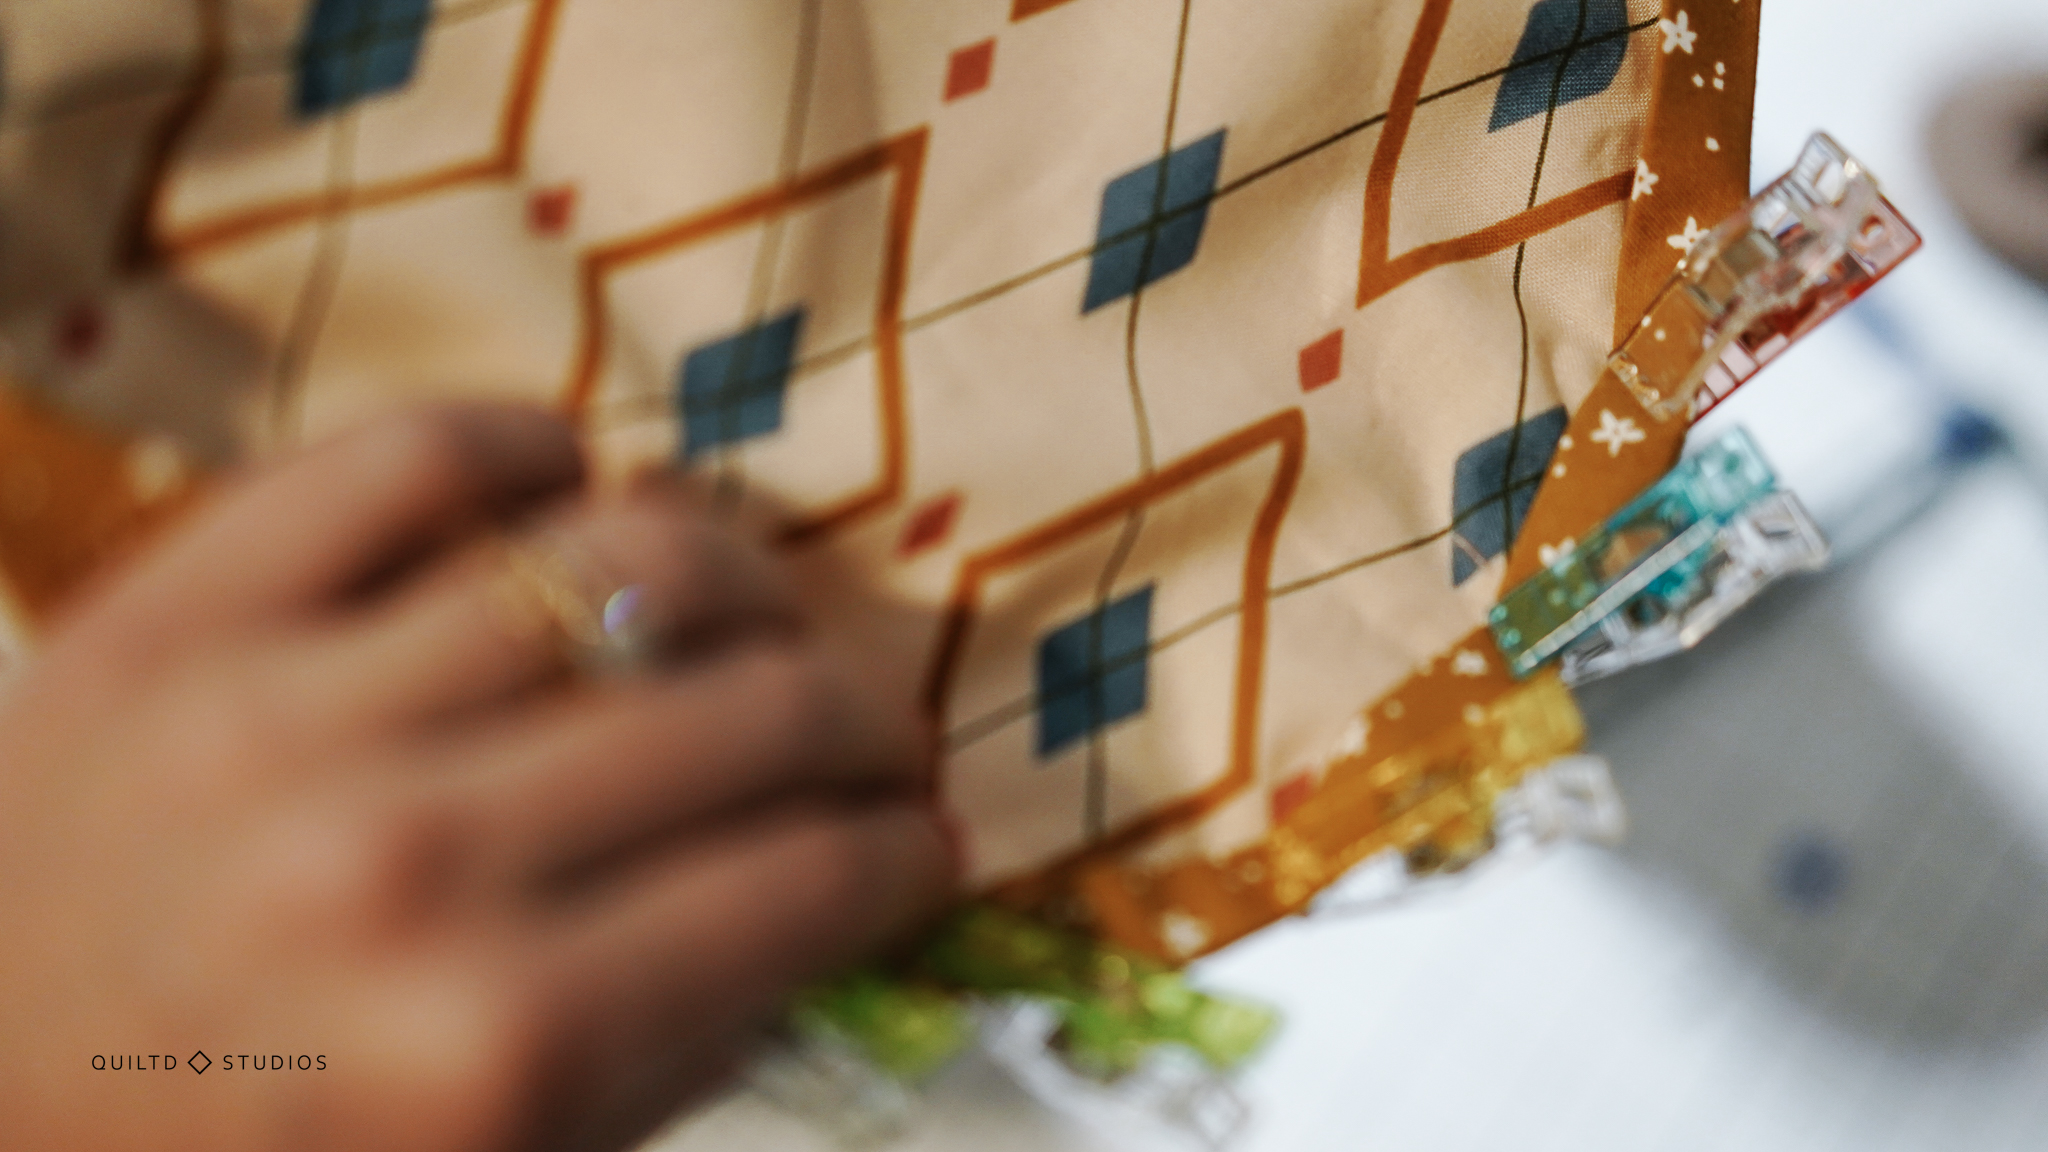
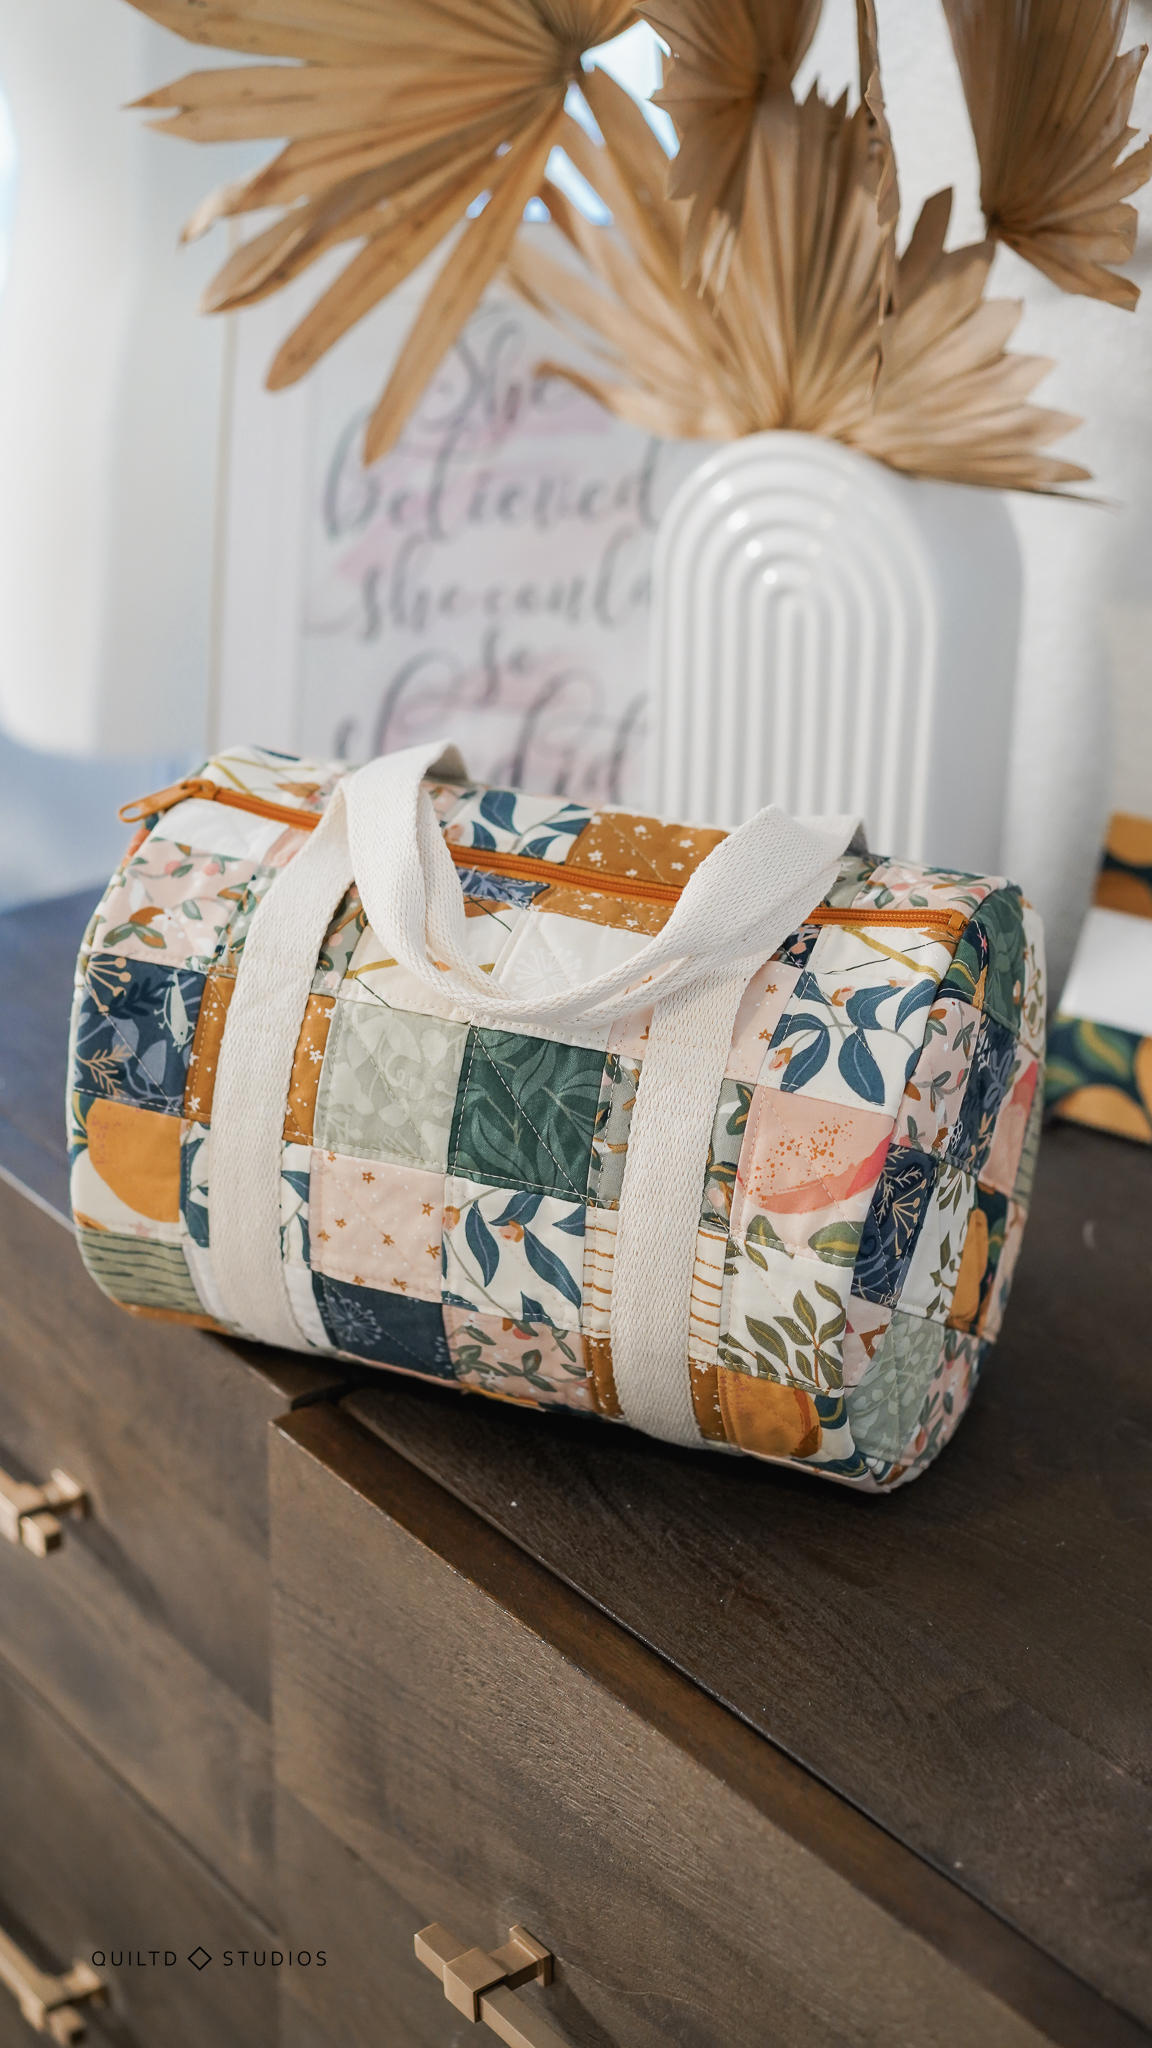
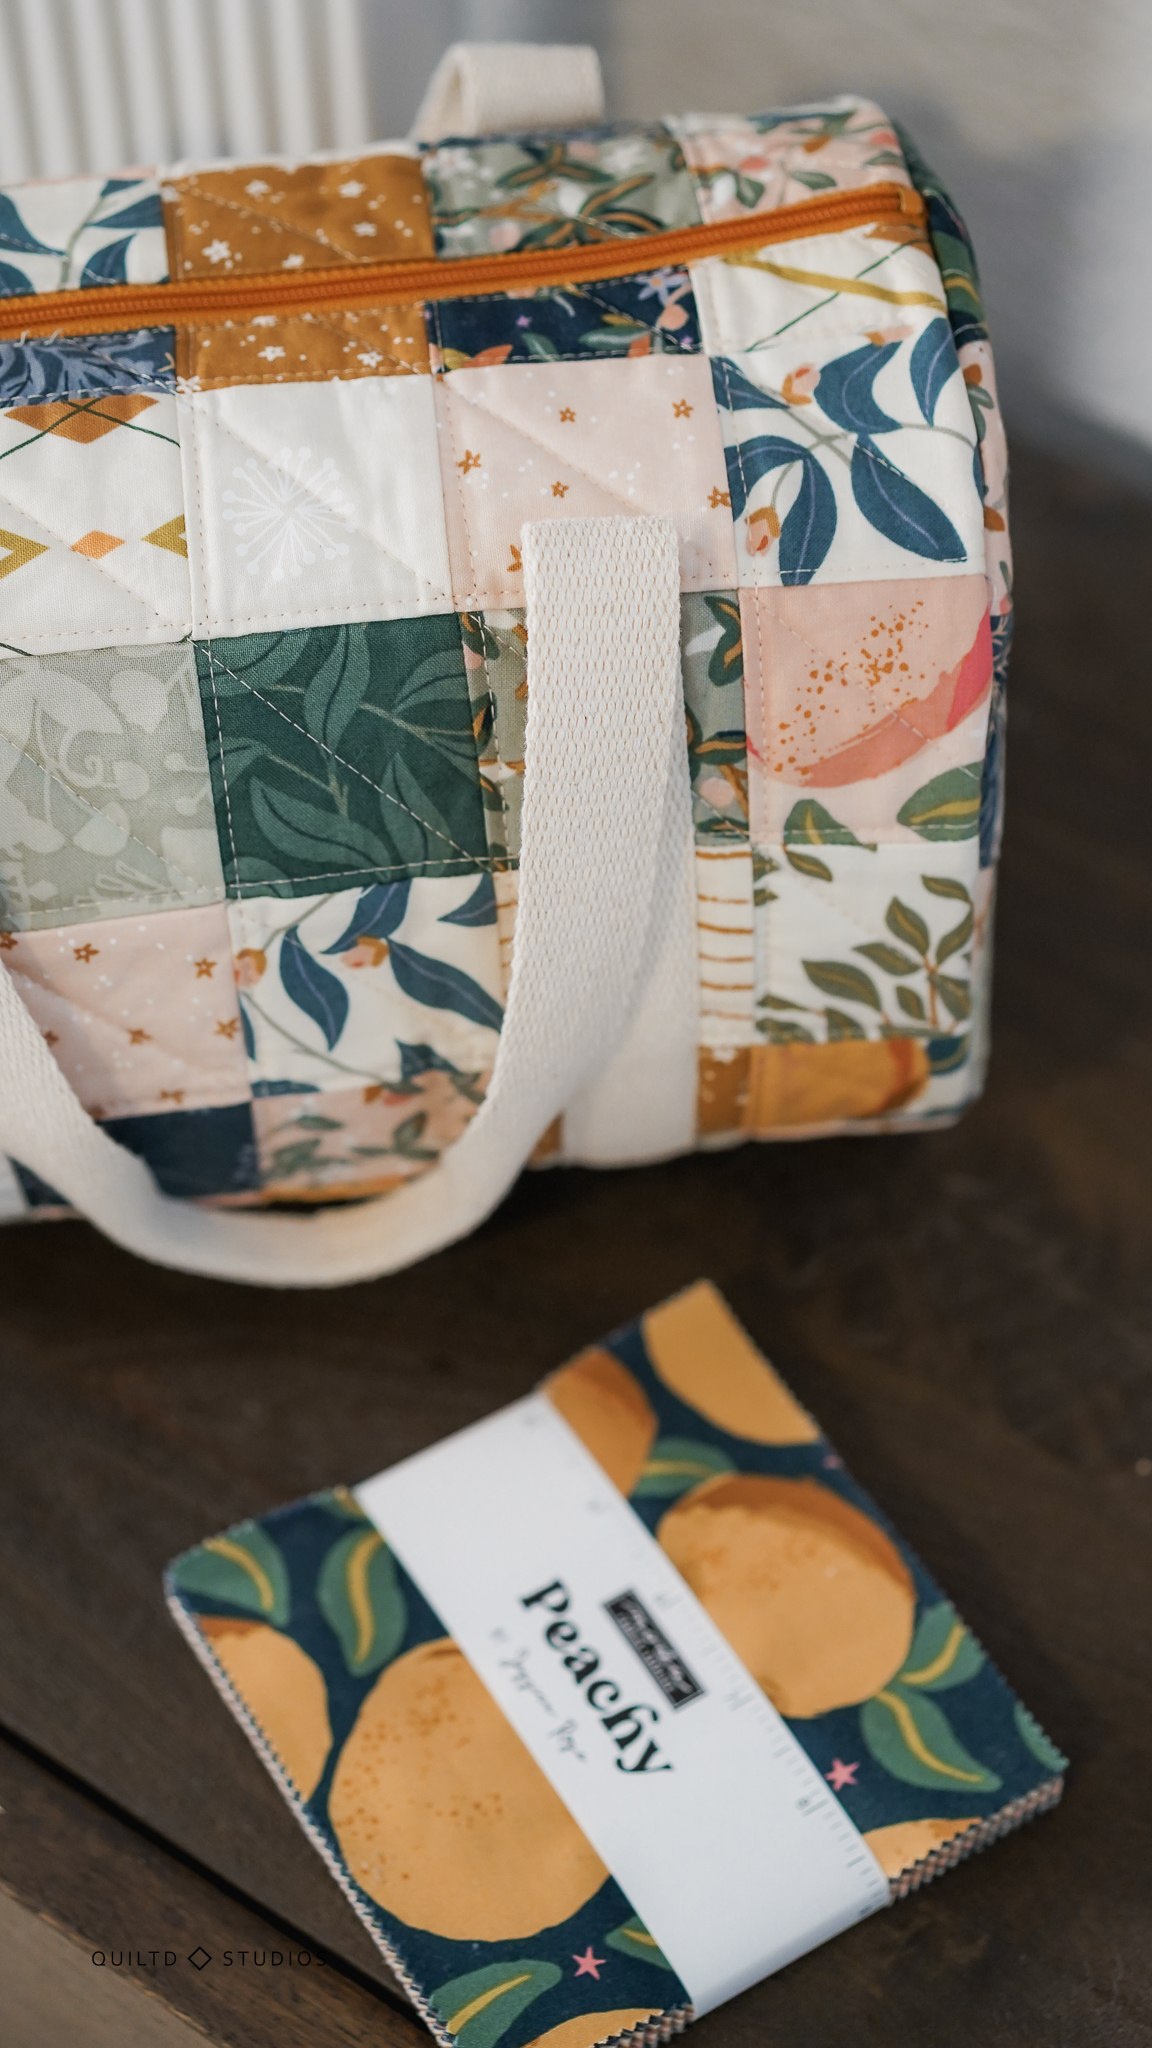
I cannot WAIT to share this fun duffel bag pattern with you! I was staring at a whole bunch of Peachy Fabric scraps (when you design fabric, there's a lot of little scraps that come with the yardage from the mill!)..
And I knew I wanted to make a bag, something not too small or big. I've always wanted to make a round duffel bag so this was the perfect opportunity!
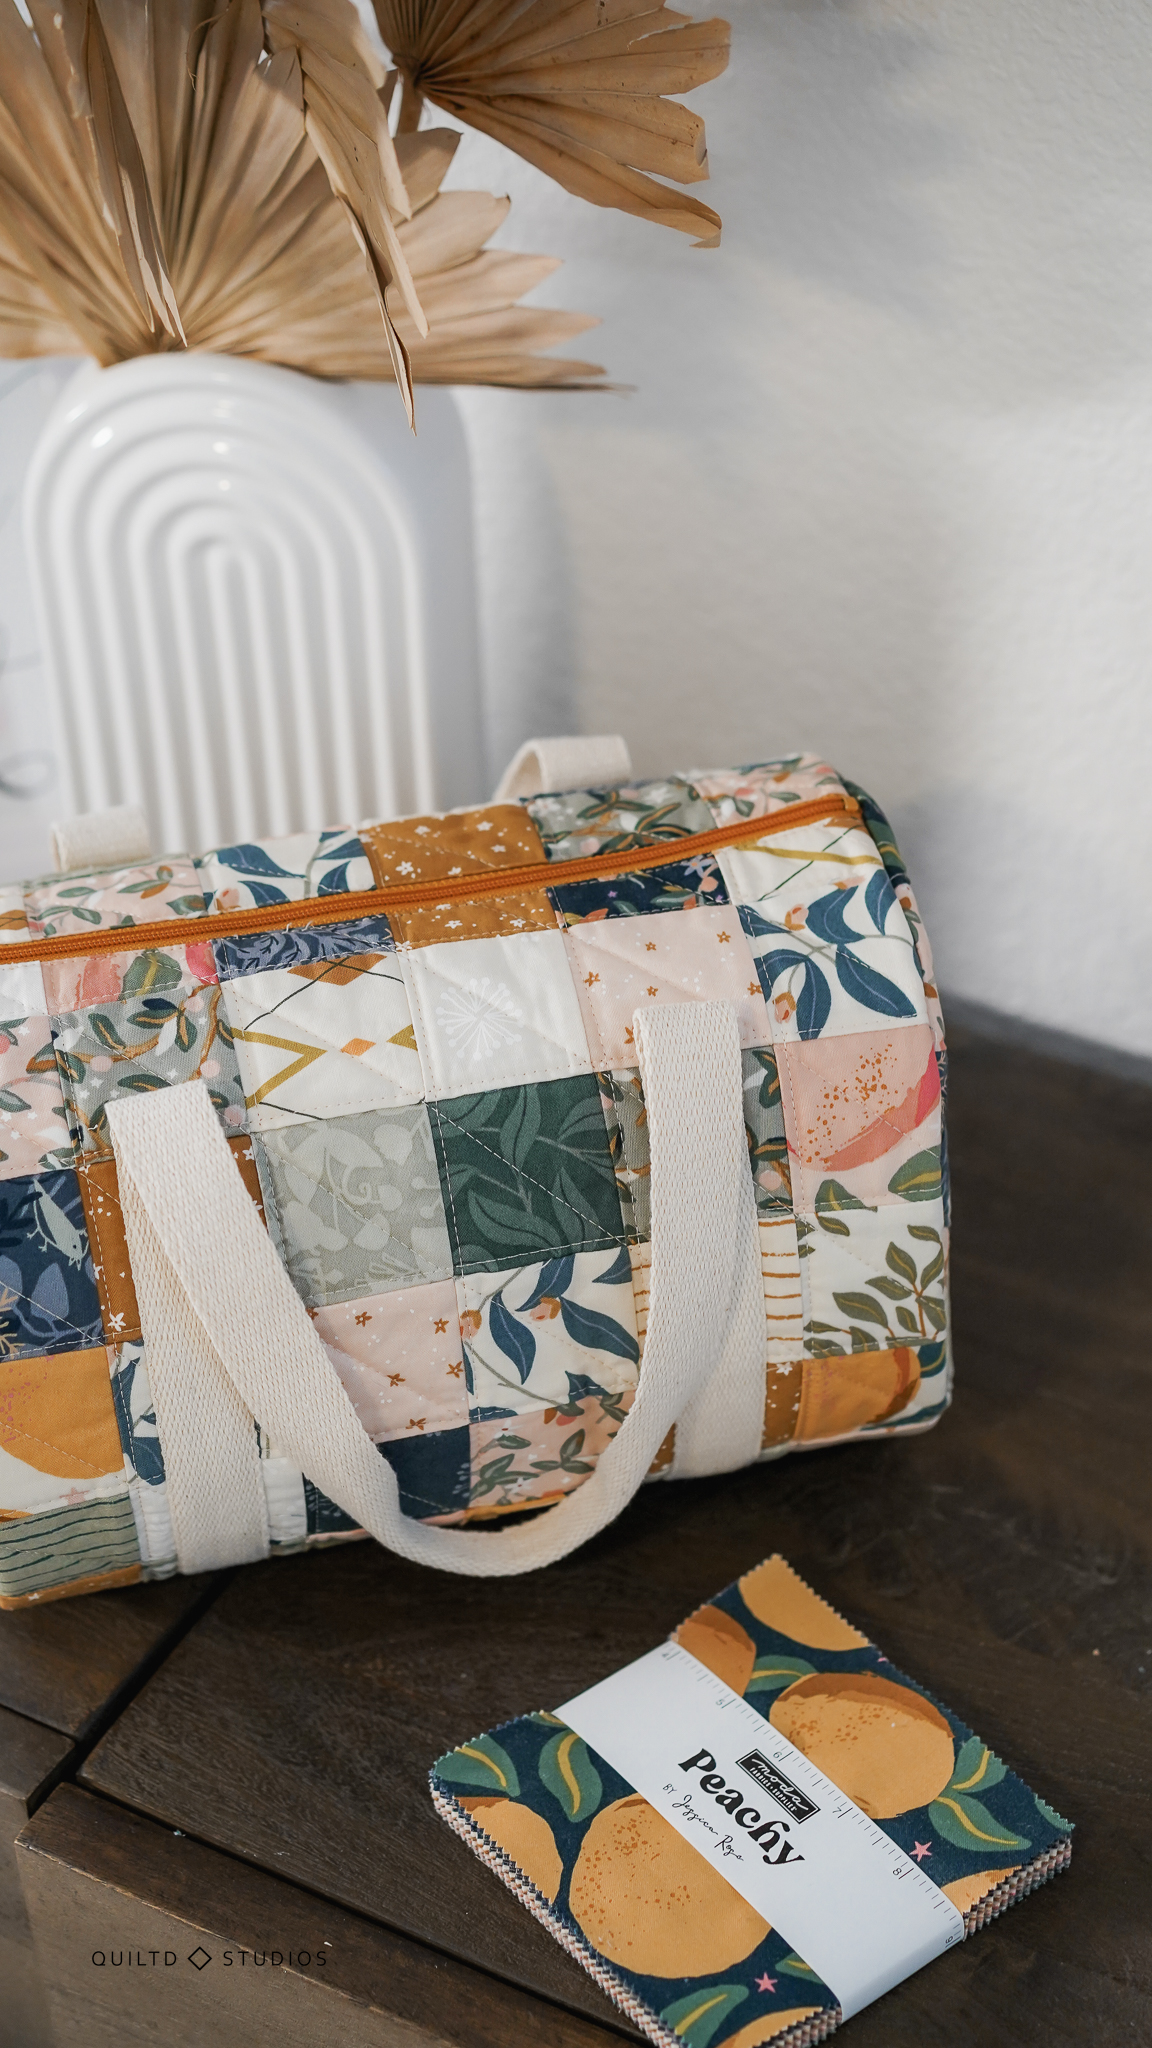
Peachy is my second line with Moda Fabrics (see the blog post here and the Moda line here) and I can't wait to share it with you!
It features super fun prints that just bring a smile to my face. If you're a shop owner, now's the time to order! If you're a quilter, now's the time to ask your local shop to carry it!
It will ship in the Winter, perfect timing for planning out and making quilting and sewing projects before spring.
![]()
That's exactly what I had in mind for the Round Trip Quilted Duffel, I wanted the perfect bag to bring to the gym/pool with my little girls all summer.
Keep in mind, this duffel pattern is great for customizing. As is, it's set up for beginners, no pockets, no extra seams, etc.
However, if you're more experienced (or even just brave) feel free to make the following customizations:
- Add a pocket to the front or back of the bag between the webbing straps.
- Change out the webbing for a different material - cork, leather, fabric, reused straps, etc.
- Add a pocket to the interior lining. Before sewing the zipper and lining, sew a pocket to the front of the lining.
- Add pockets to the round sides of the bag, create a few more outside circle panels, cut a small section off the top, add lining to the back and bind it, then baste stitch it to the front of the circle side panel, then sew it in when finishing the bag!
- When sewing in the circle sides, pin some webbing to both sides to create a long strap. Optionally, add loops and then hardware to make an adjustable strap like a duffel bag.
Even if you don't do any of these fun additions, I know you're going to adore making this bag! I know I did, and I've made quite a few zipper bags.
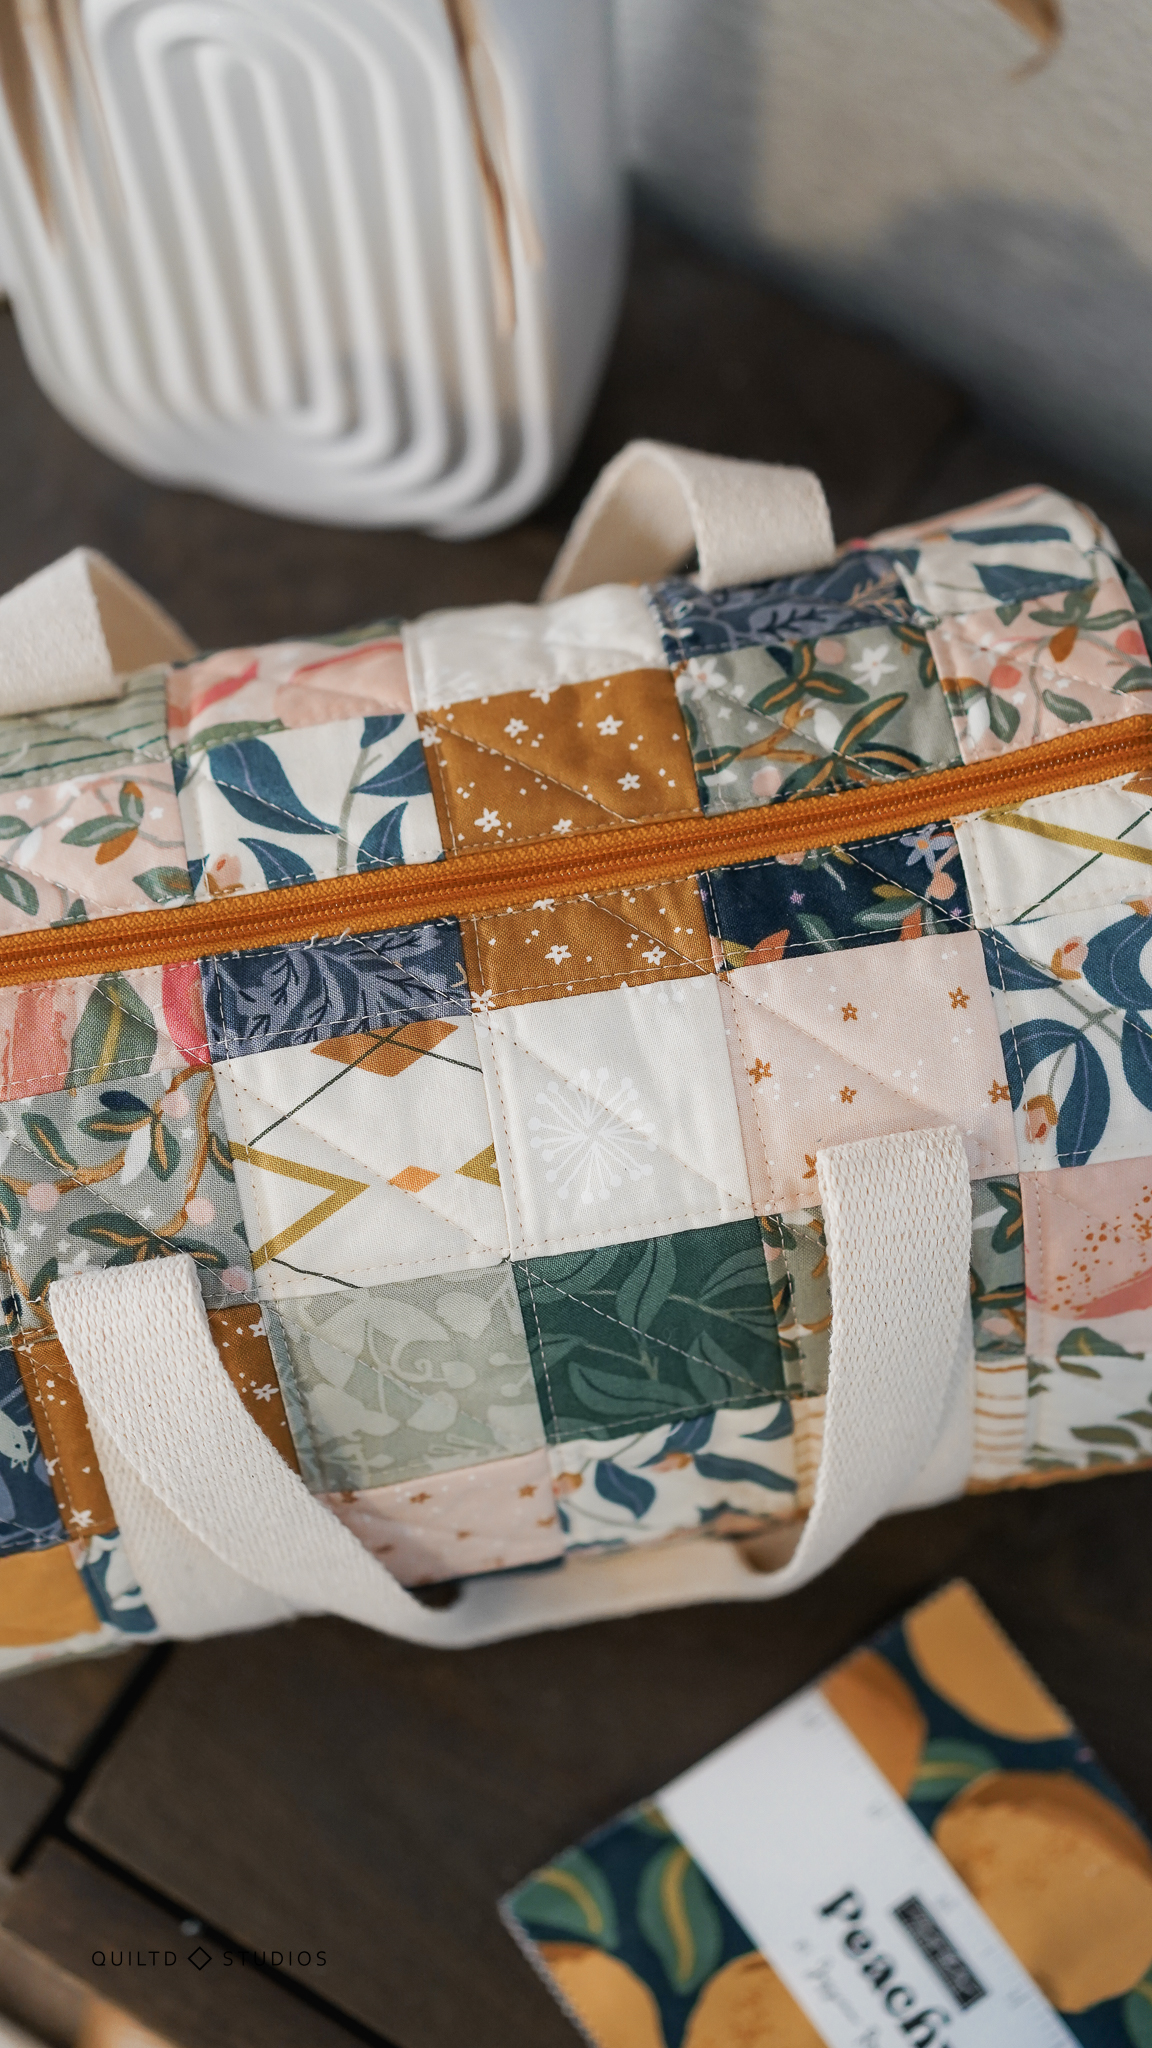
Now let's get sewing! It took me just a few afternoons to finish it, especially if you make the patchwork using the same technique that I did ("Iron and Sew" small squares). Make sure you read through ALL of the directions before beginning.
Finished Bag Dimensions
- Length: 11½" (from end to end)
- Width: 8" (diameter of circular sides)
- Height: 8" (from base to top of zipper)
- Seam Allowances:
- ¼" for patchwork
- ½" for all construction seams
Supplies Needed
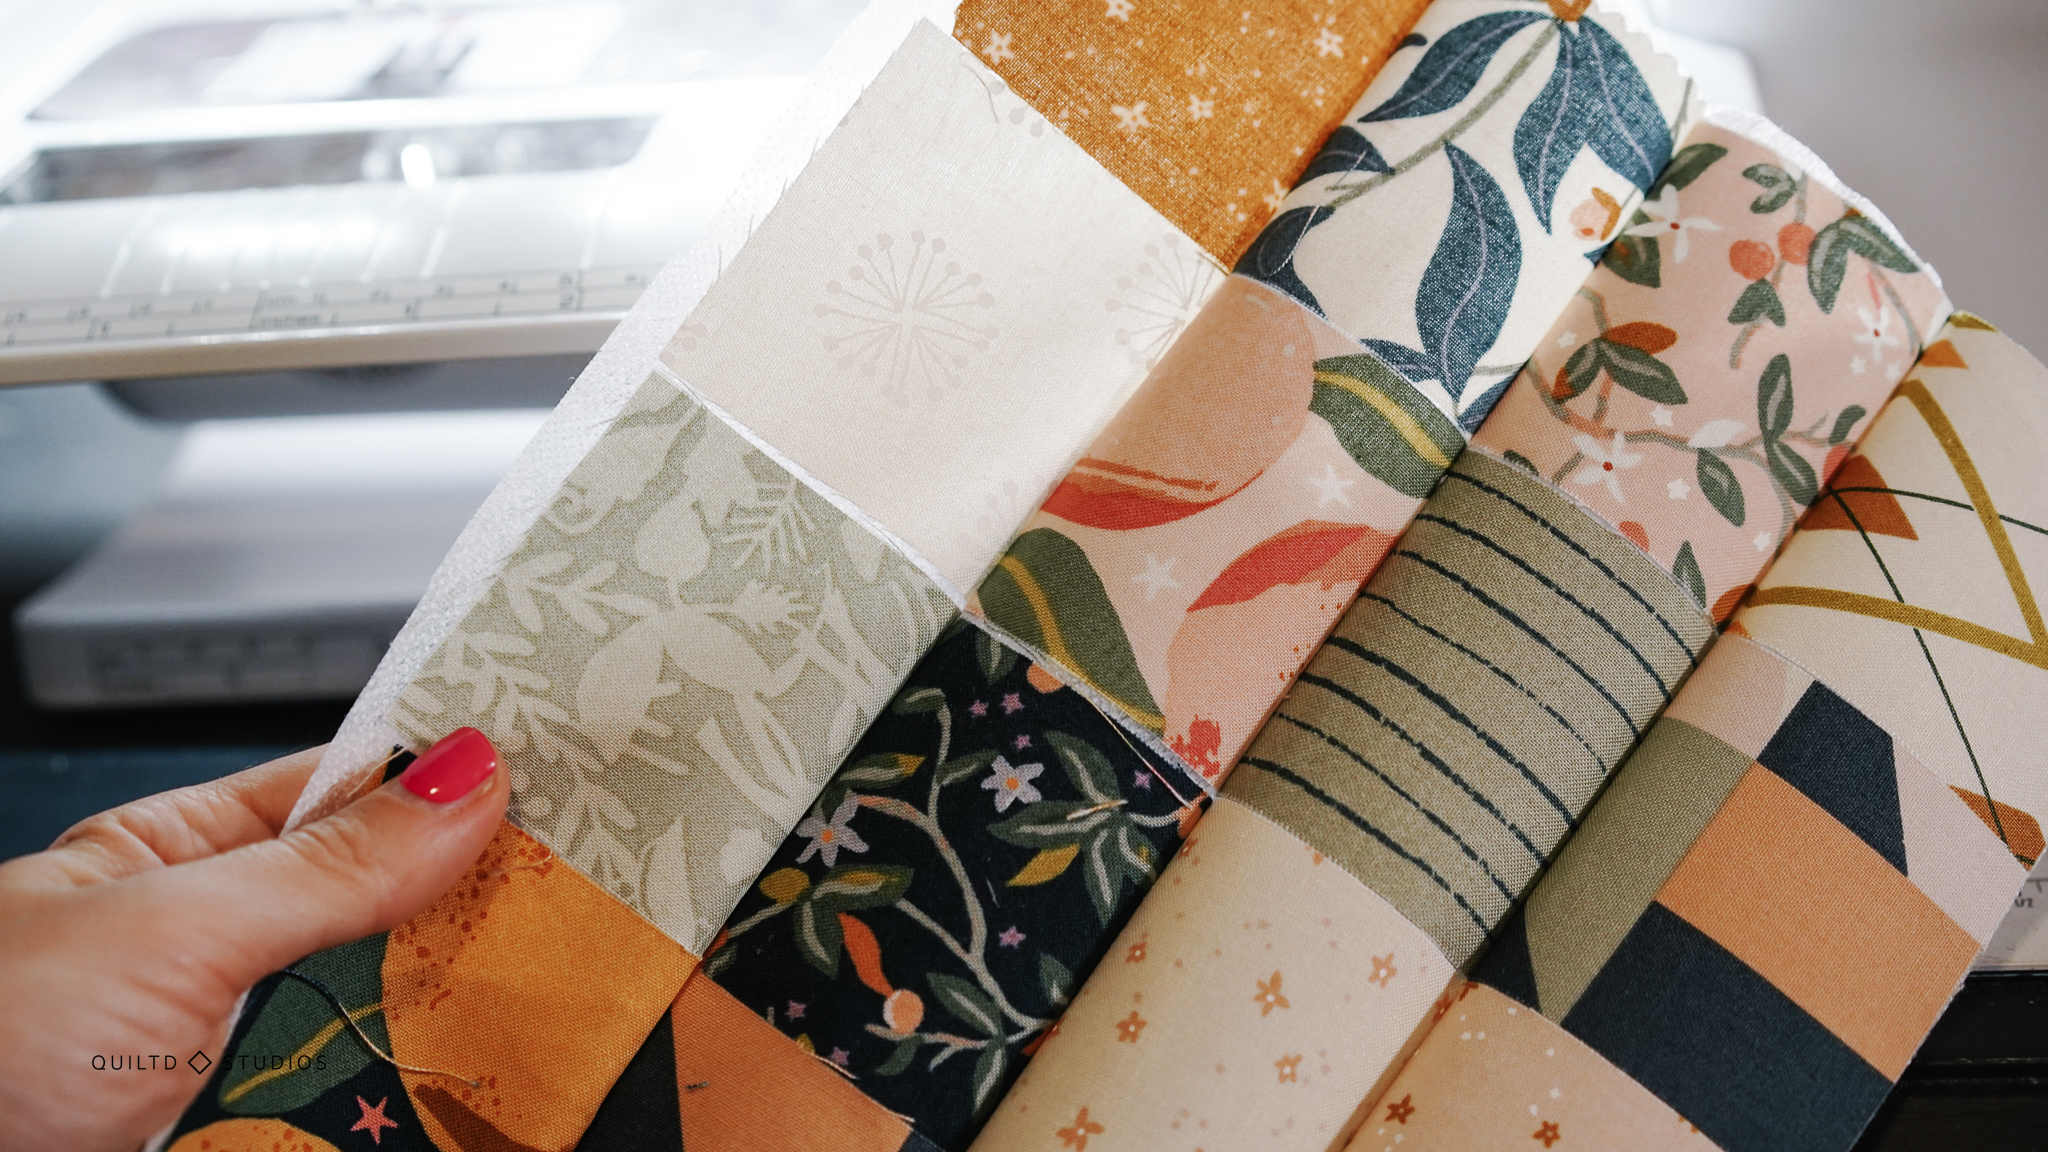
- 84 fabric squares – 2½" × 2½" each (for patchwork body) - 6 squares x 14 squares
- 60 fabric squares– 2½" × 2½" each (for circle sides) - 6 squares x 10 squares
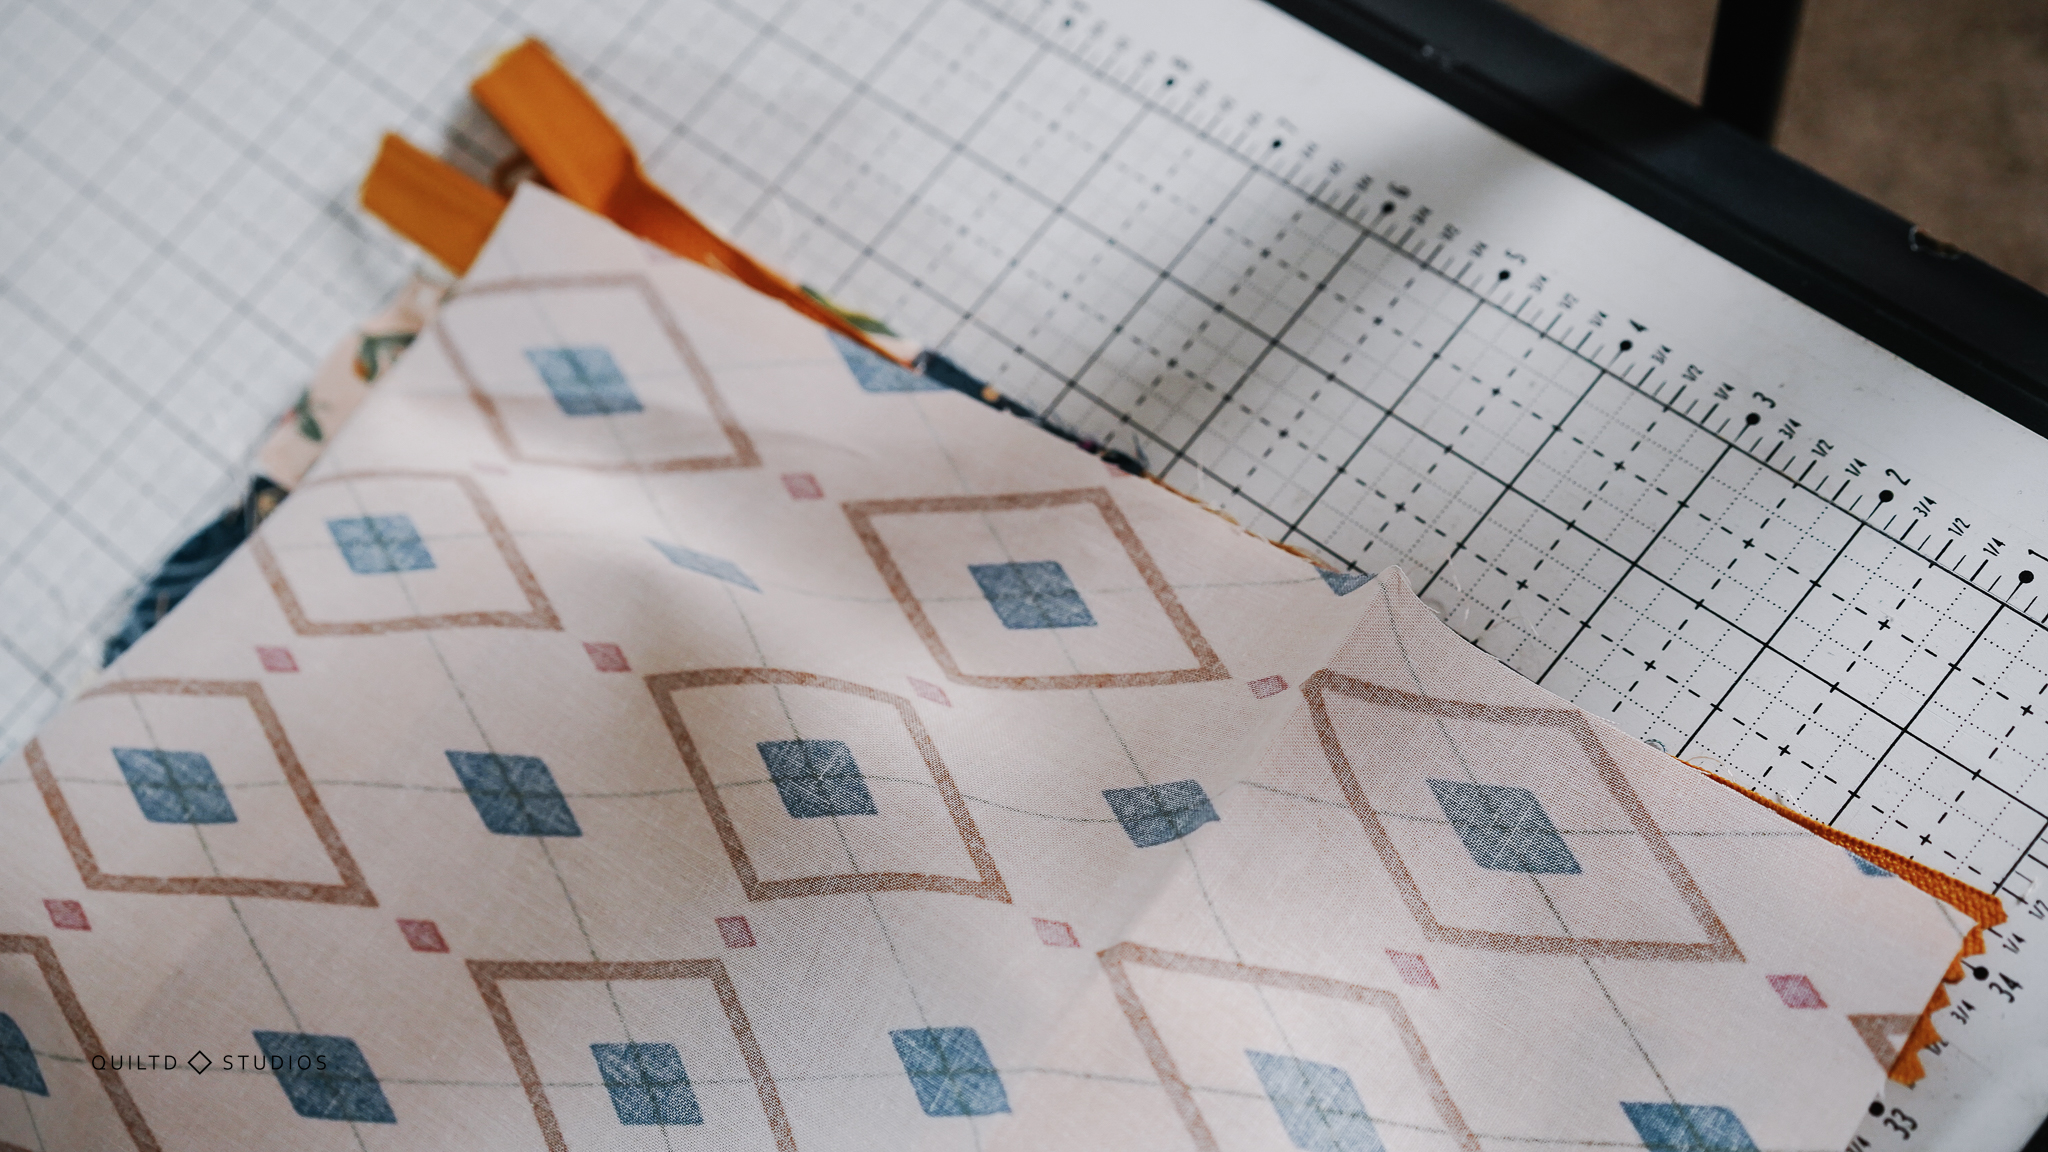
- 1 lining rectangle – 26¼" × 12"
- 1 Circle template (8" diameter circle) - Use this to cut the foam circles, then using a ruler, measure 1/2" around to make a 9" diameter circle to do your final cuts for the circle sides.
- 2 Lining circles – 9" diameter
- (2) 2" x 29" Lining strips to make double bias tape (for two inside circle seams)
- Lightweight iron on interfacing for ironing patchwork to (I used this)
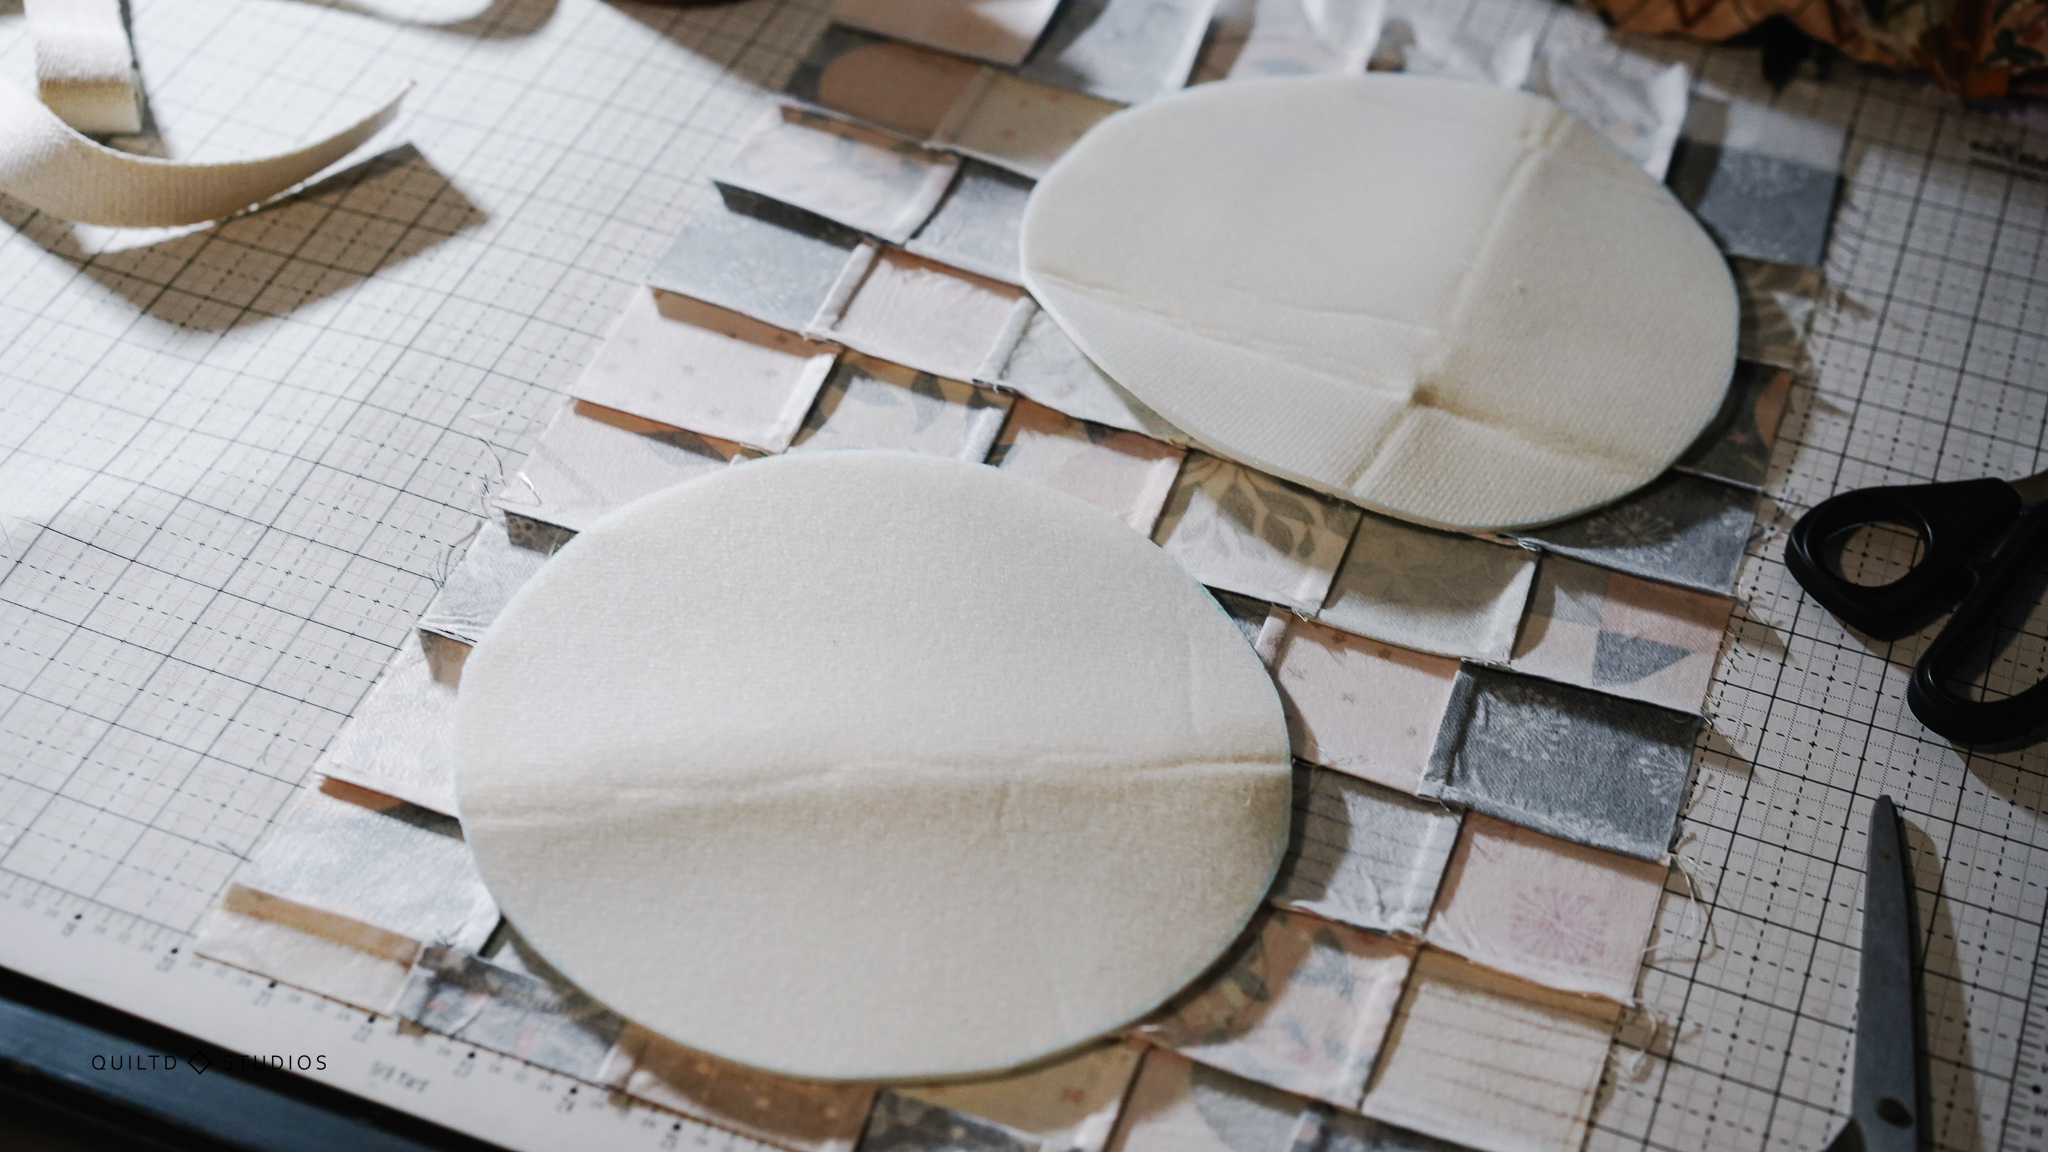
- 1 piece bag foam – 25¼" × 11" (for body), 2 foam circles – 8" (for circle sides) (note: you can use fusible fleece, however the circle duffel may not keep its shape as perfectly)
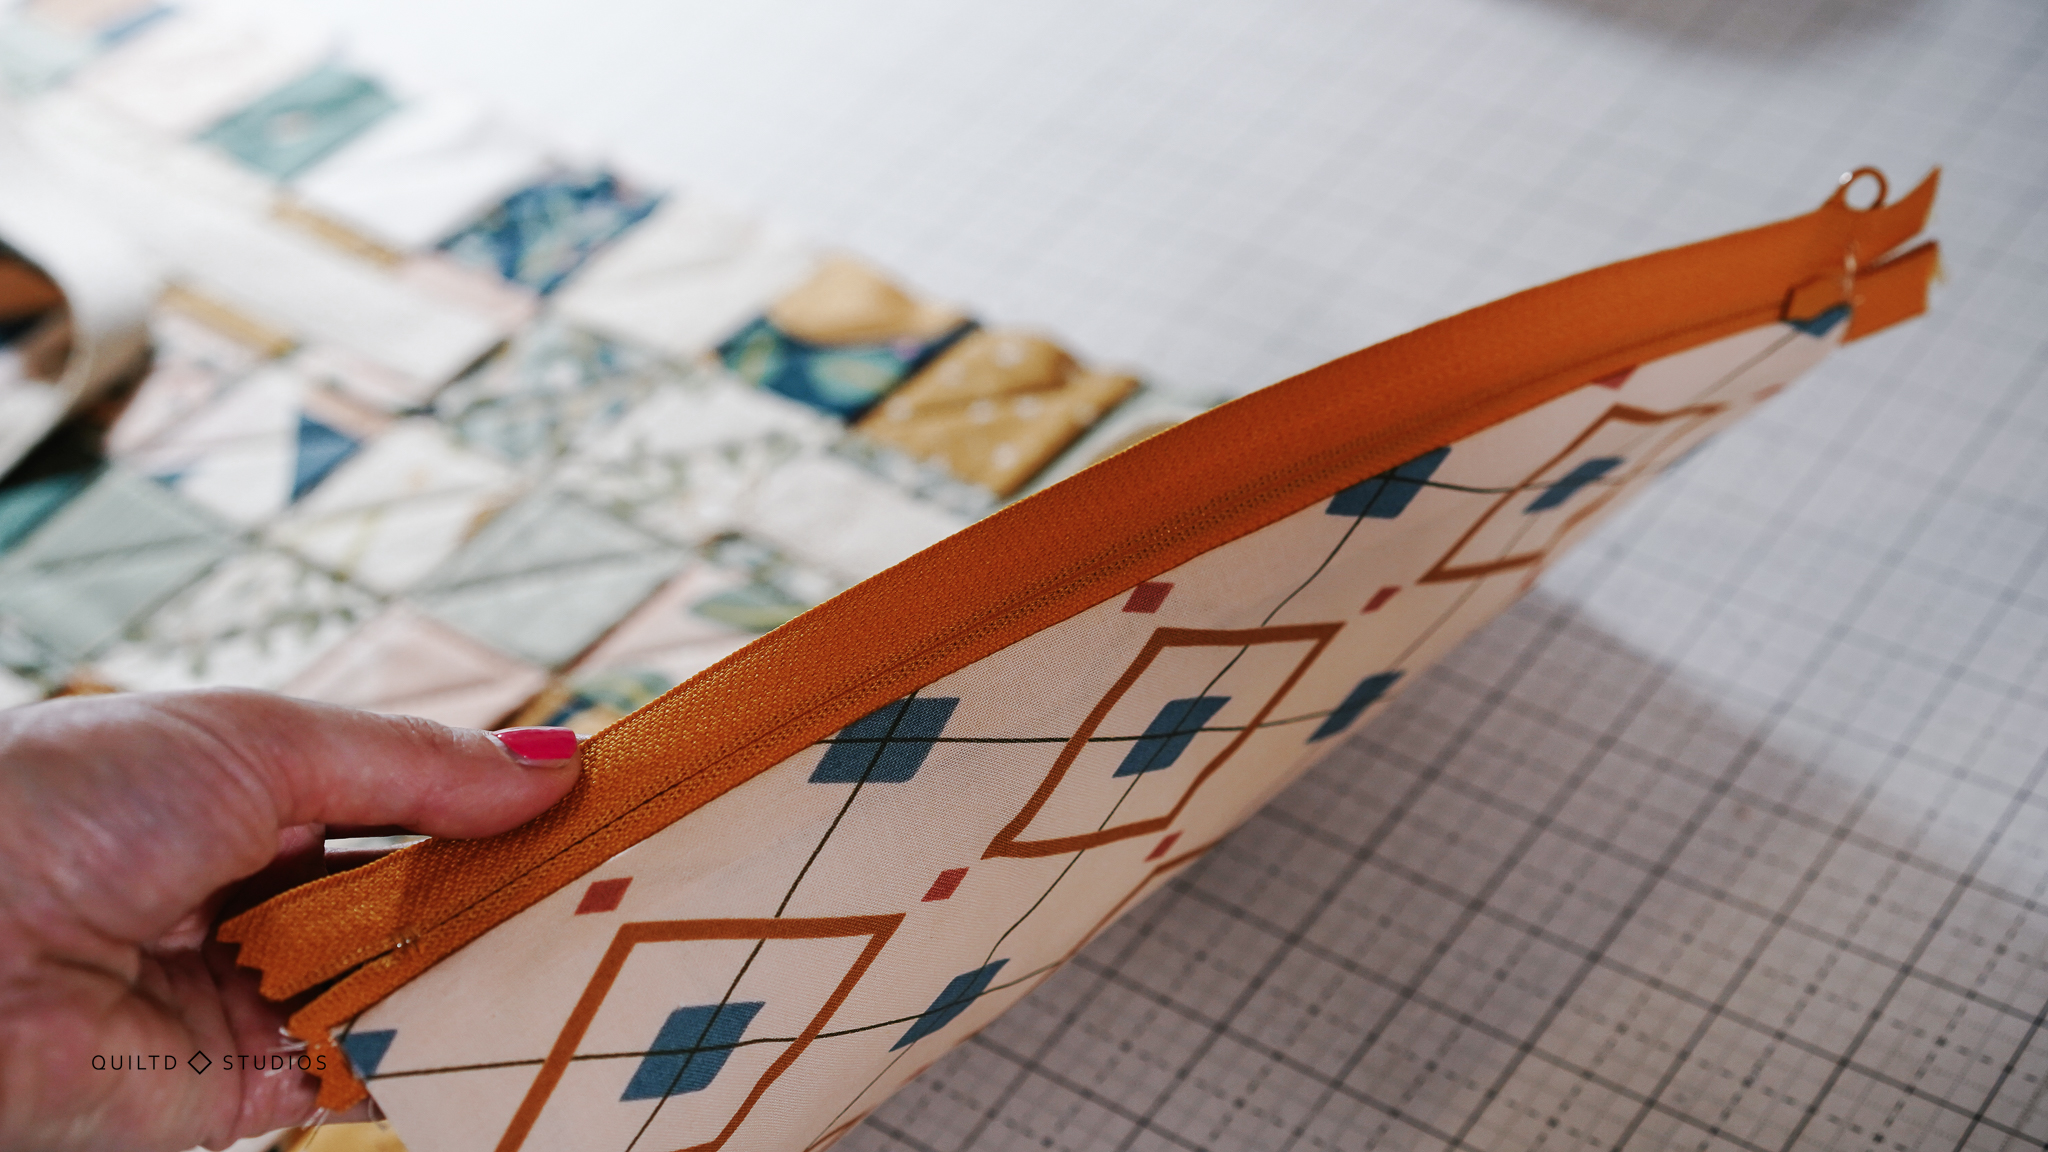
- 1 nylon zipper – 13" (can be 12" but you'll need to make zipper tabs for the ends)
- 2 webbing handles – 35" each, 1" diameter
- Matching thread
- Optional: double sided sticky tape for bag handle placement
- Notes: I used my accuquilt 2.5" die to cut all of my squares out! It was super easy to use and perfect for scraps.
Get your free Circle template below!
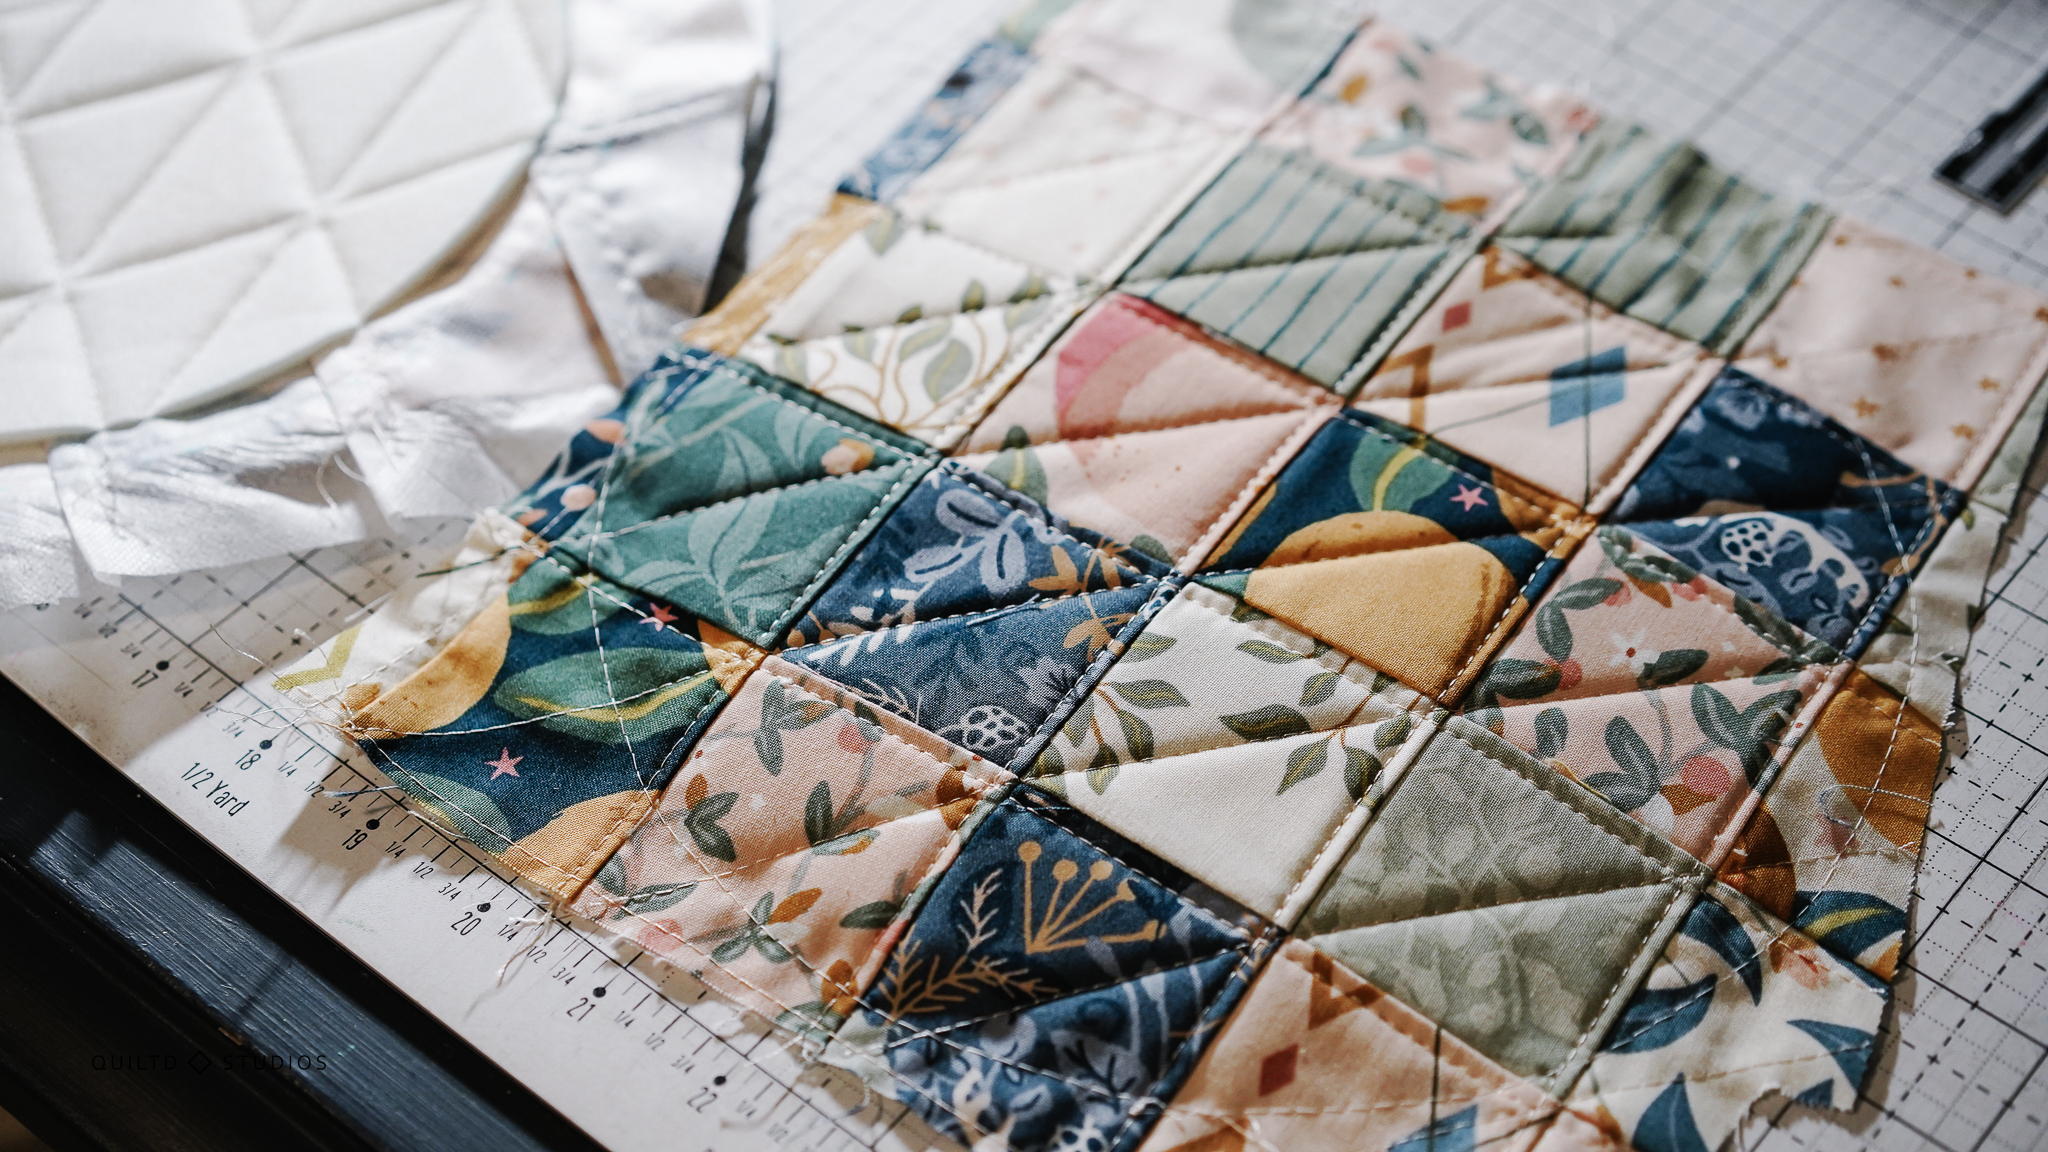
"Iron and Sew" Square Patchwork Instructions
Use ¼" seam allowances for piecing patchwork squares, and ½" seam allowances for bag construction.
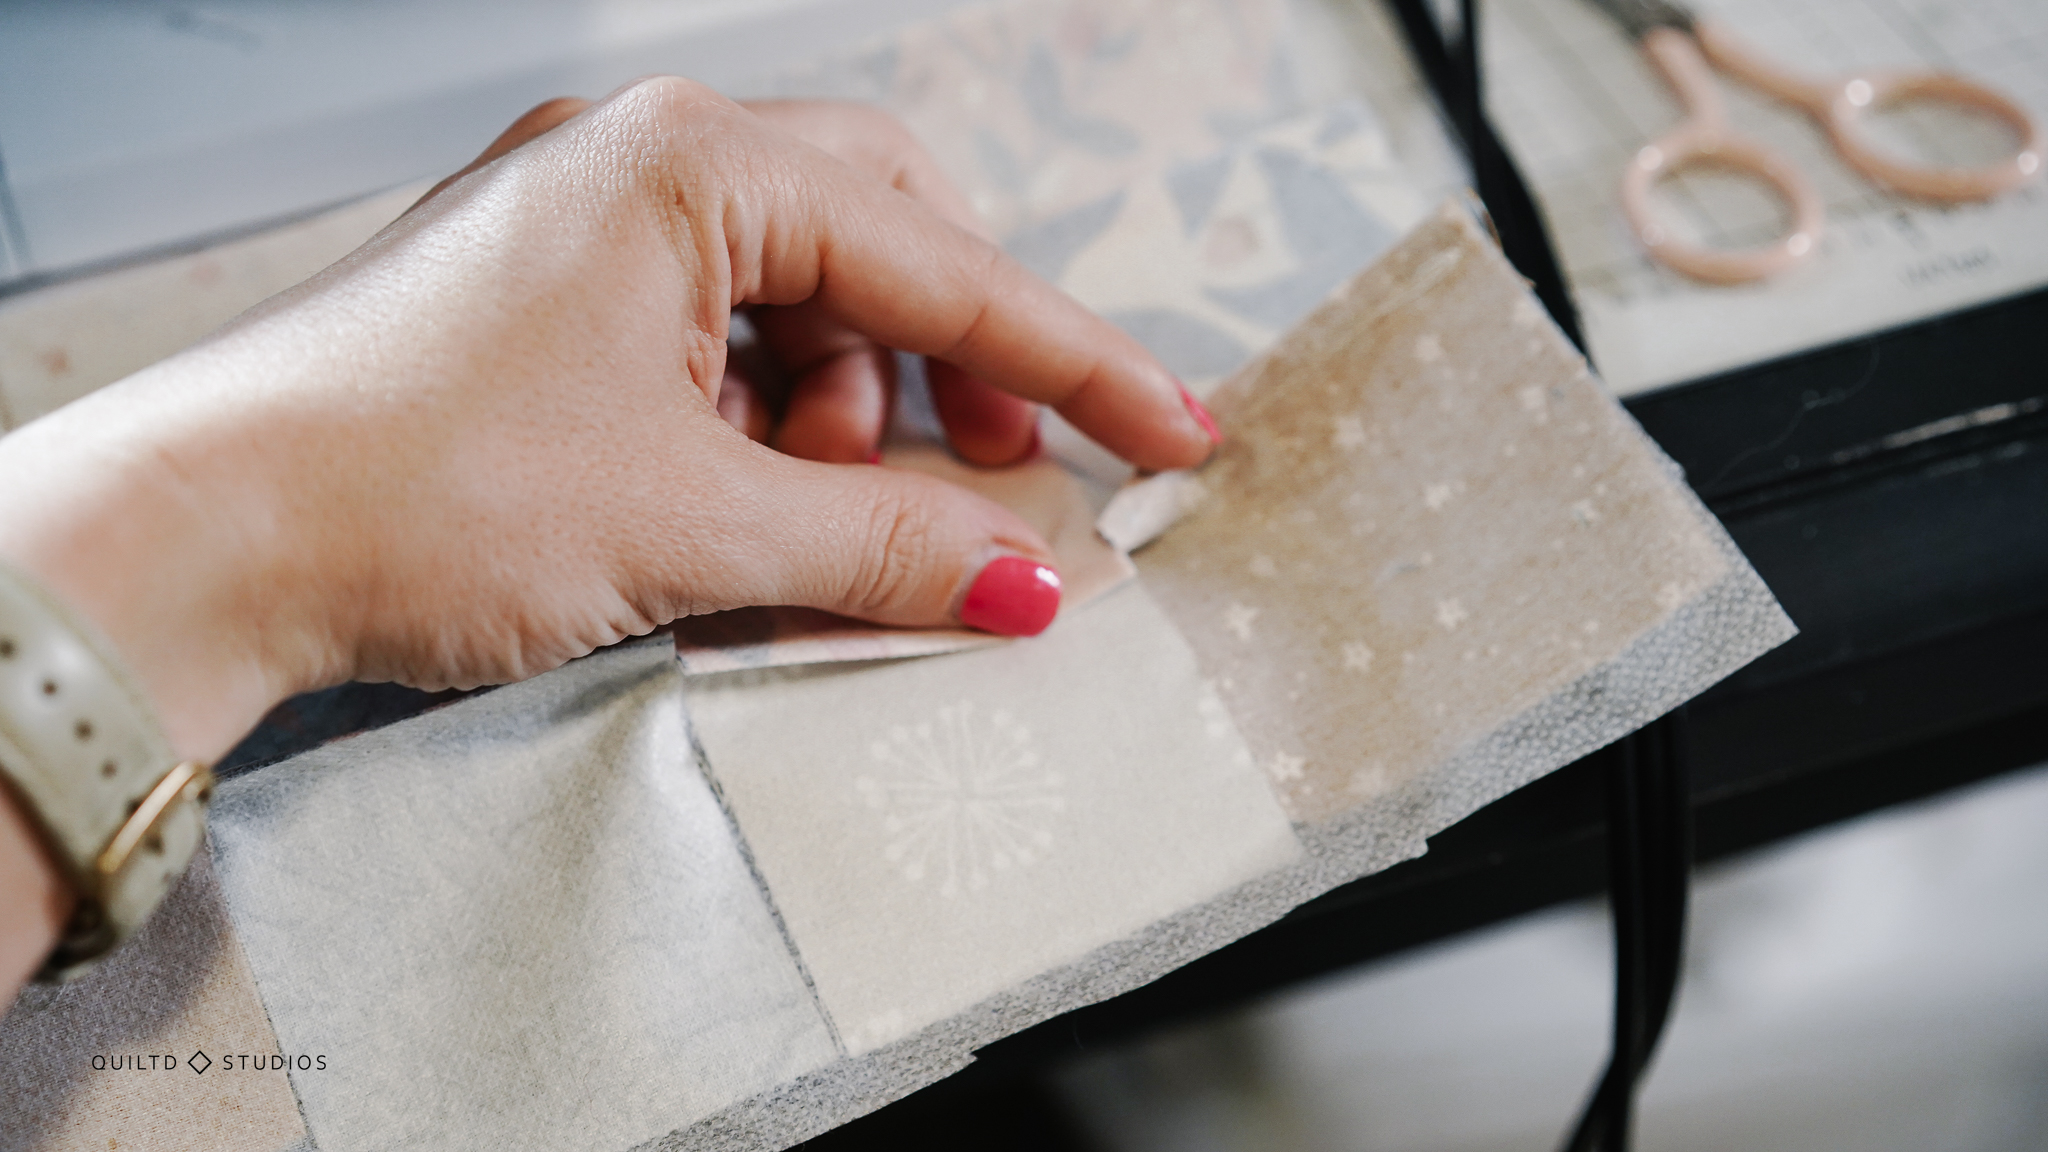
Lay out your iron on interfacing with the little sticky dots facing UP. Using the edge of the interfacing as a guide, carefully lay out your squares right next to each other into a panel 6 x 14 squares large. (Note: my panels were smaller in some of the pictures, I used up some smaller piece of interfacing and then sewed them together to make the correct size panel).
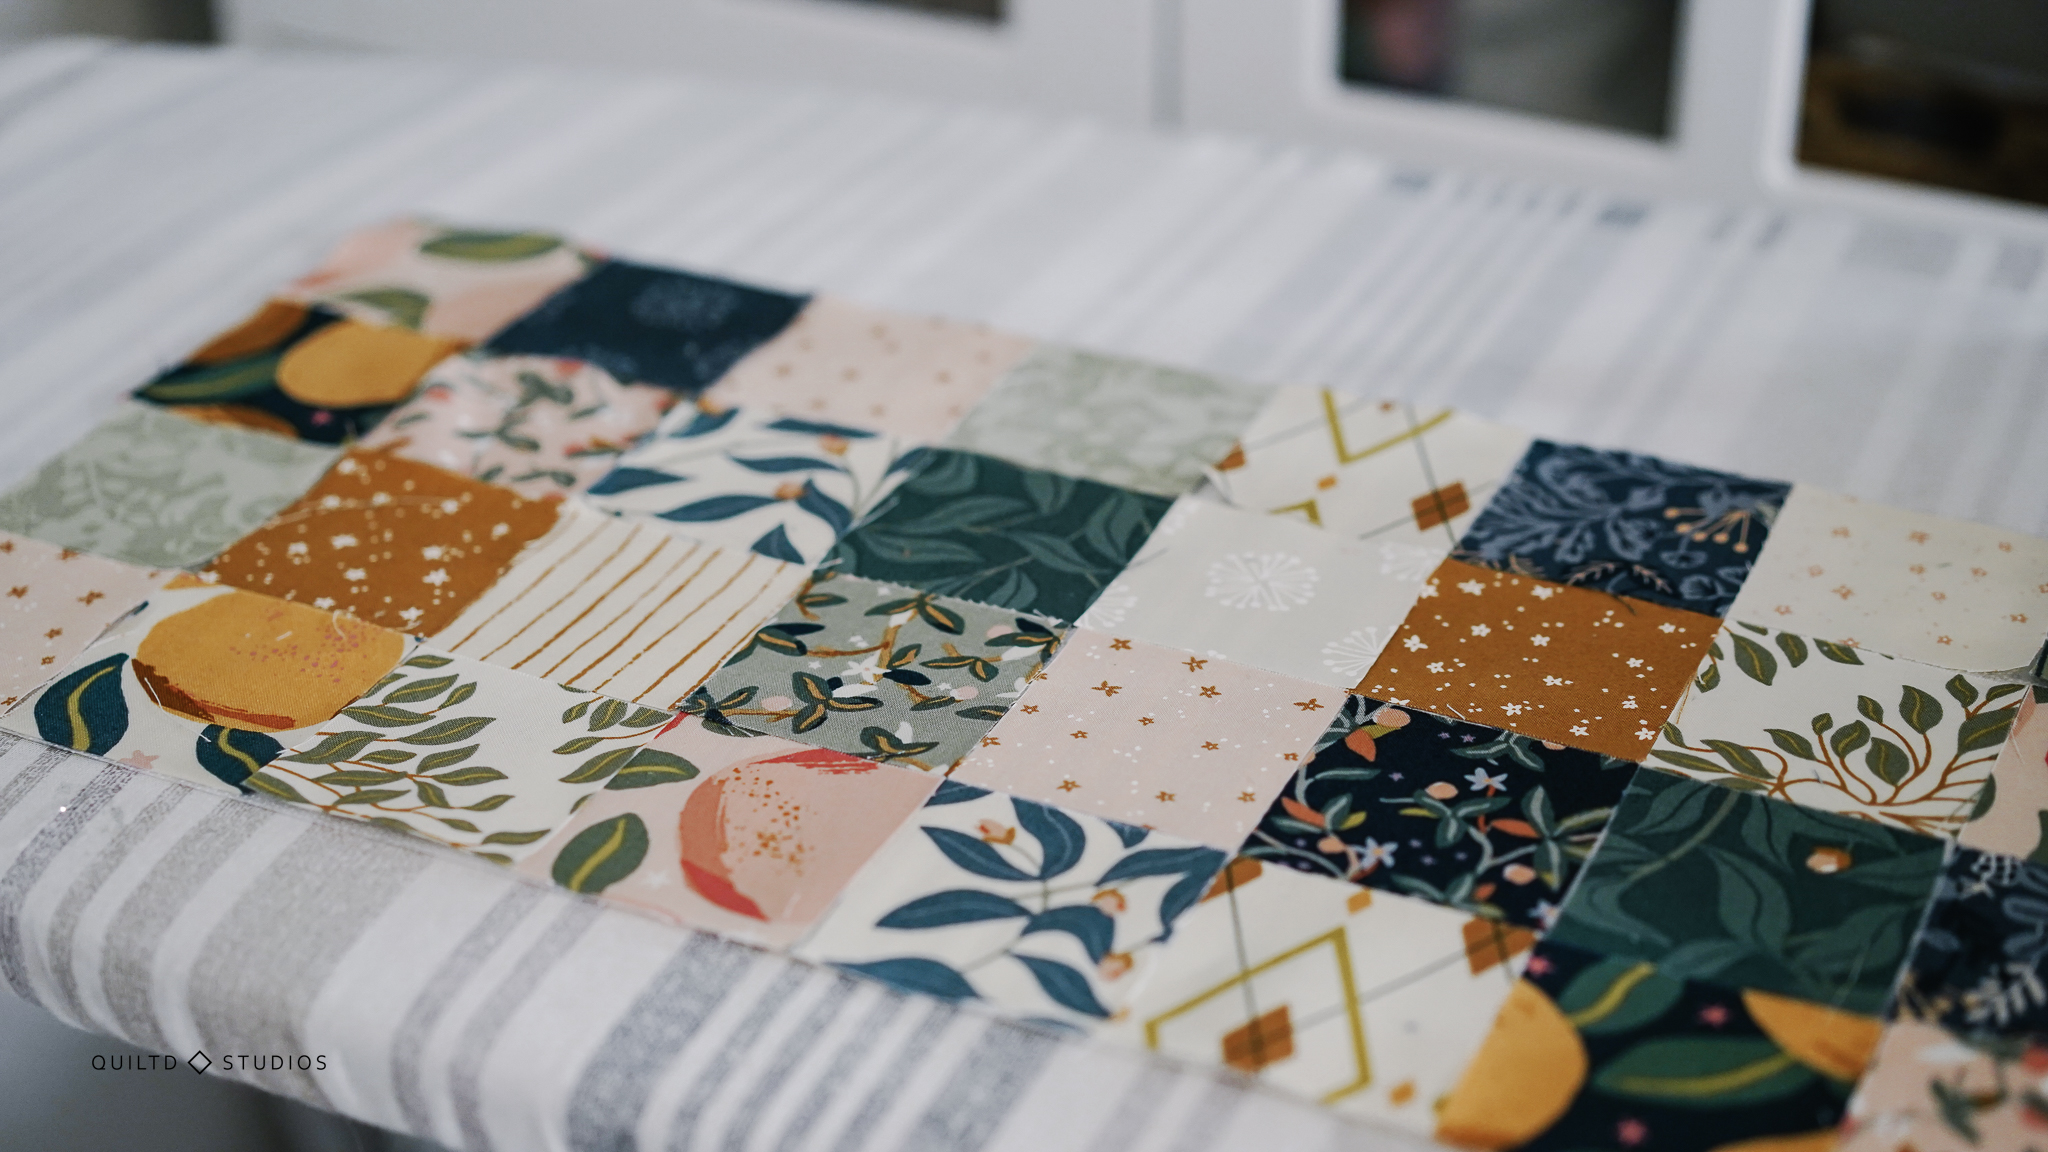
Squares should be just barely touching, not overlapping, and no wide gaps.
Iron the squares to the interfacing so they are nice and stuck, no shifting or peeling off.
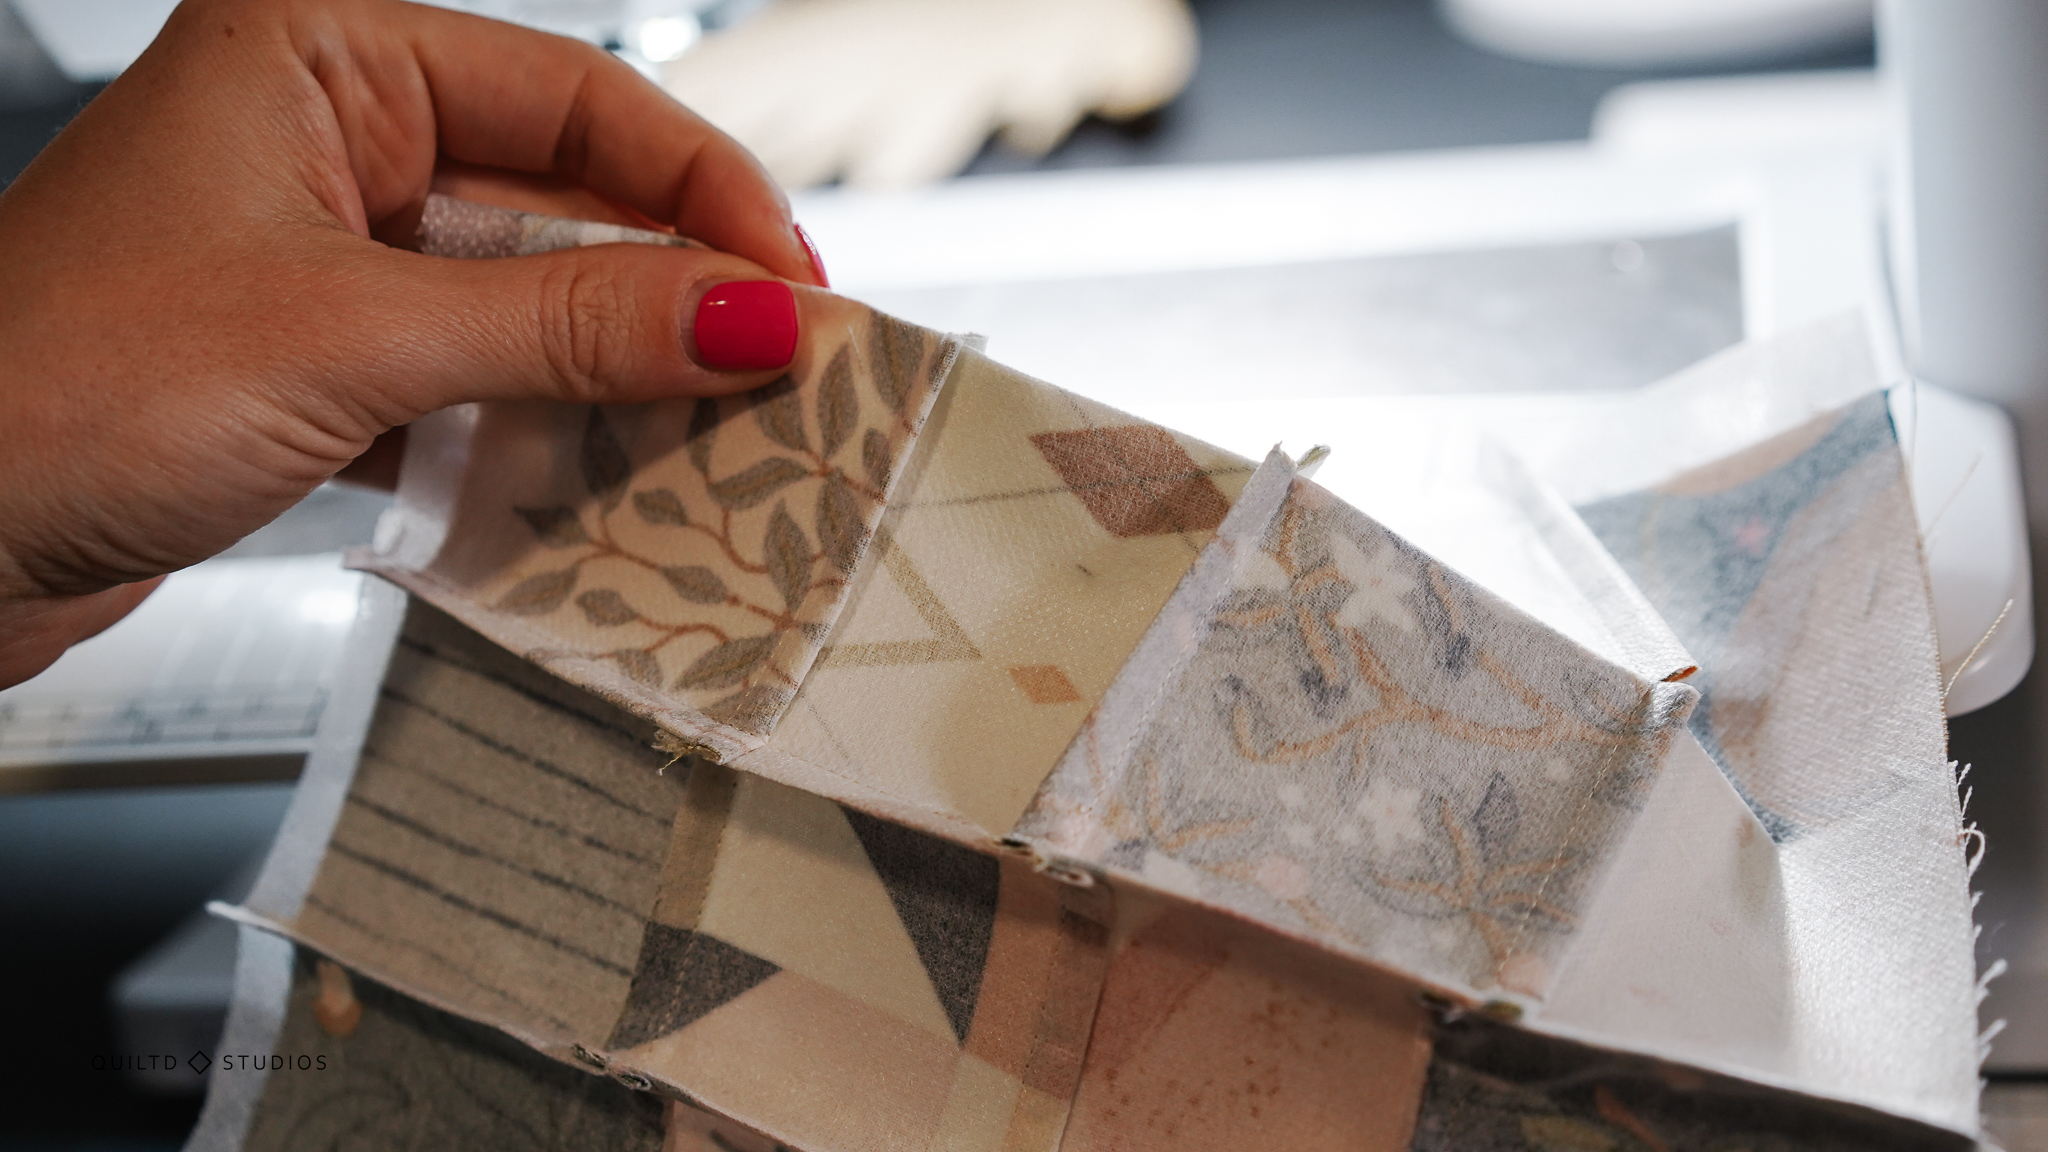
Move to the sewing machine, fold over your first row (or column, up to you!) so that the squares all line up with each other.
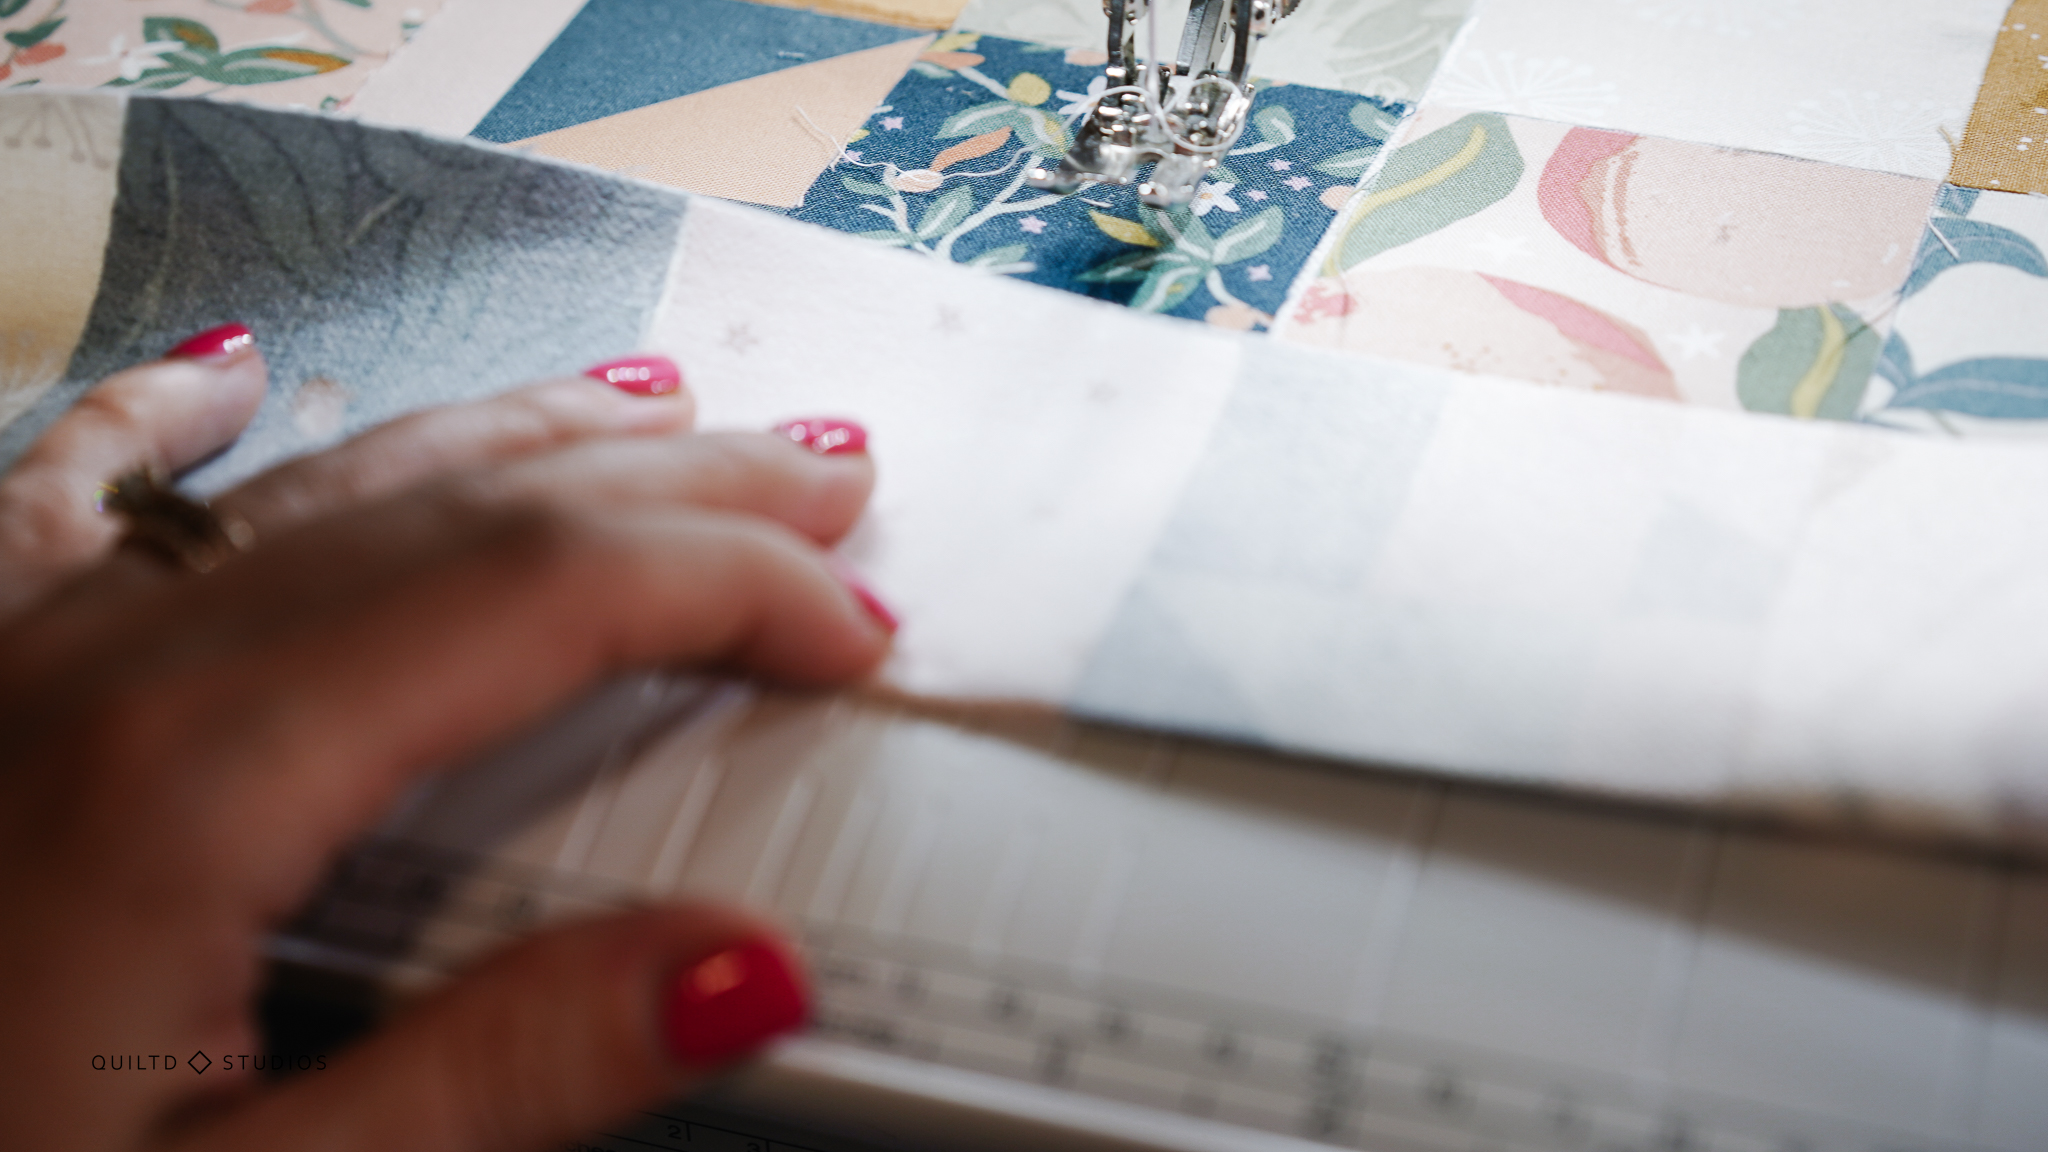
Using the edge of the squares as a guide and sew using a scant 1/4" seam allowance (if using a full 1/4" seam, your panels and squares will be a little smaller, which is fine but keep that in mind).
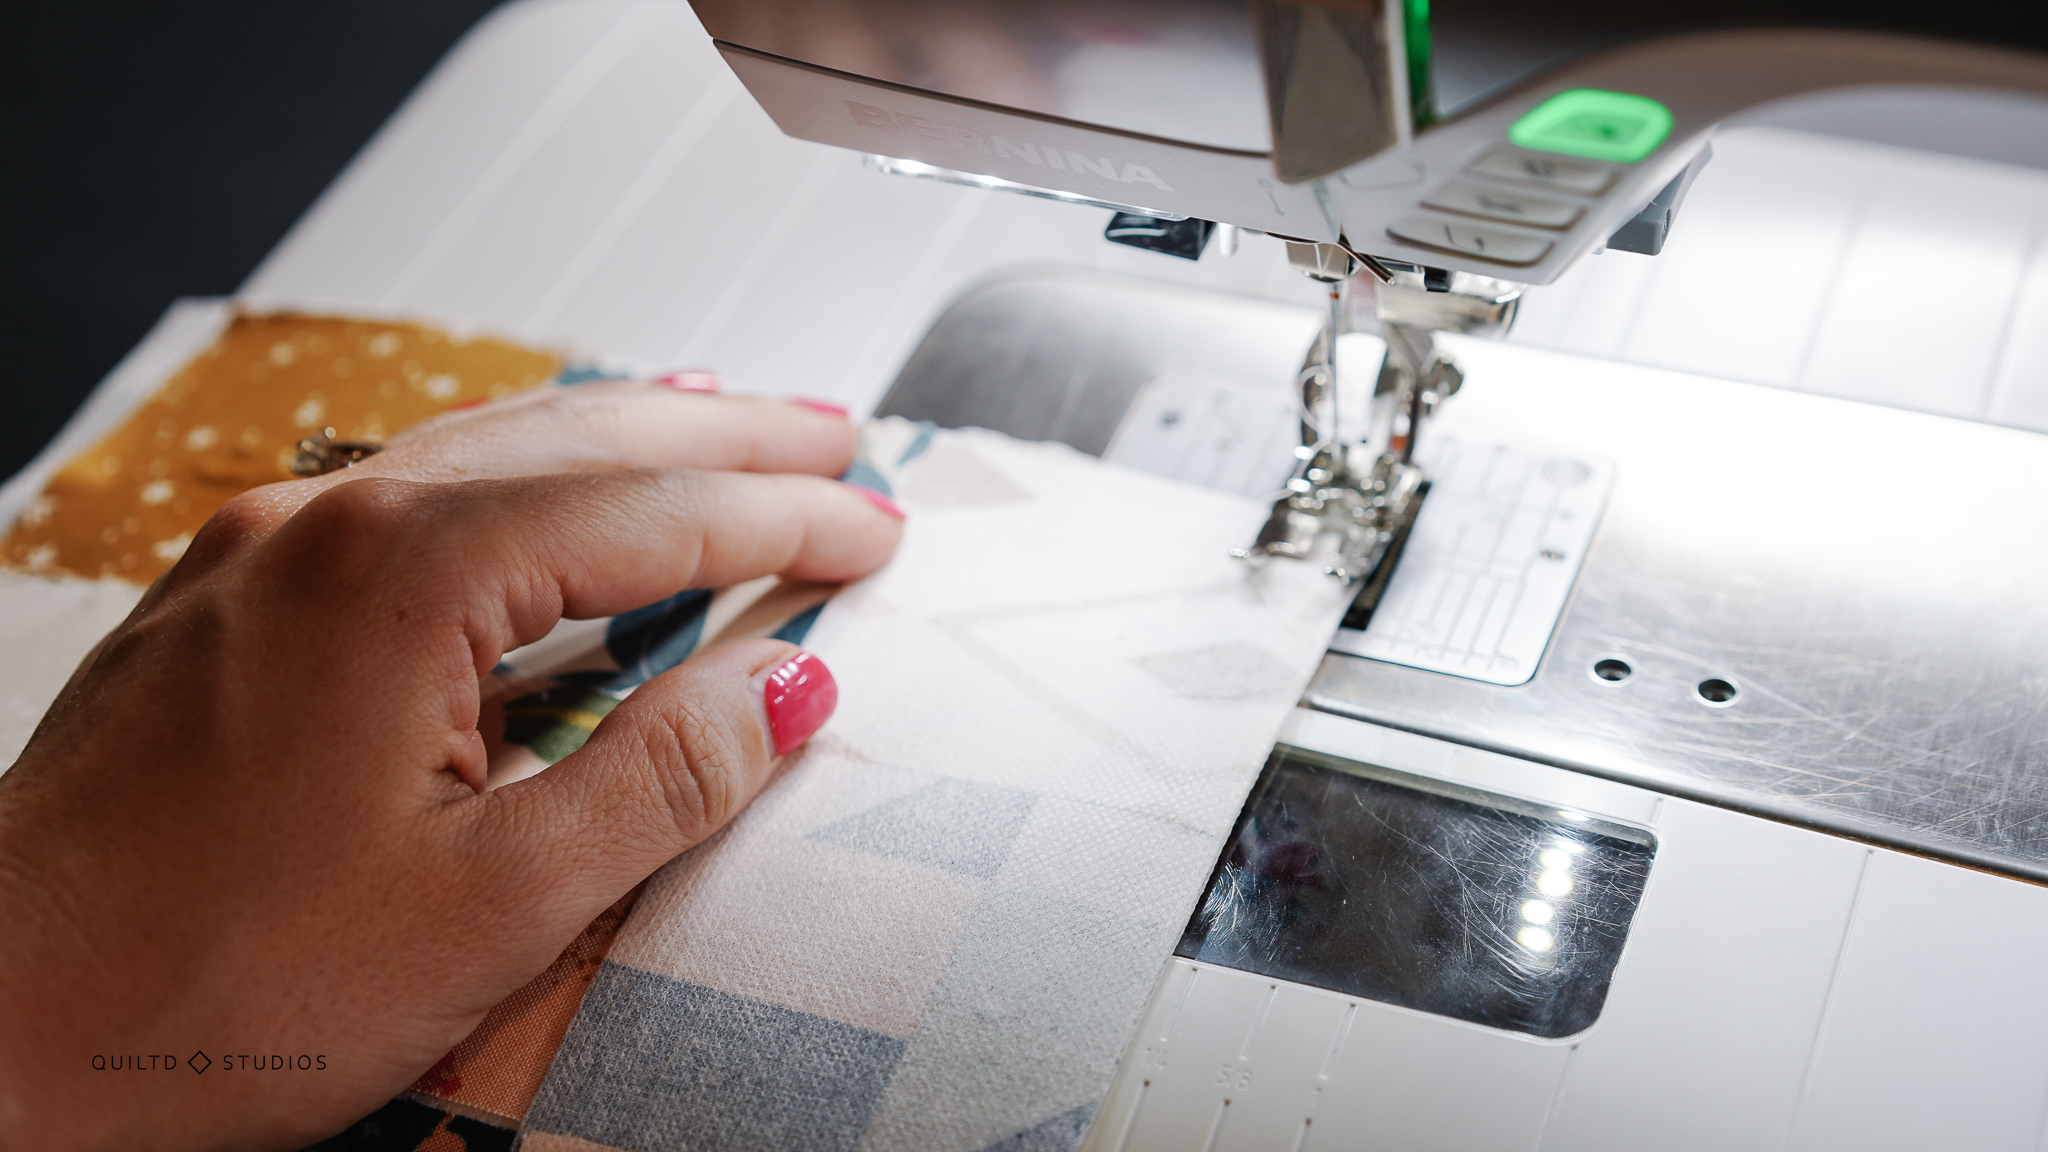
Repeat folding over each row or column until they've all been sewn.
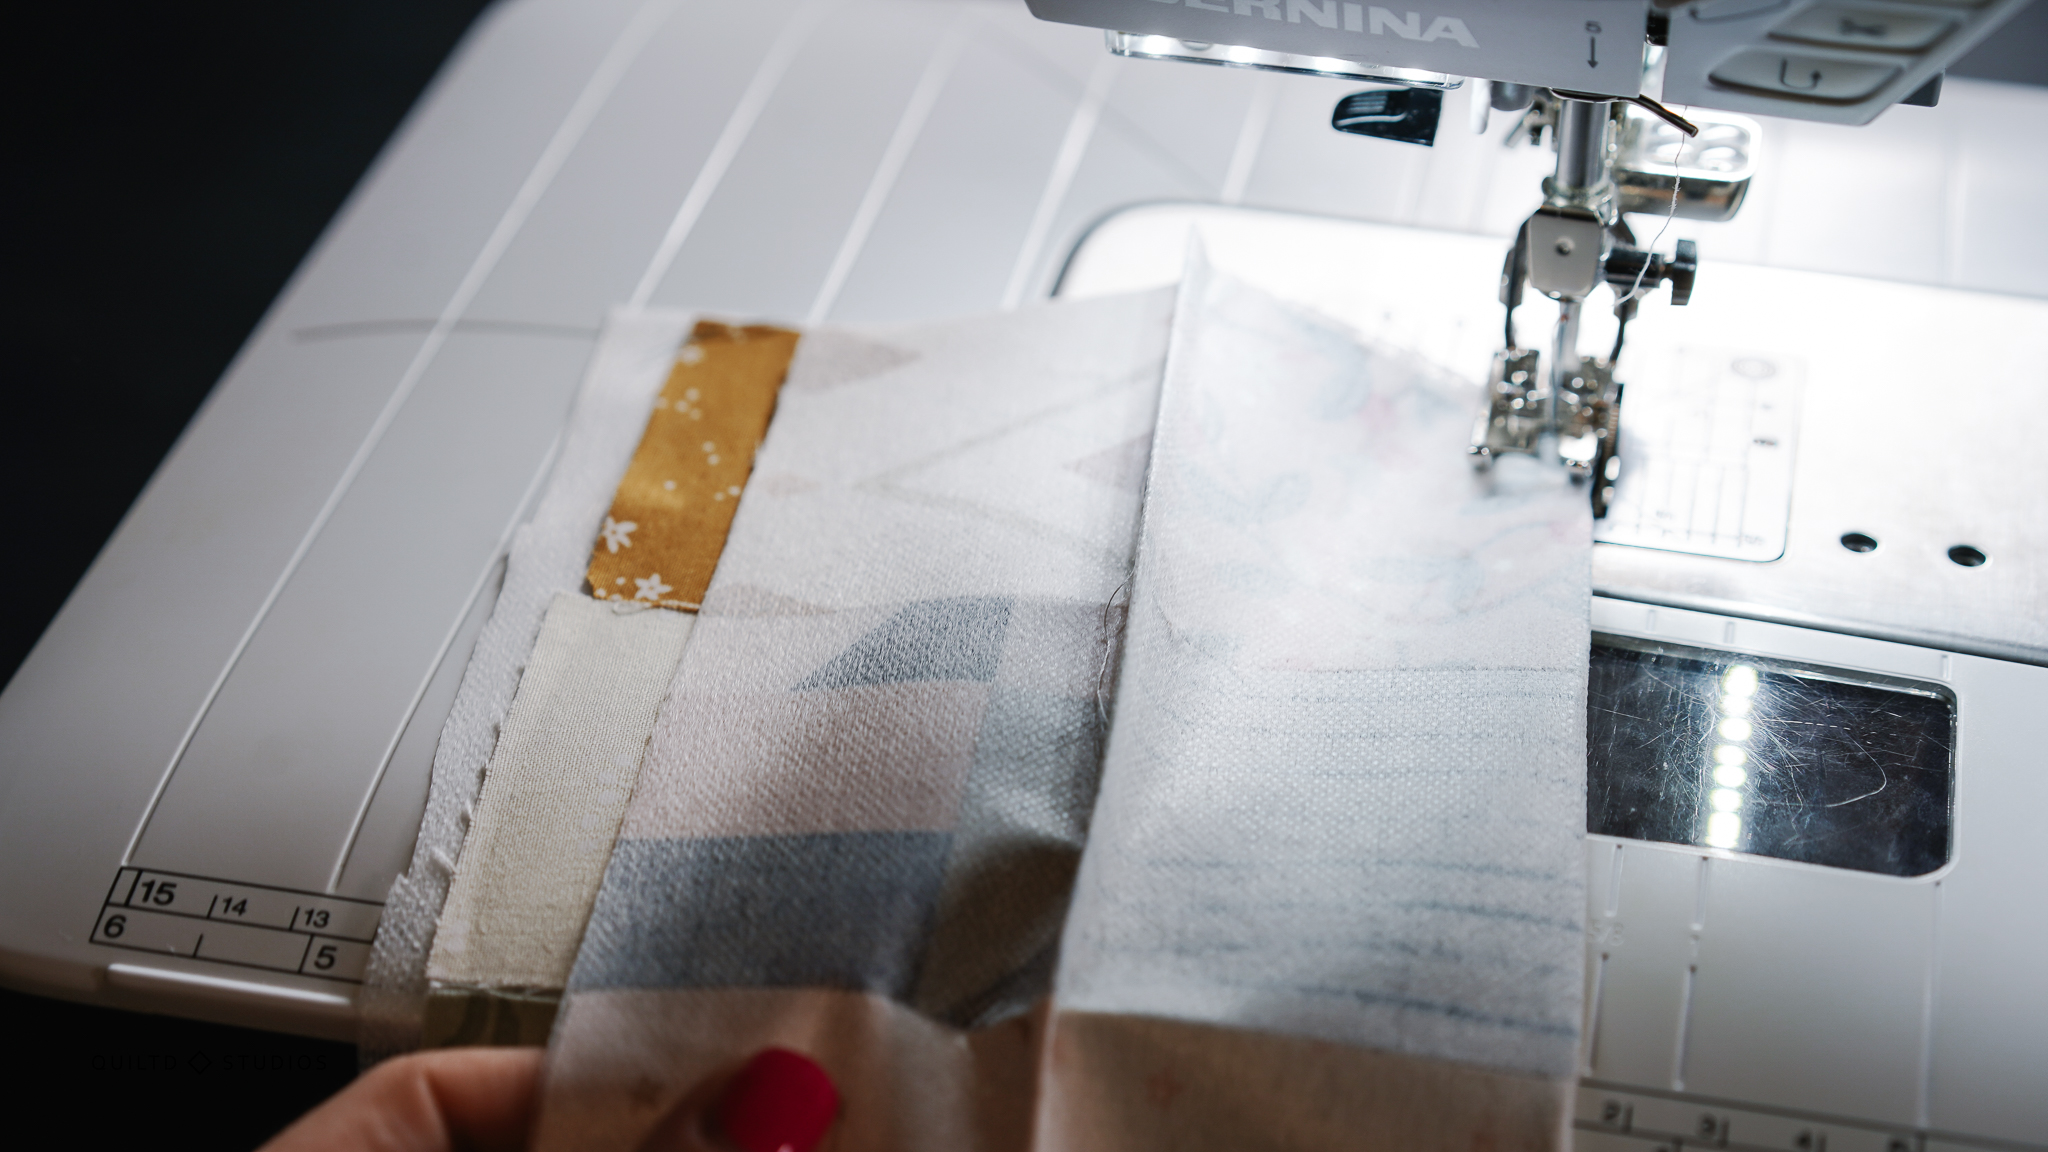
Clip the seams where the interfacing and squares meet up, this will allow us to lay the column down flat to sew the opposite direction.

Don't clip into the stitches, just a hair before it.
Carefully fold down the first column.
I make sure that seam allowances go in opposite directions so that it nests nicely.
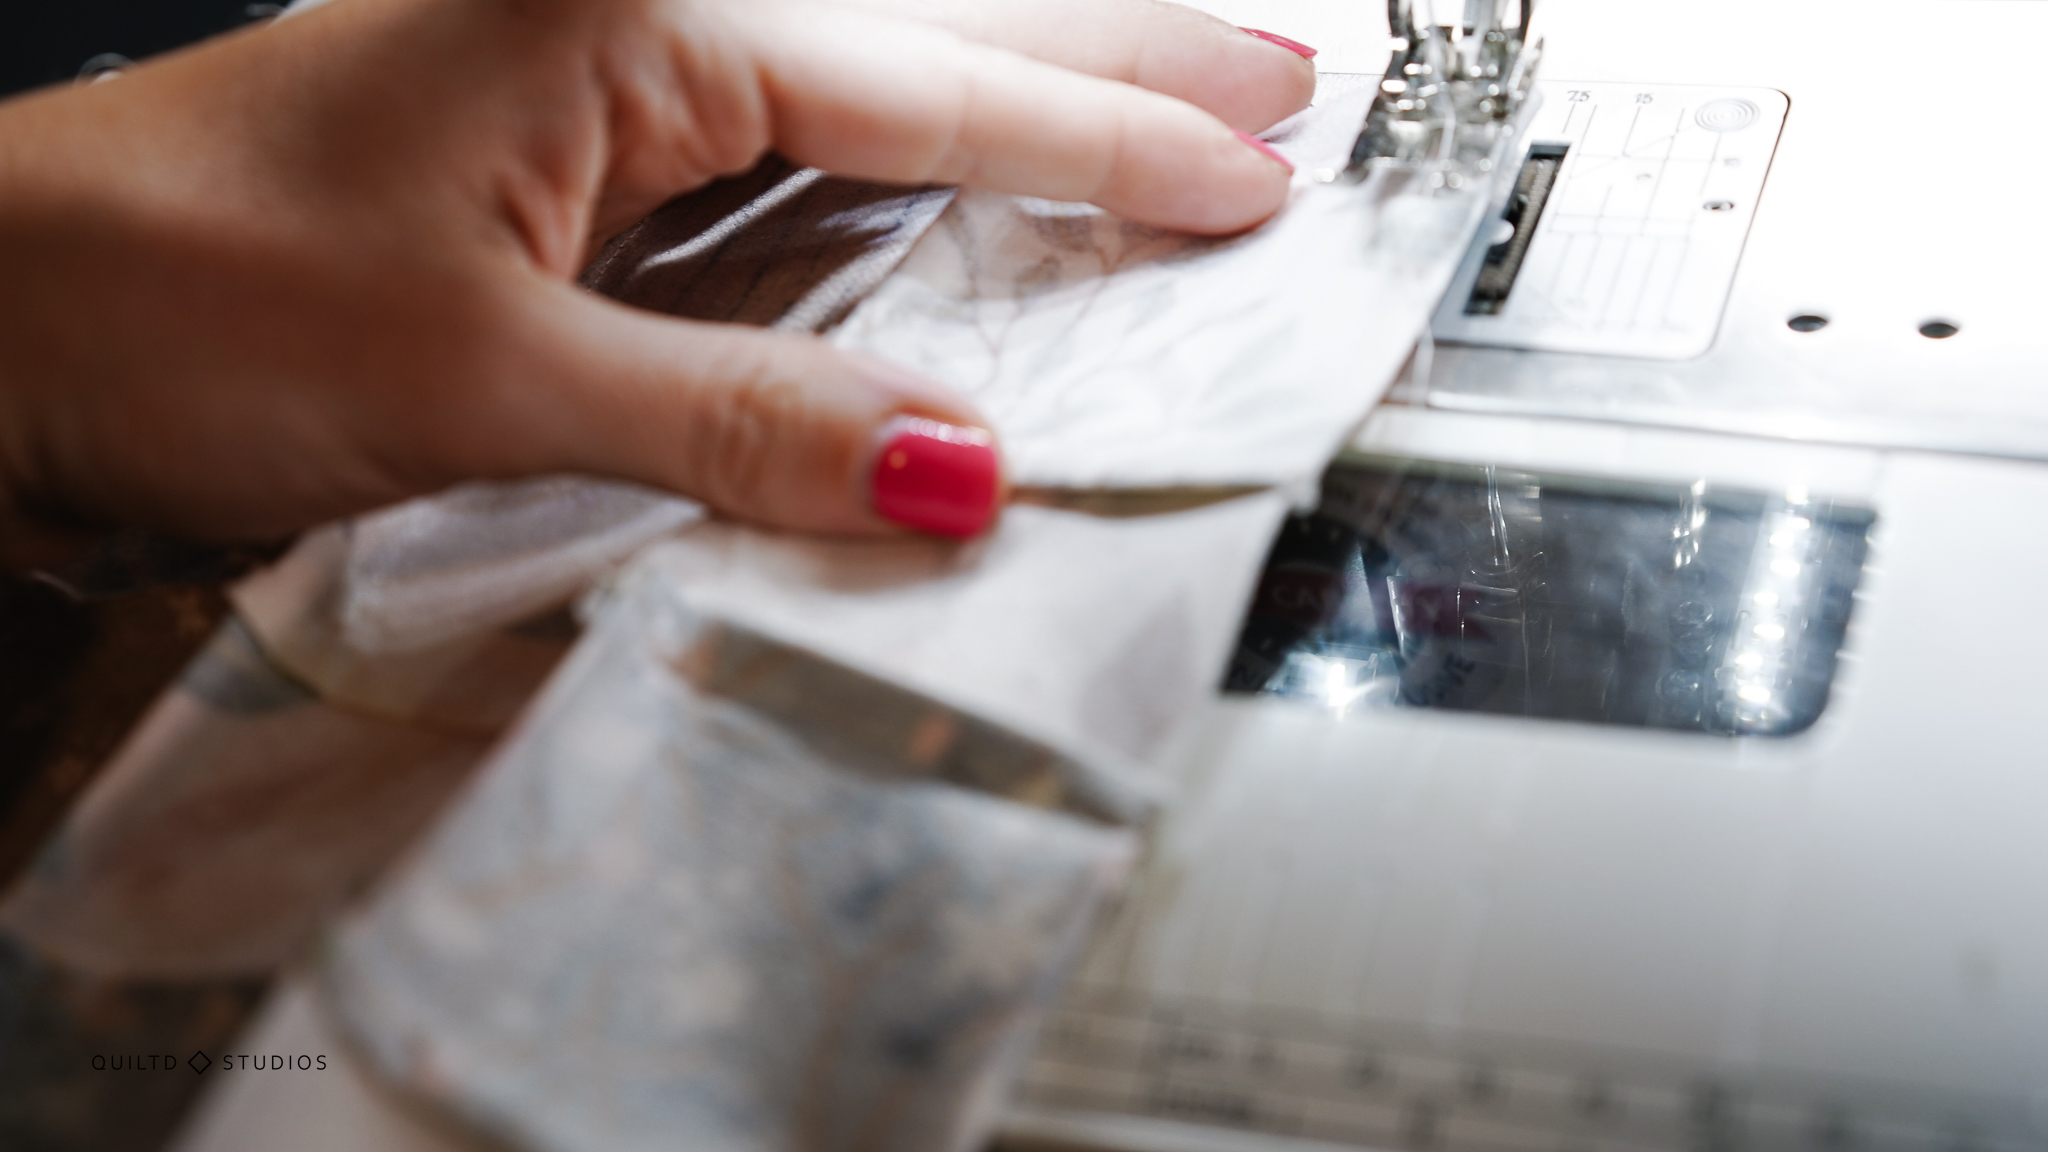
Sew down using the edge as a guide and repeat just like earlier.
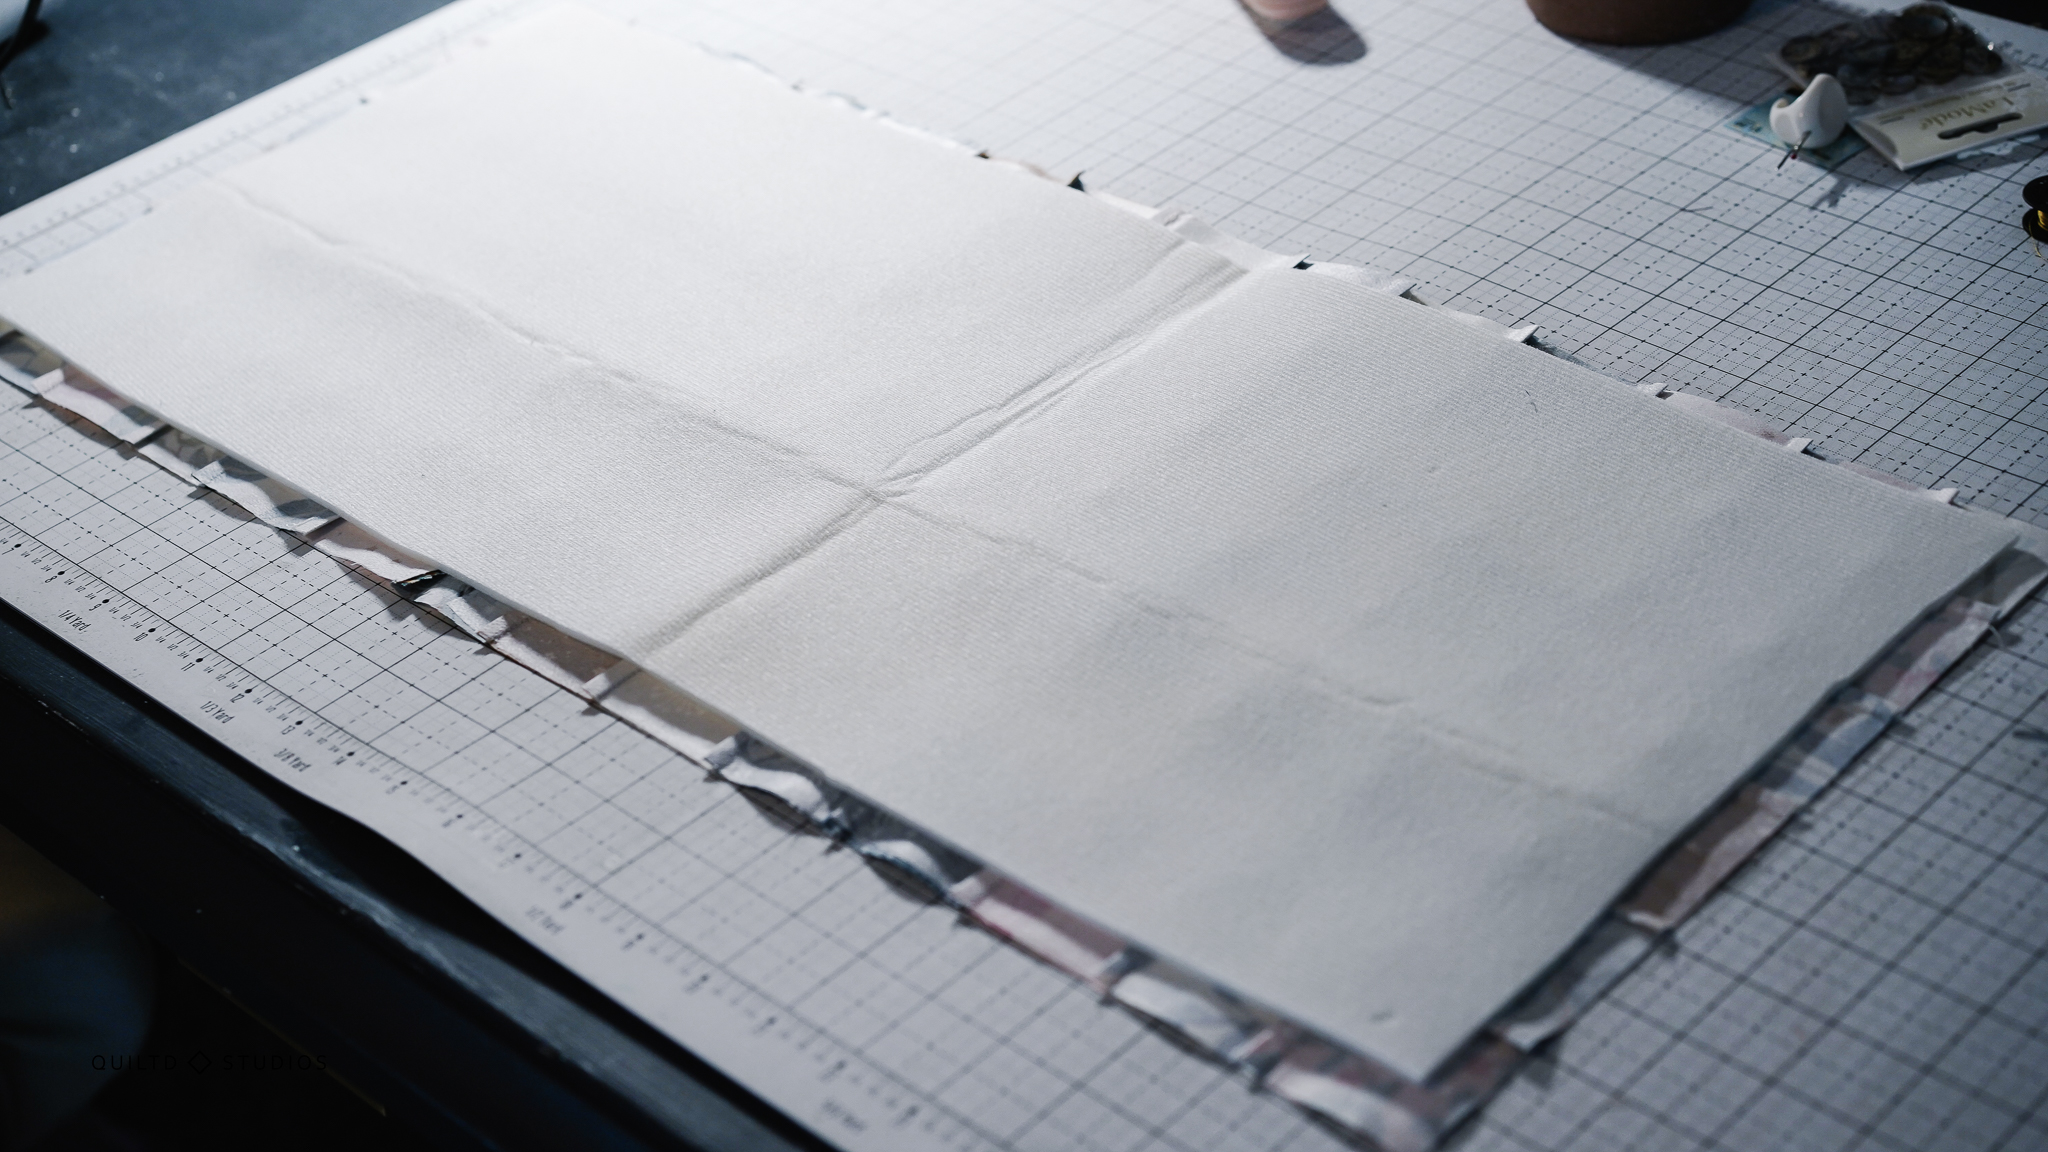
Take your panel to the iron and press flat. I used steam to get a really flat finish.
Make sure you have enough patchwork panels to get your main bag rectangle, and two 9" circles.
Don't trim them down yet, let's do that after we've quilted them (they have a tendency to shift, this same principle applies when doing quilted clothing as well)
Quilting The Panels
Next we're going to baste the foam to the back side of the panels, using basting spray or even long hand stitches, baste the foam onto the wrong side of the panels.
For the largest rectangle, the foam will be 1/2" smaller than the final cut piece on all sides. This reduces bulk at the seam allowances, so center the foam where you'd like your final piece cut.
Note, I had trimmed mine down, your panel will be slightly bigger.
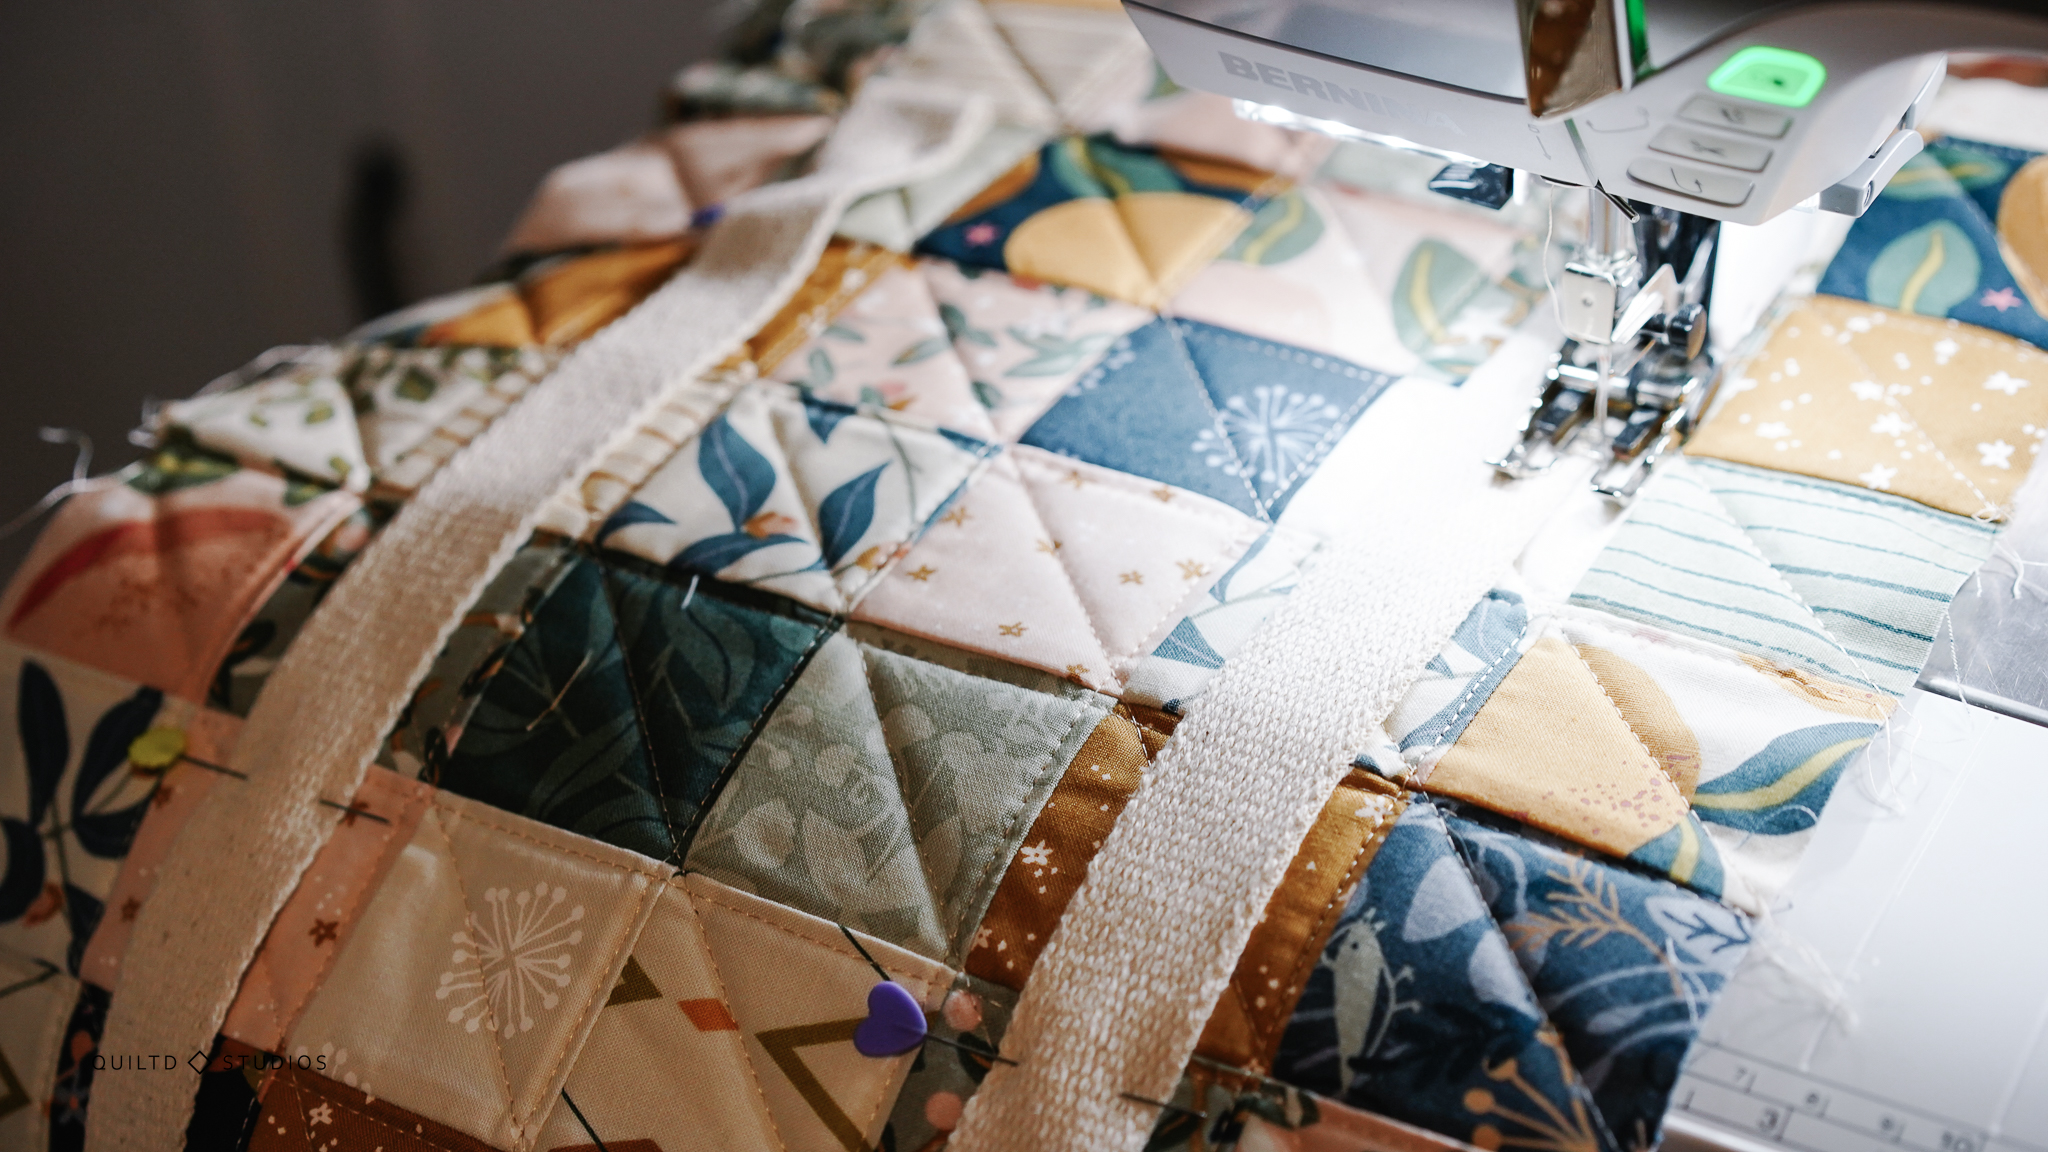
Quilt the foam to the panels using whatever design you'd like. I tend to use the edge of my walking foot as a guide and pick a few seams to follow. I did horizontal, vertical and diagonal lines for mine.
My stitch length was 3.5mm for this bag.
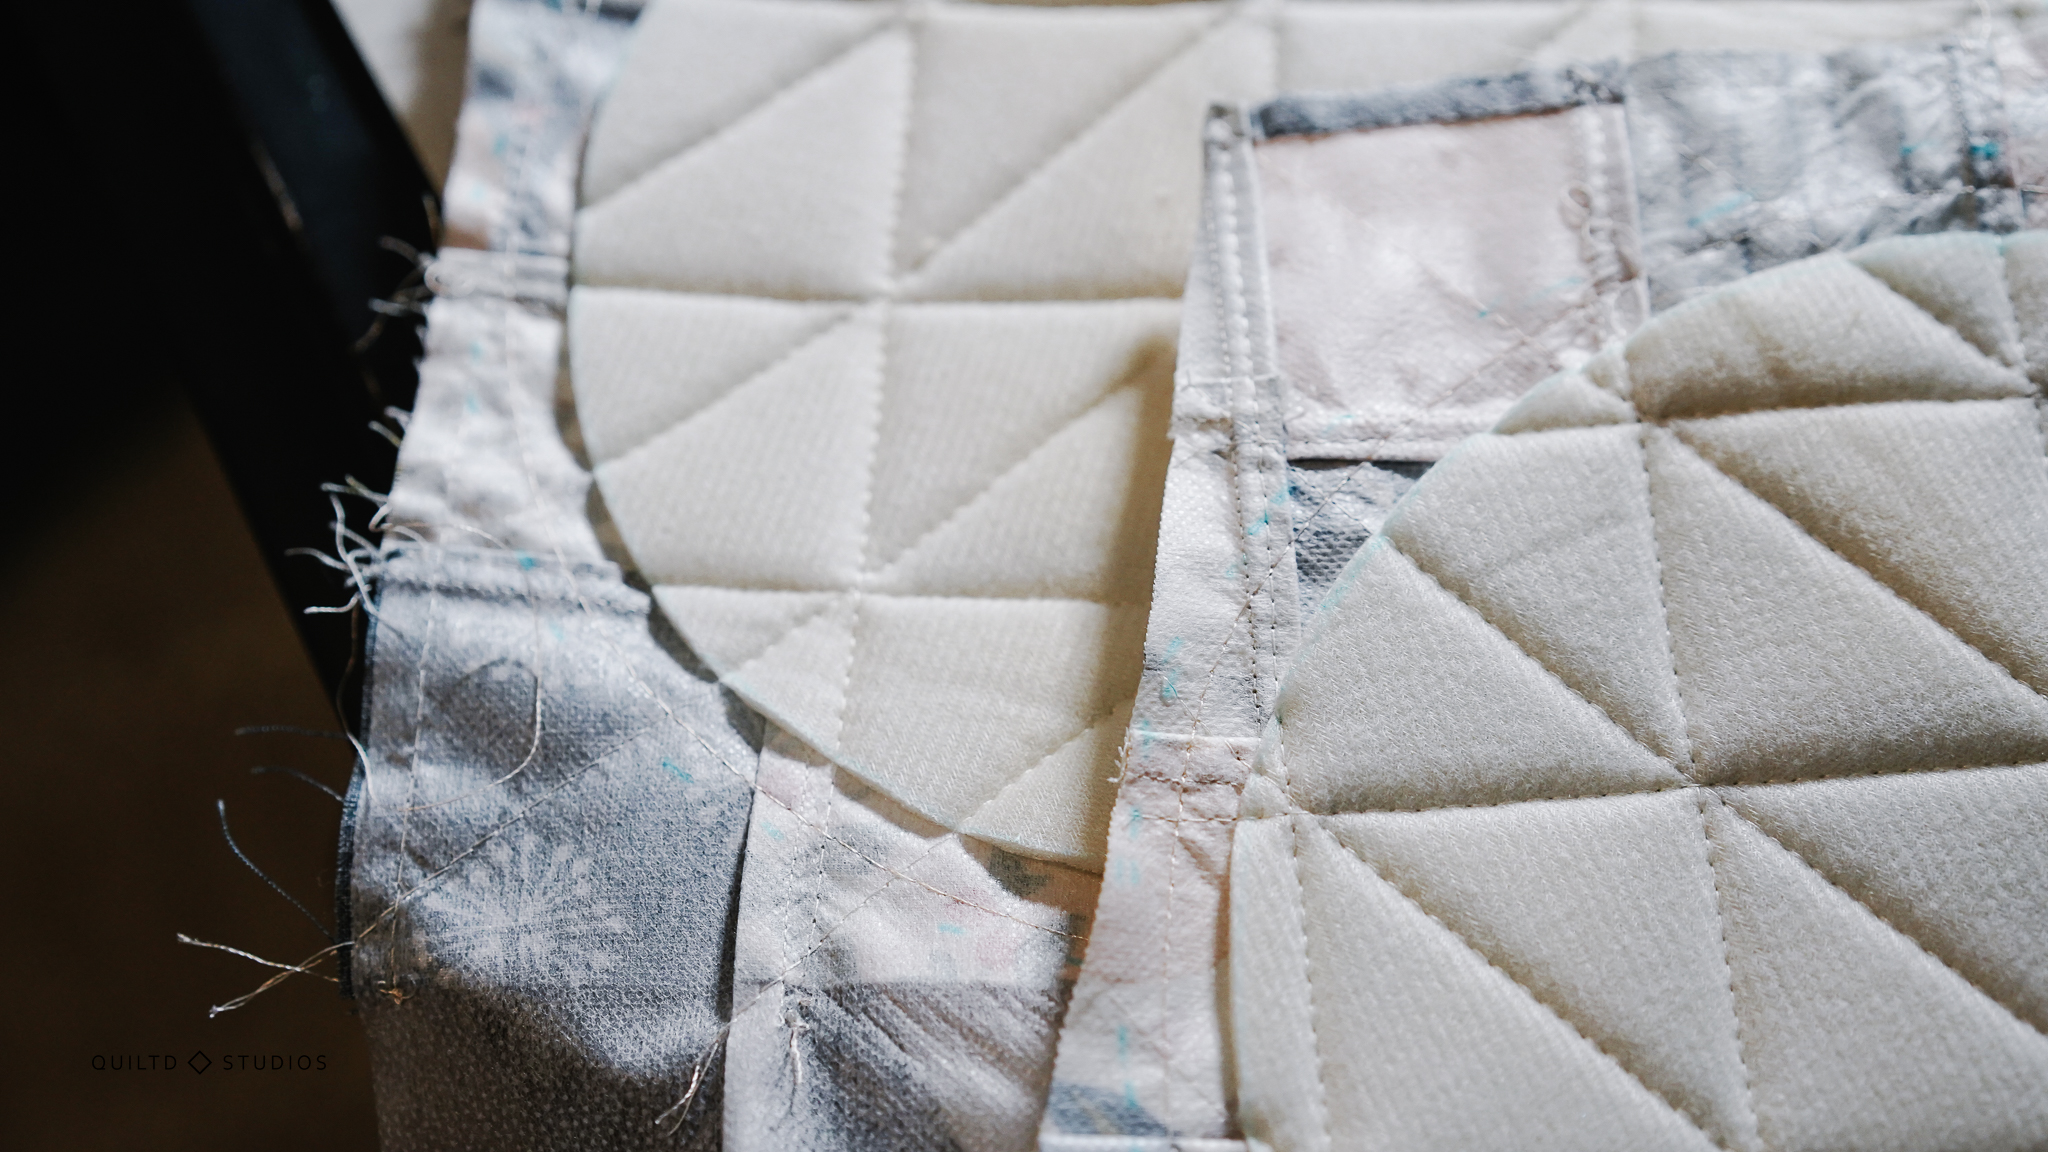
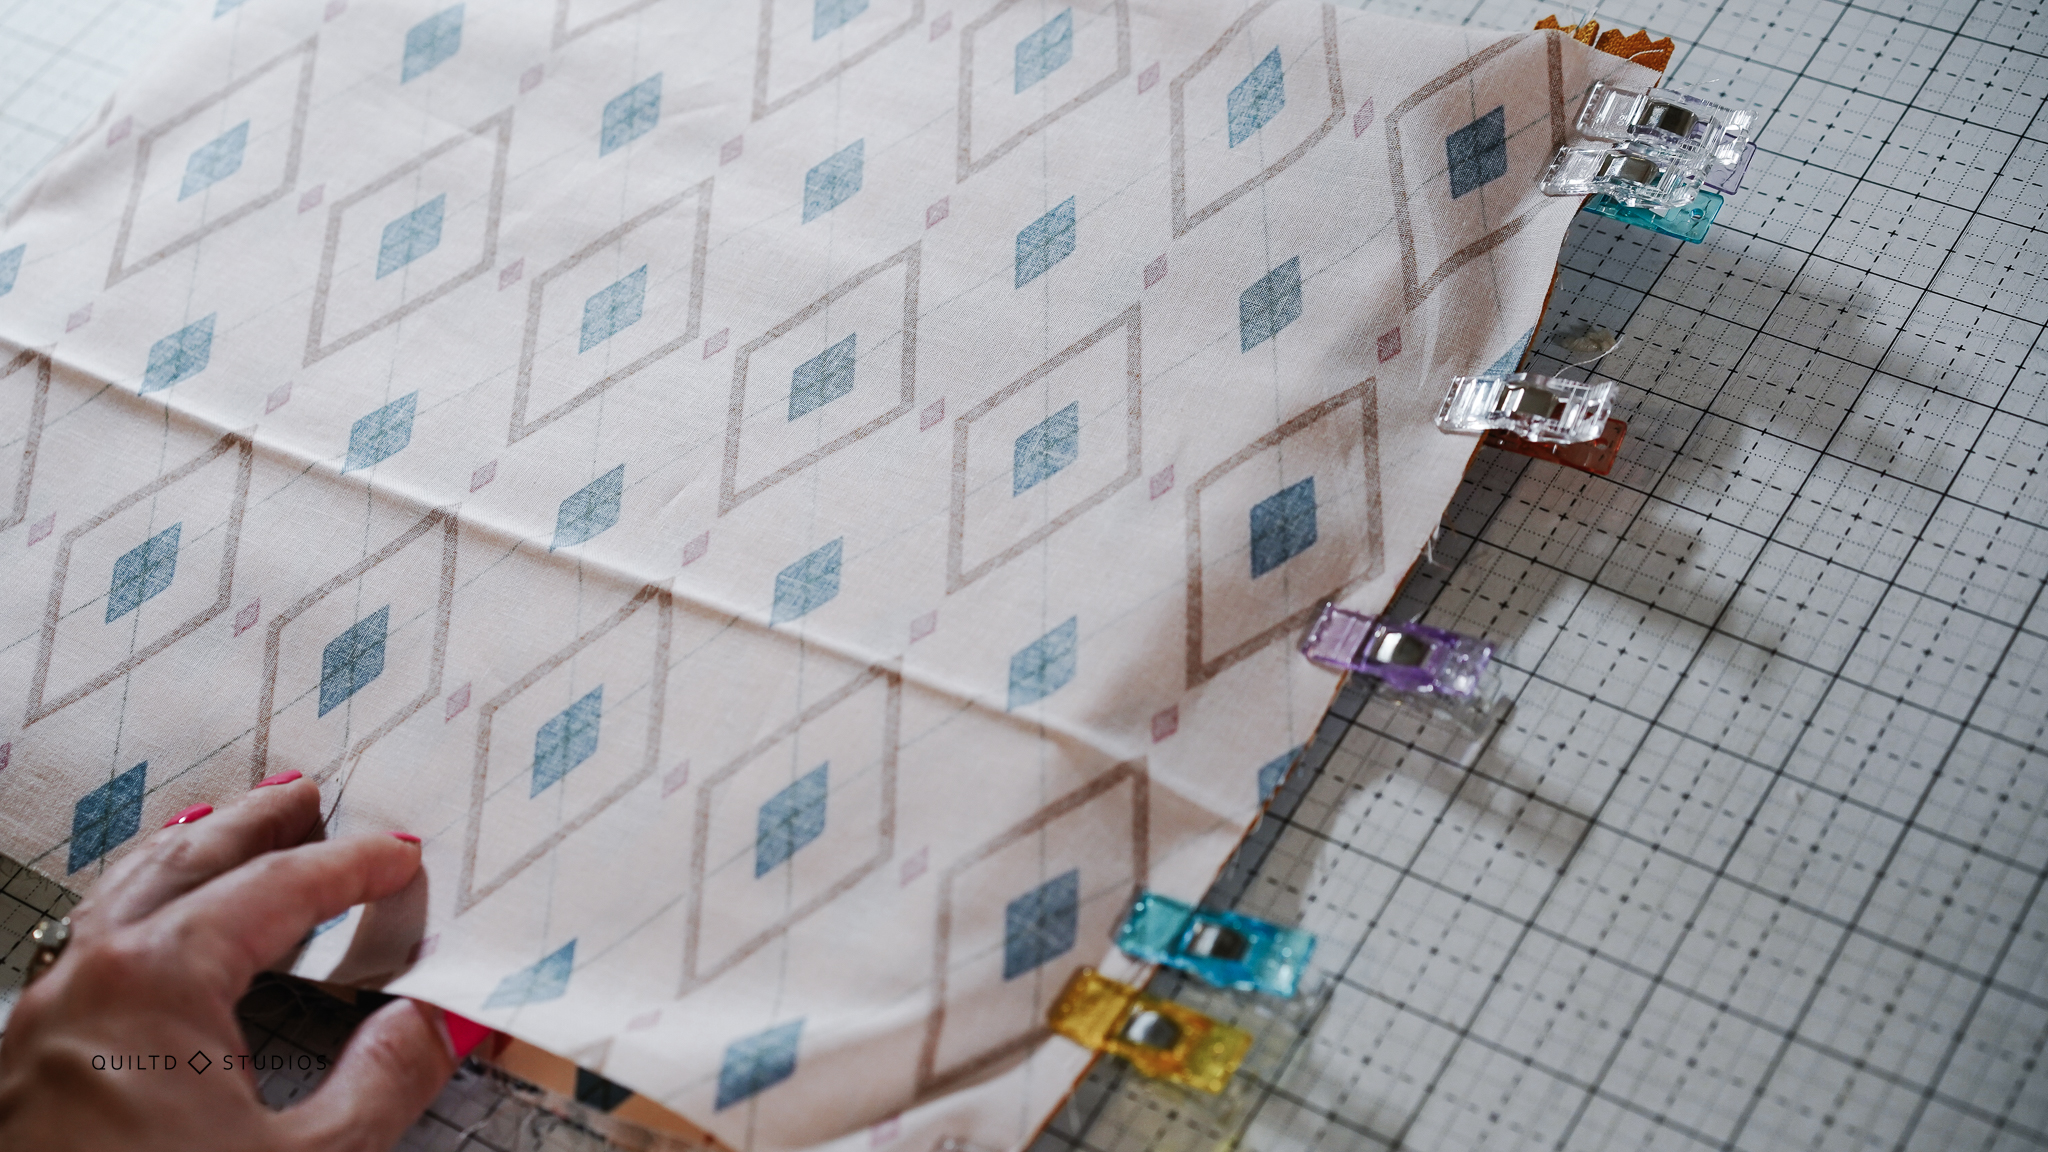
When you're done, trim one panel to 26¼" × 12". This is the main body panel.
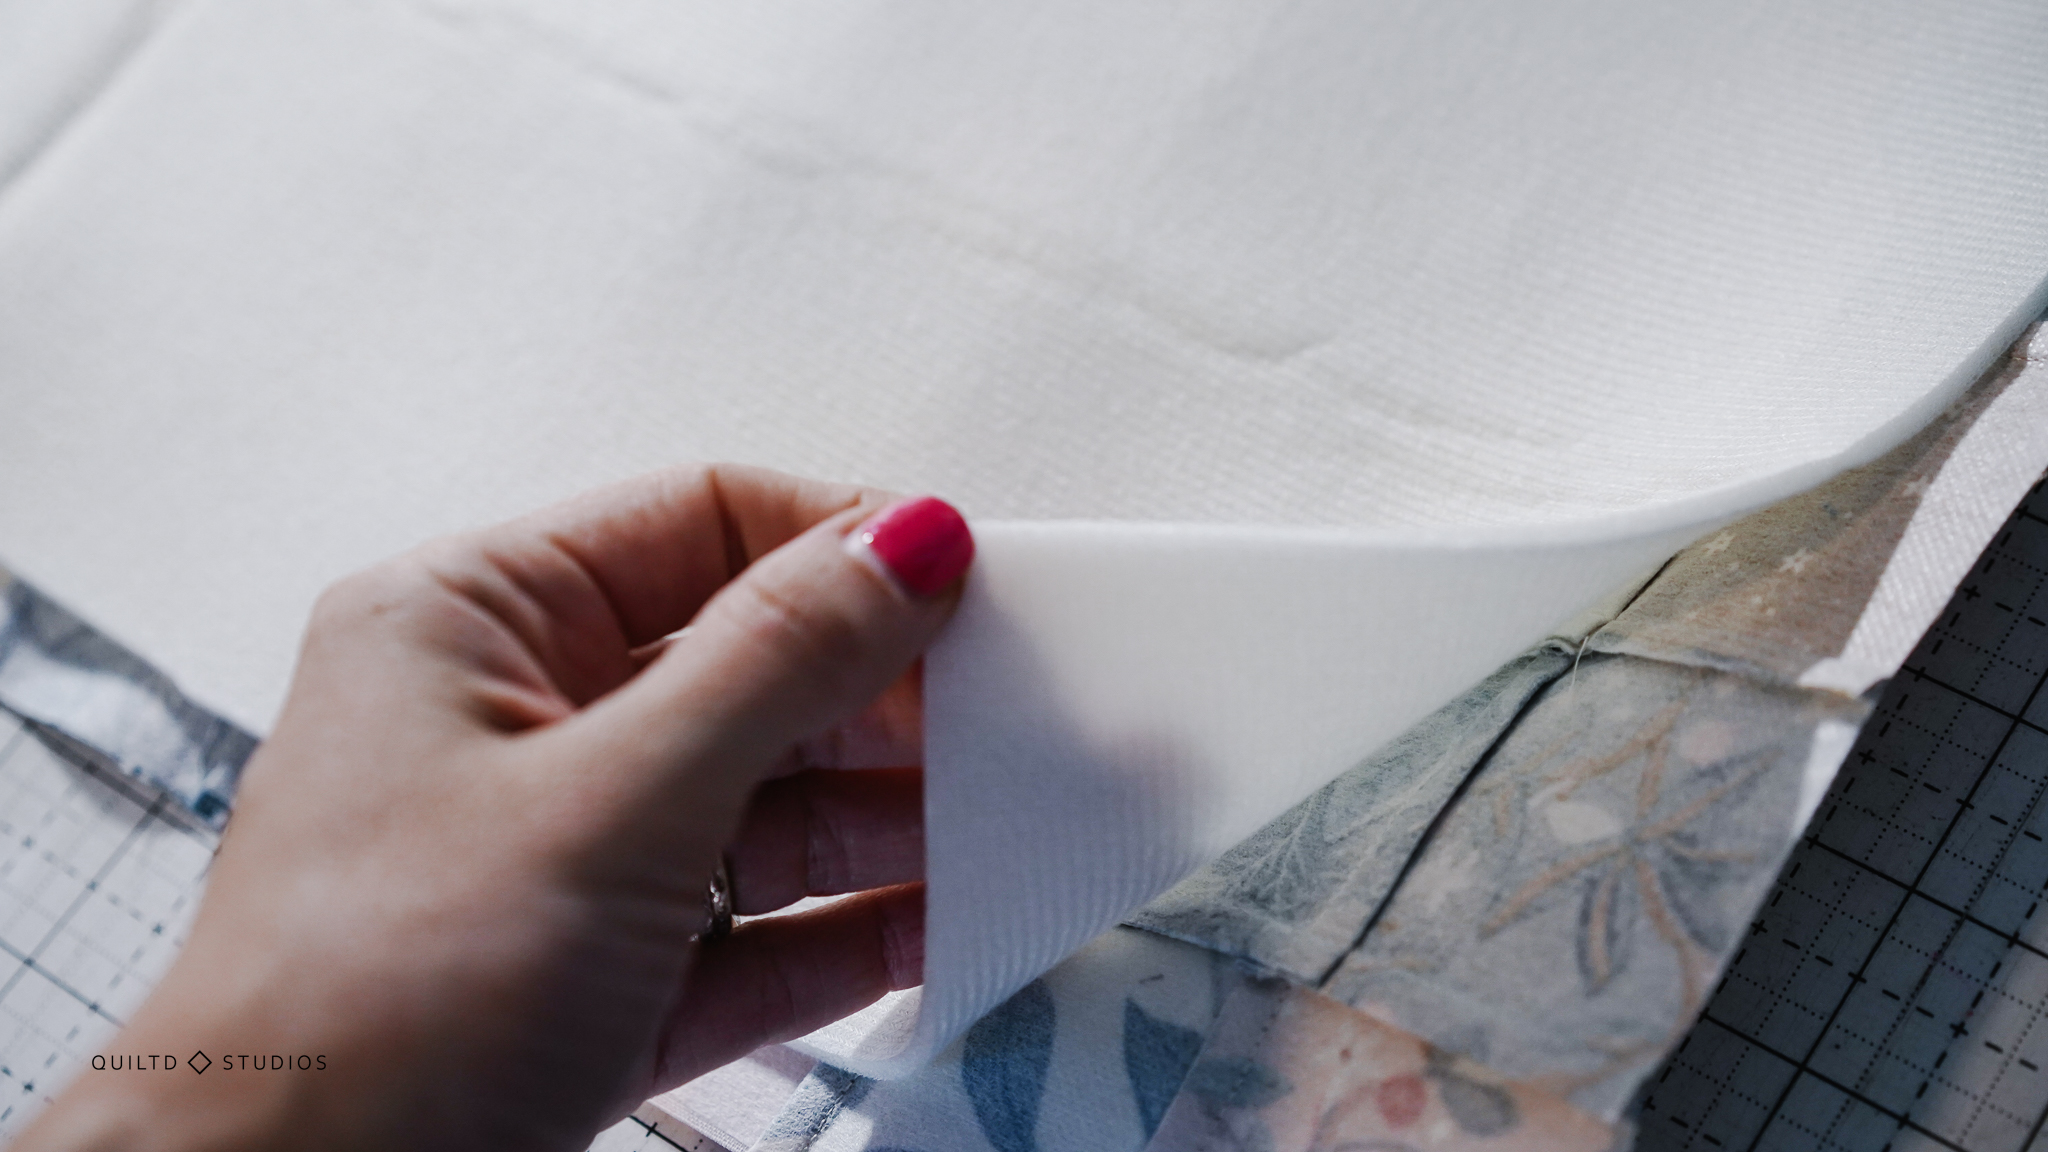
Then measure 1/2" around the foam circles and mark a line. Baste stitch 1/8" inside the marked line and then cut a 9" circle out (on the line) Repeat to get (2) total 9" circles.
You should have 1 main body piece and 2 side circles.
This is really it! That was the hardest part of the bag, I promise!
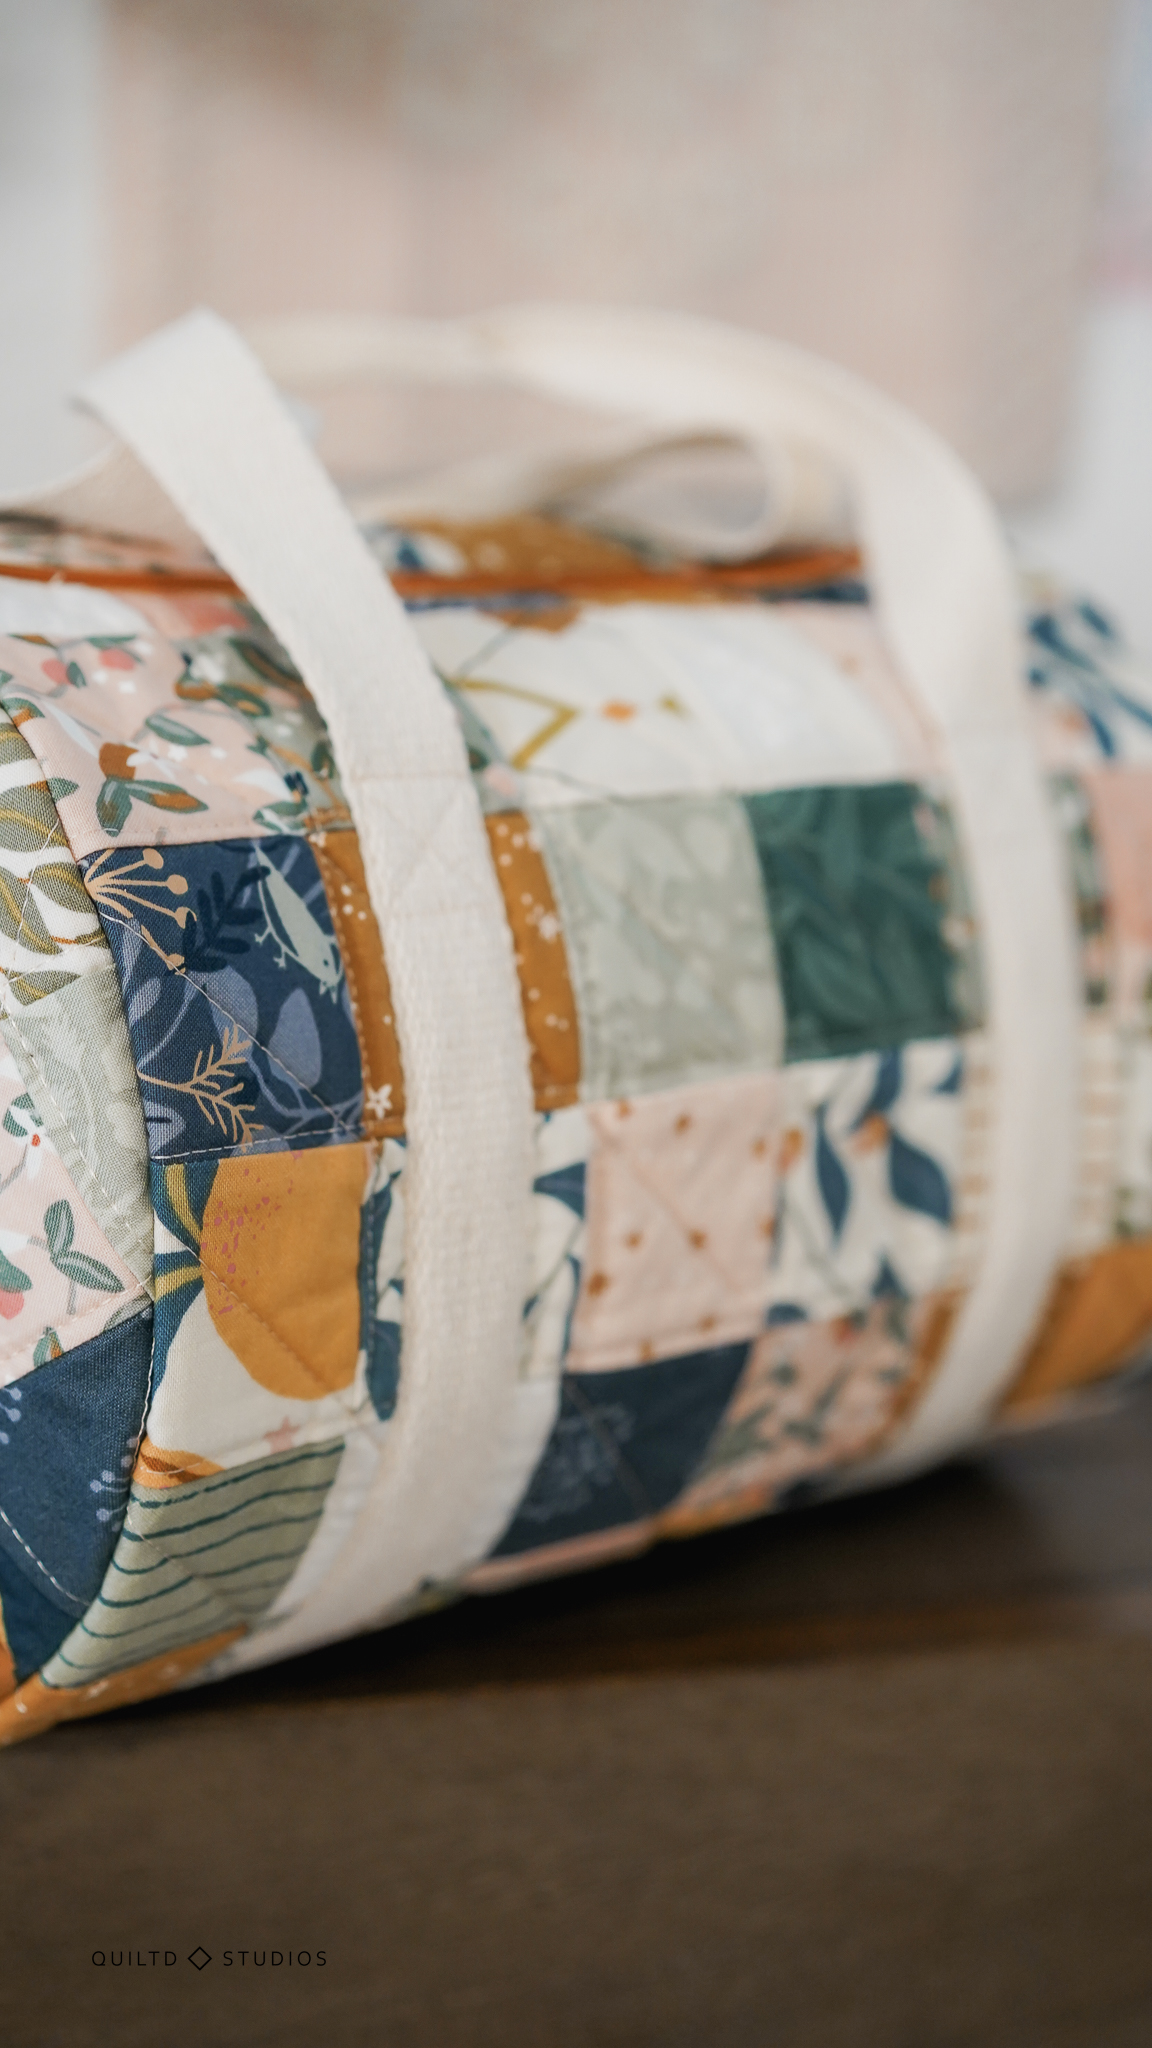
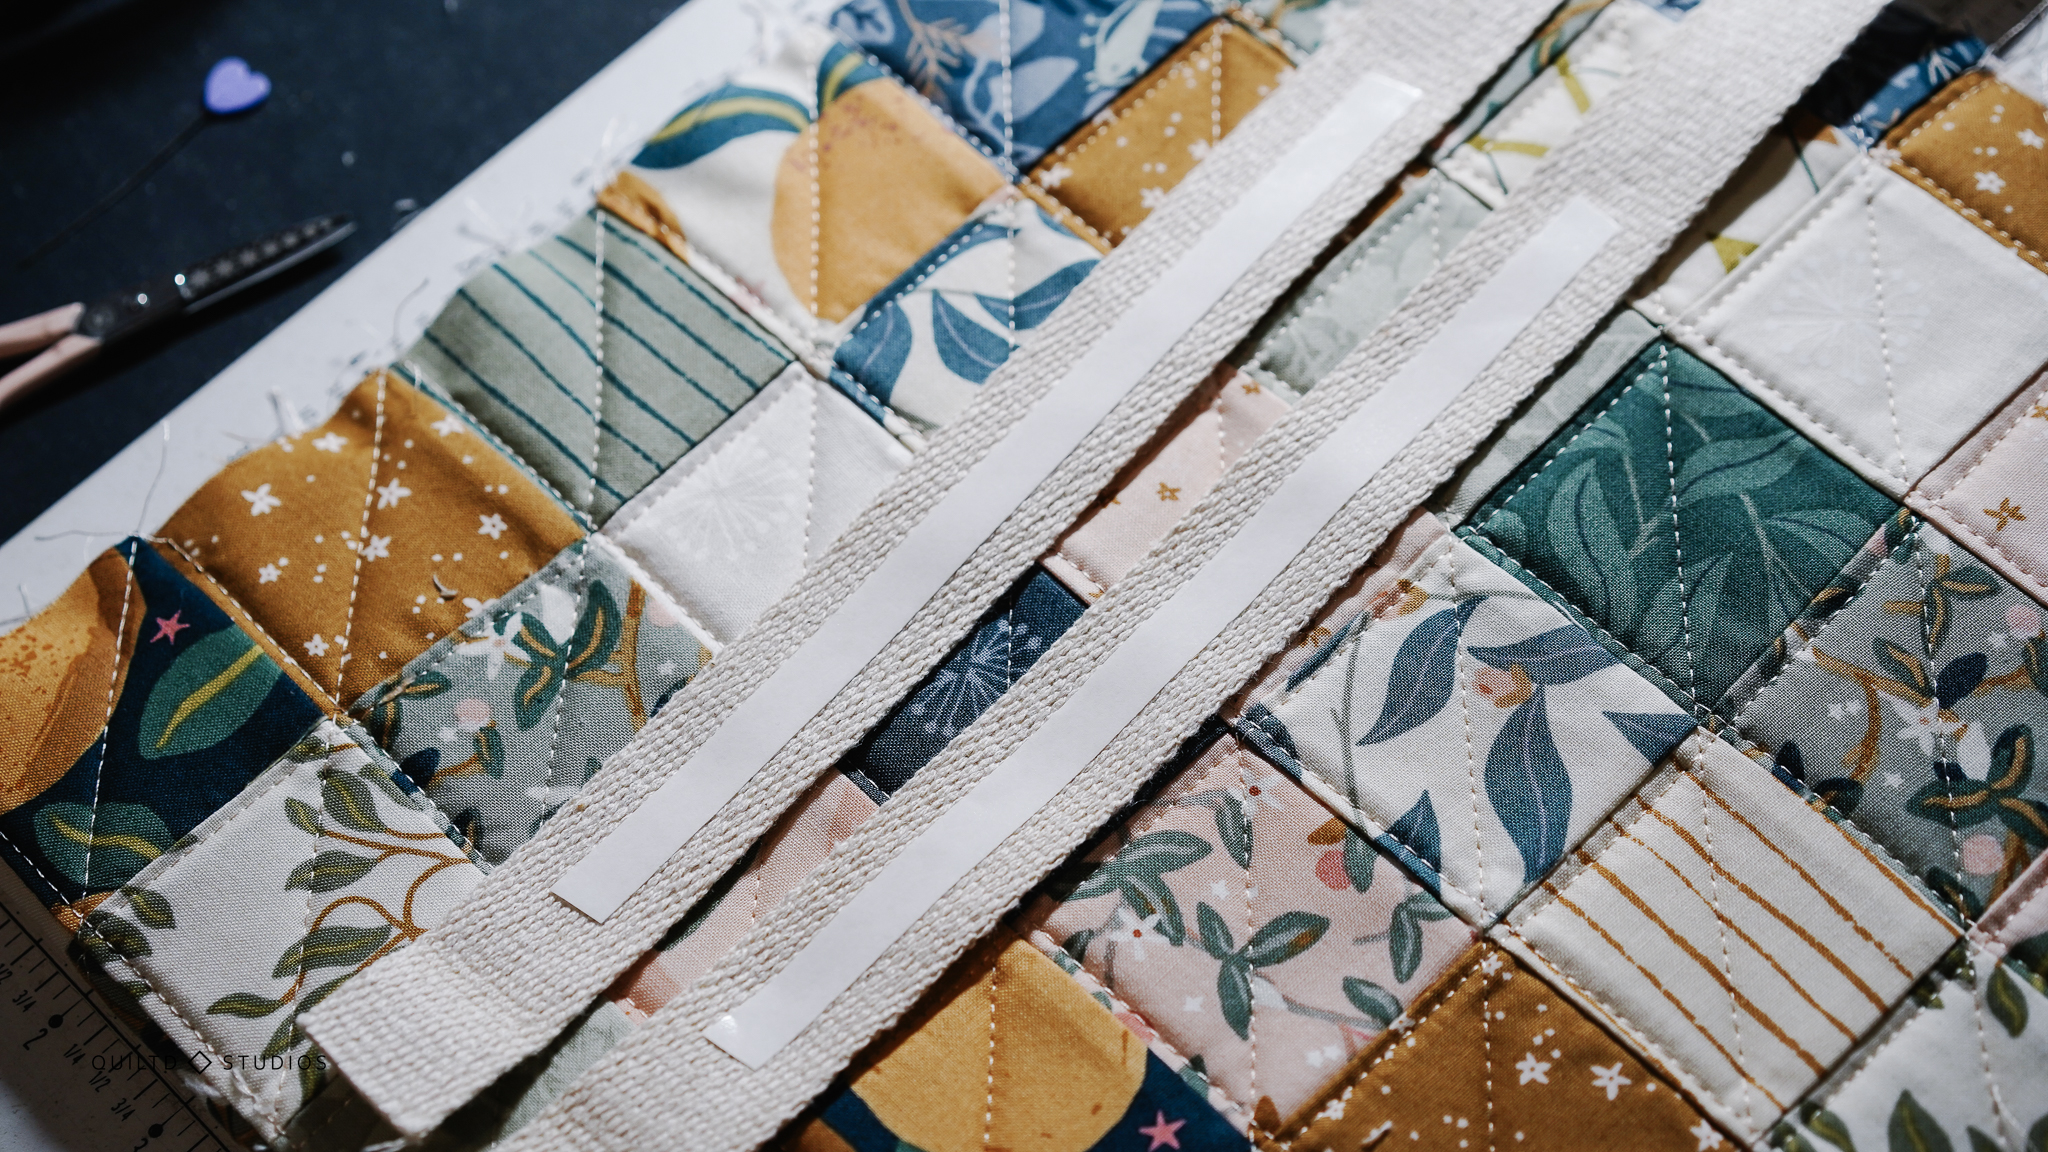
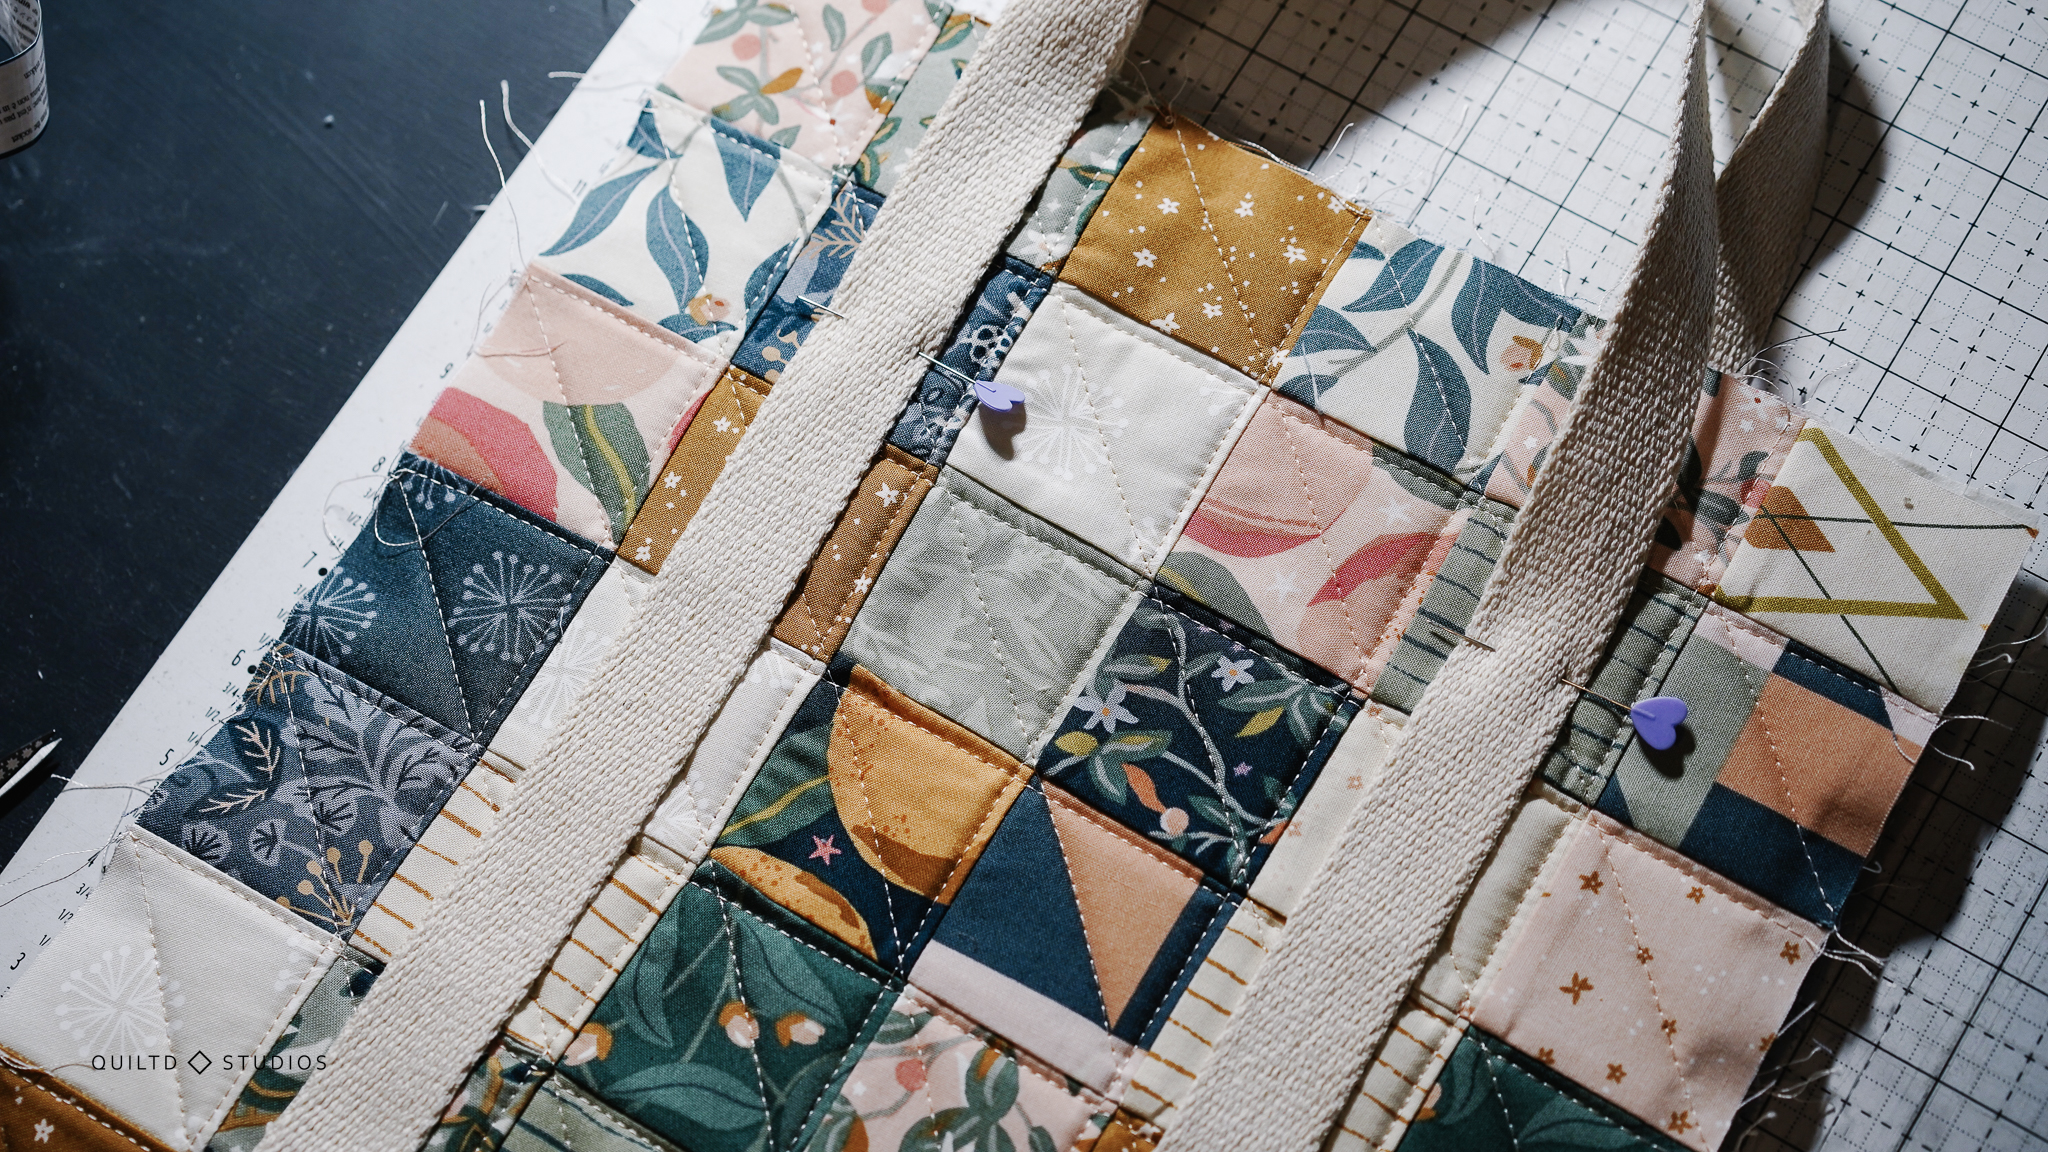
Add the Webbing Handles
Where you place the handles is up to you, I decided I liked mine in the middle of the square, however, you can put yours to the inside or outside edge of the square, it' completely up you!
Fold your bag in half, face up.
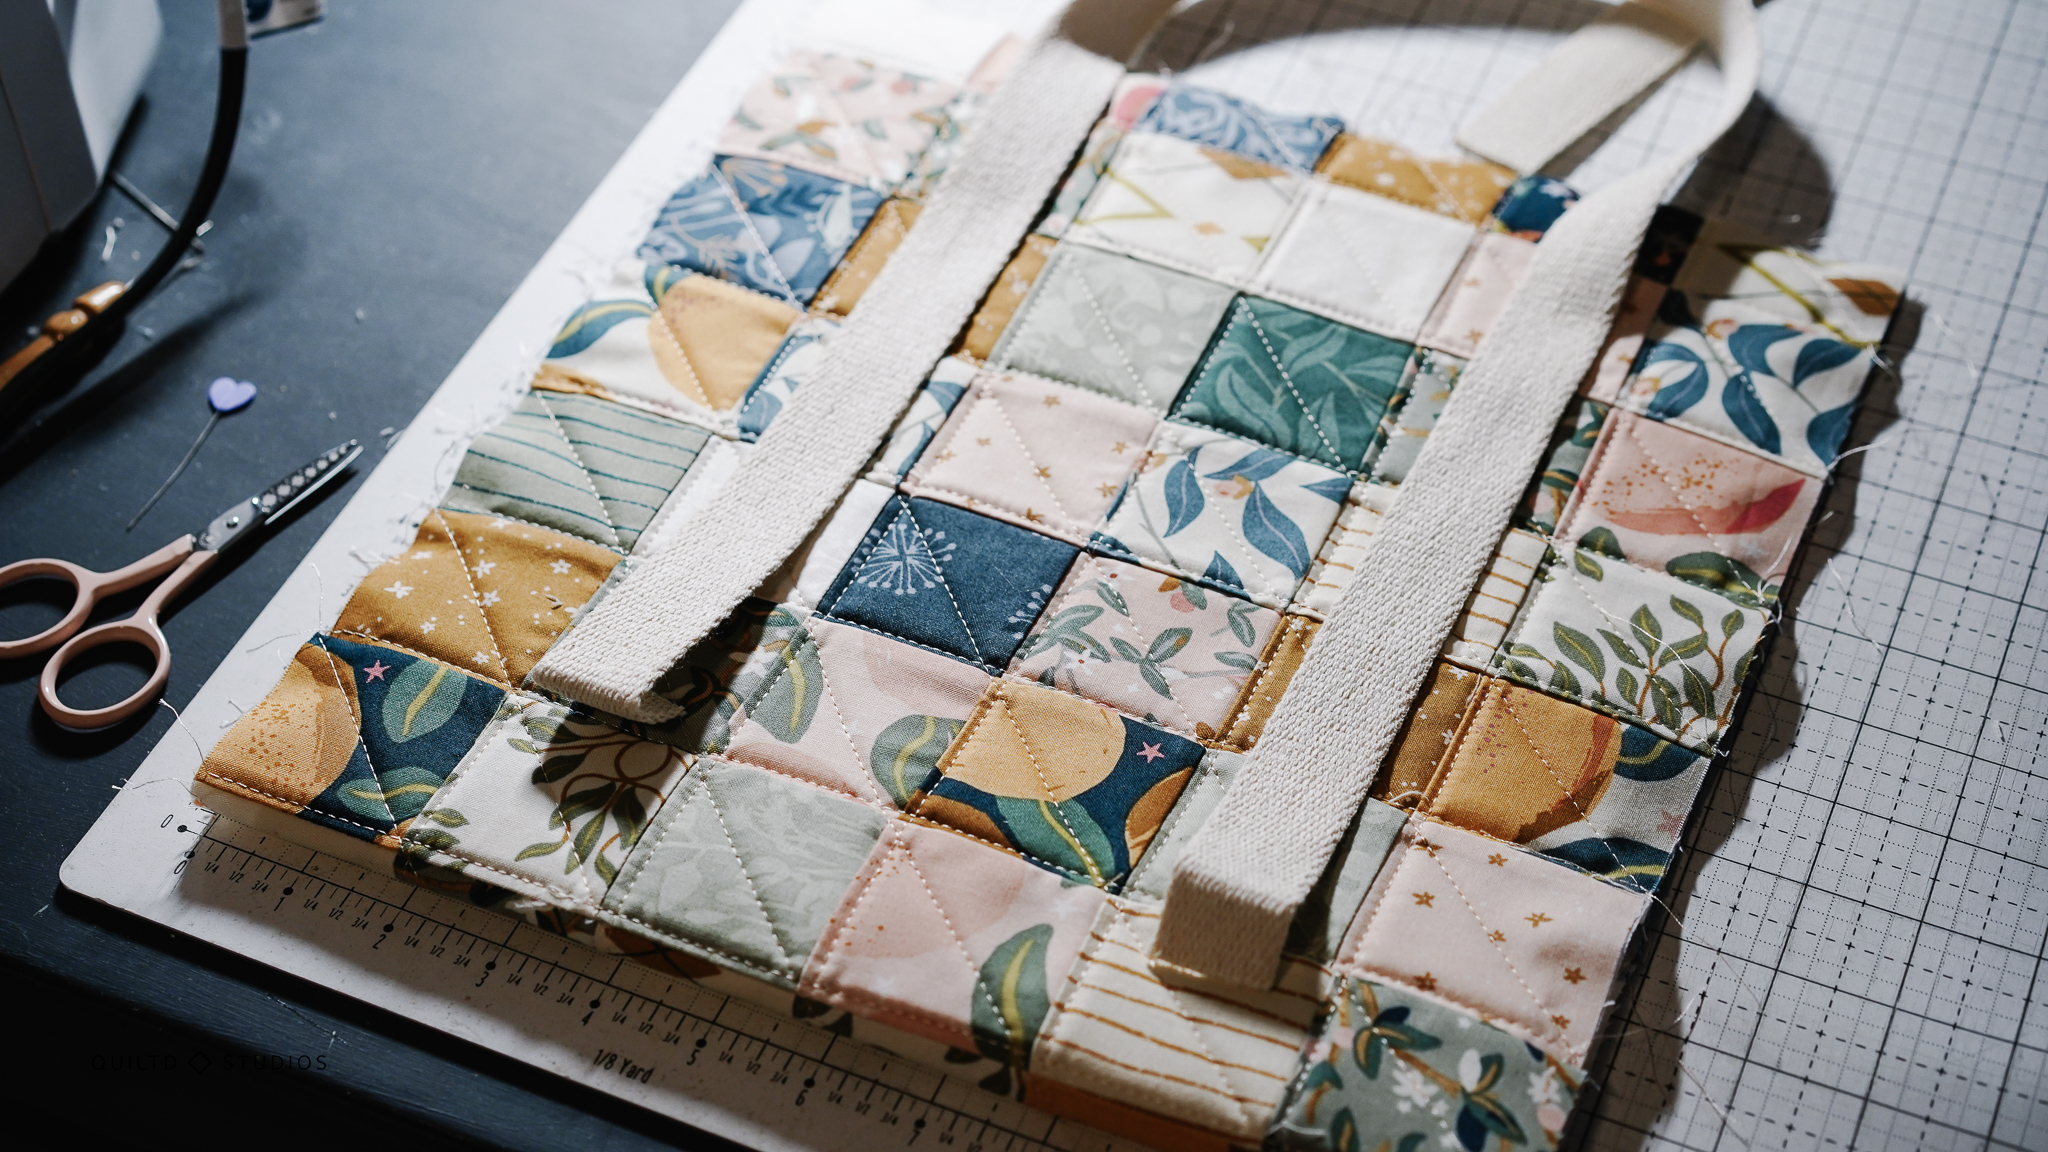
Next fold your strap end under by 3/4" and pin in place on the bag on one side, lining up the folded edge (1) 2" square up from the bottom. Repeat on the opposite side.
The bottom of the strips will be 2" from the bottom fold and 3" centered in from the edge.
These ends won't be seen, they'll be underneath the bag in the end.
I used a long narrow strip of bag tape (double sided sticky tape) to keep my strap in place while sewing, you can pin in place.
Place a pin 10" up from the bottom of the bag (bottom meaning the bottom fold of the bag). This is where we'll stop sewing the strap.
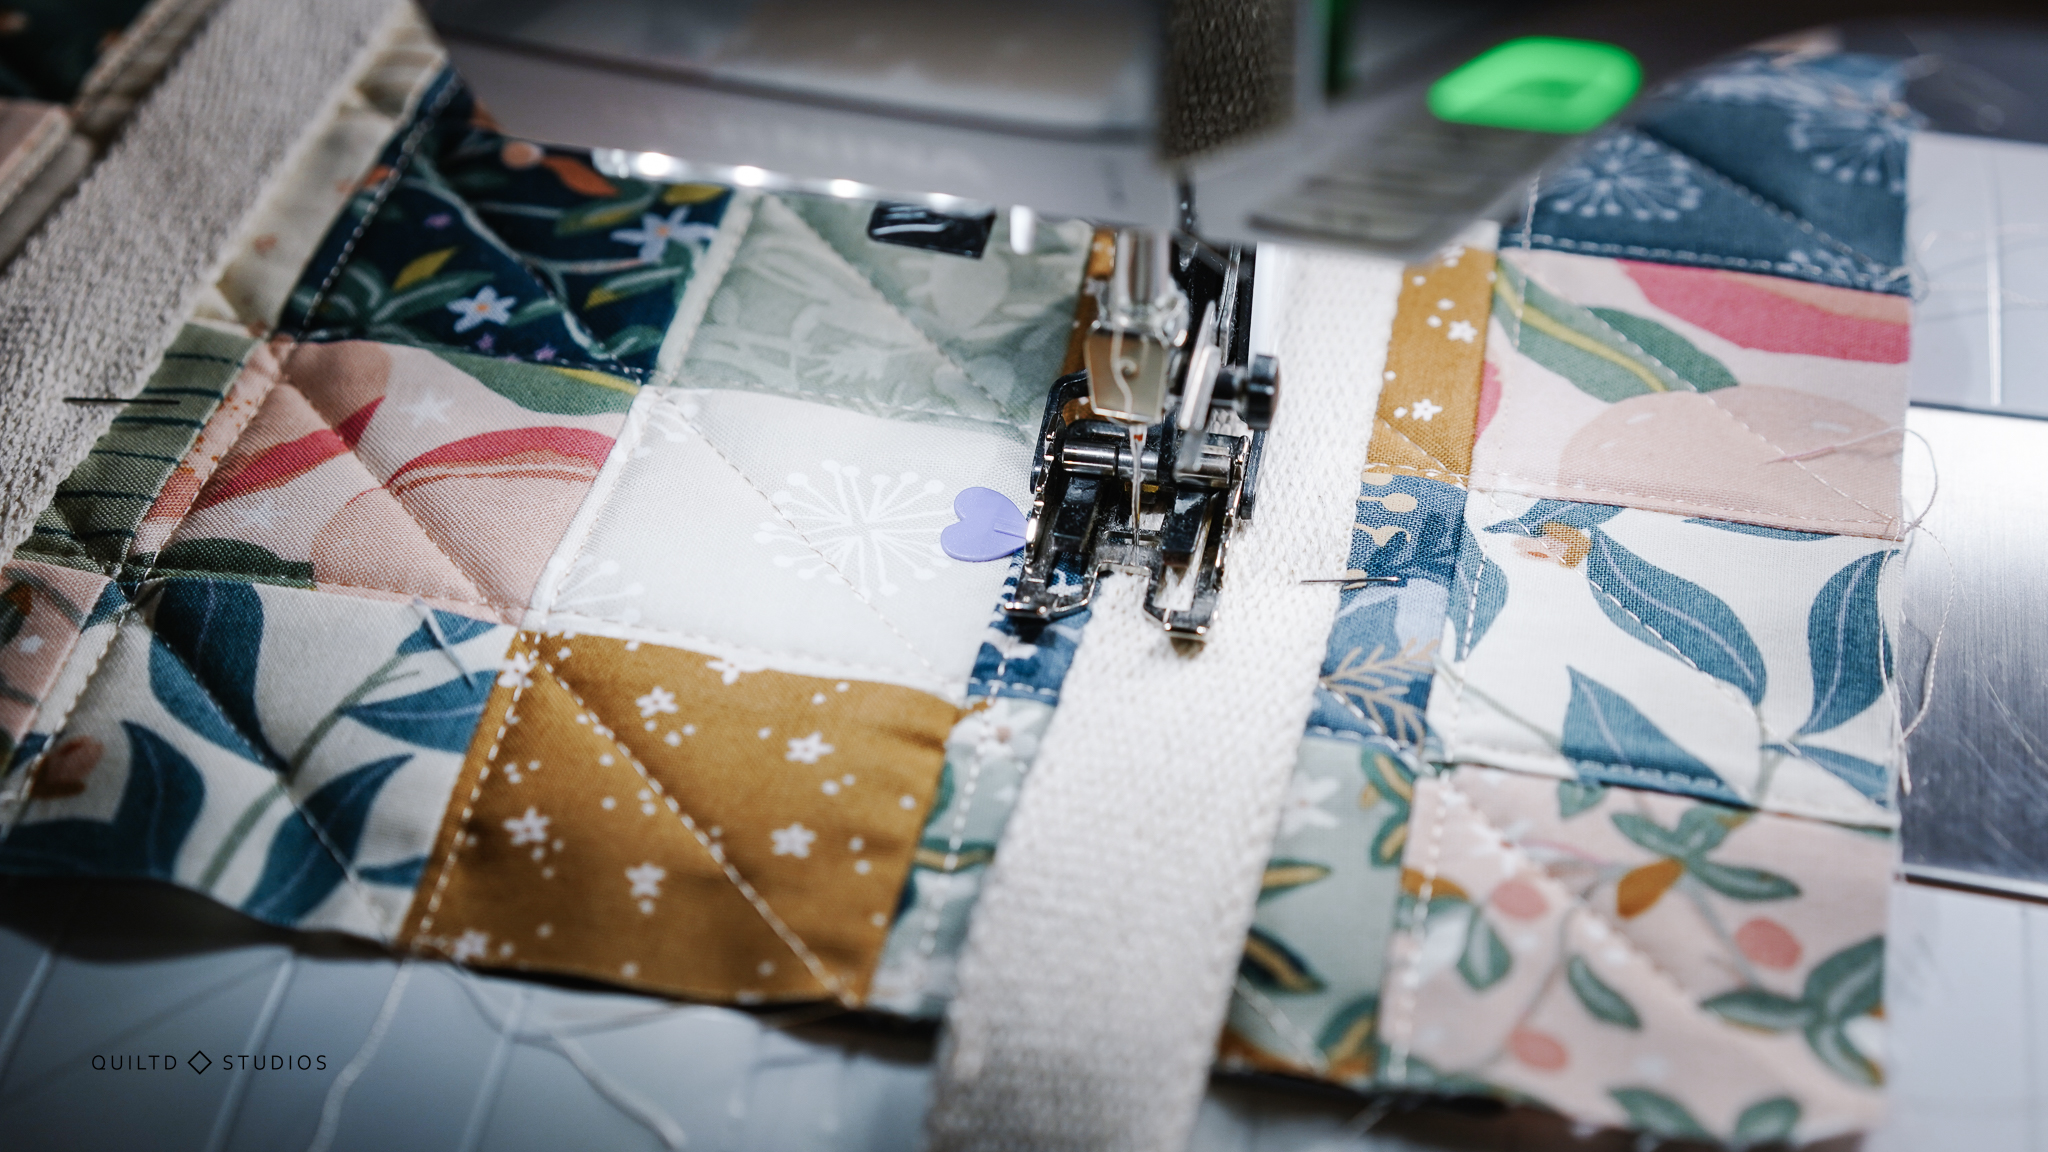
Start sewing from the bottom, lowering your needle and lifting your foot to pivot around corners. I did an X on the bottom and the top of the straps.

I generally sew straps right on the edge of the strap. You can also add another line of stitching to the center. This is your bag, you do you!
Reverse and secure your stitches when starting and stopping.

Repeat this same process on the opposite side of the bag.
You should now have 2 handles attached to the bag.
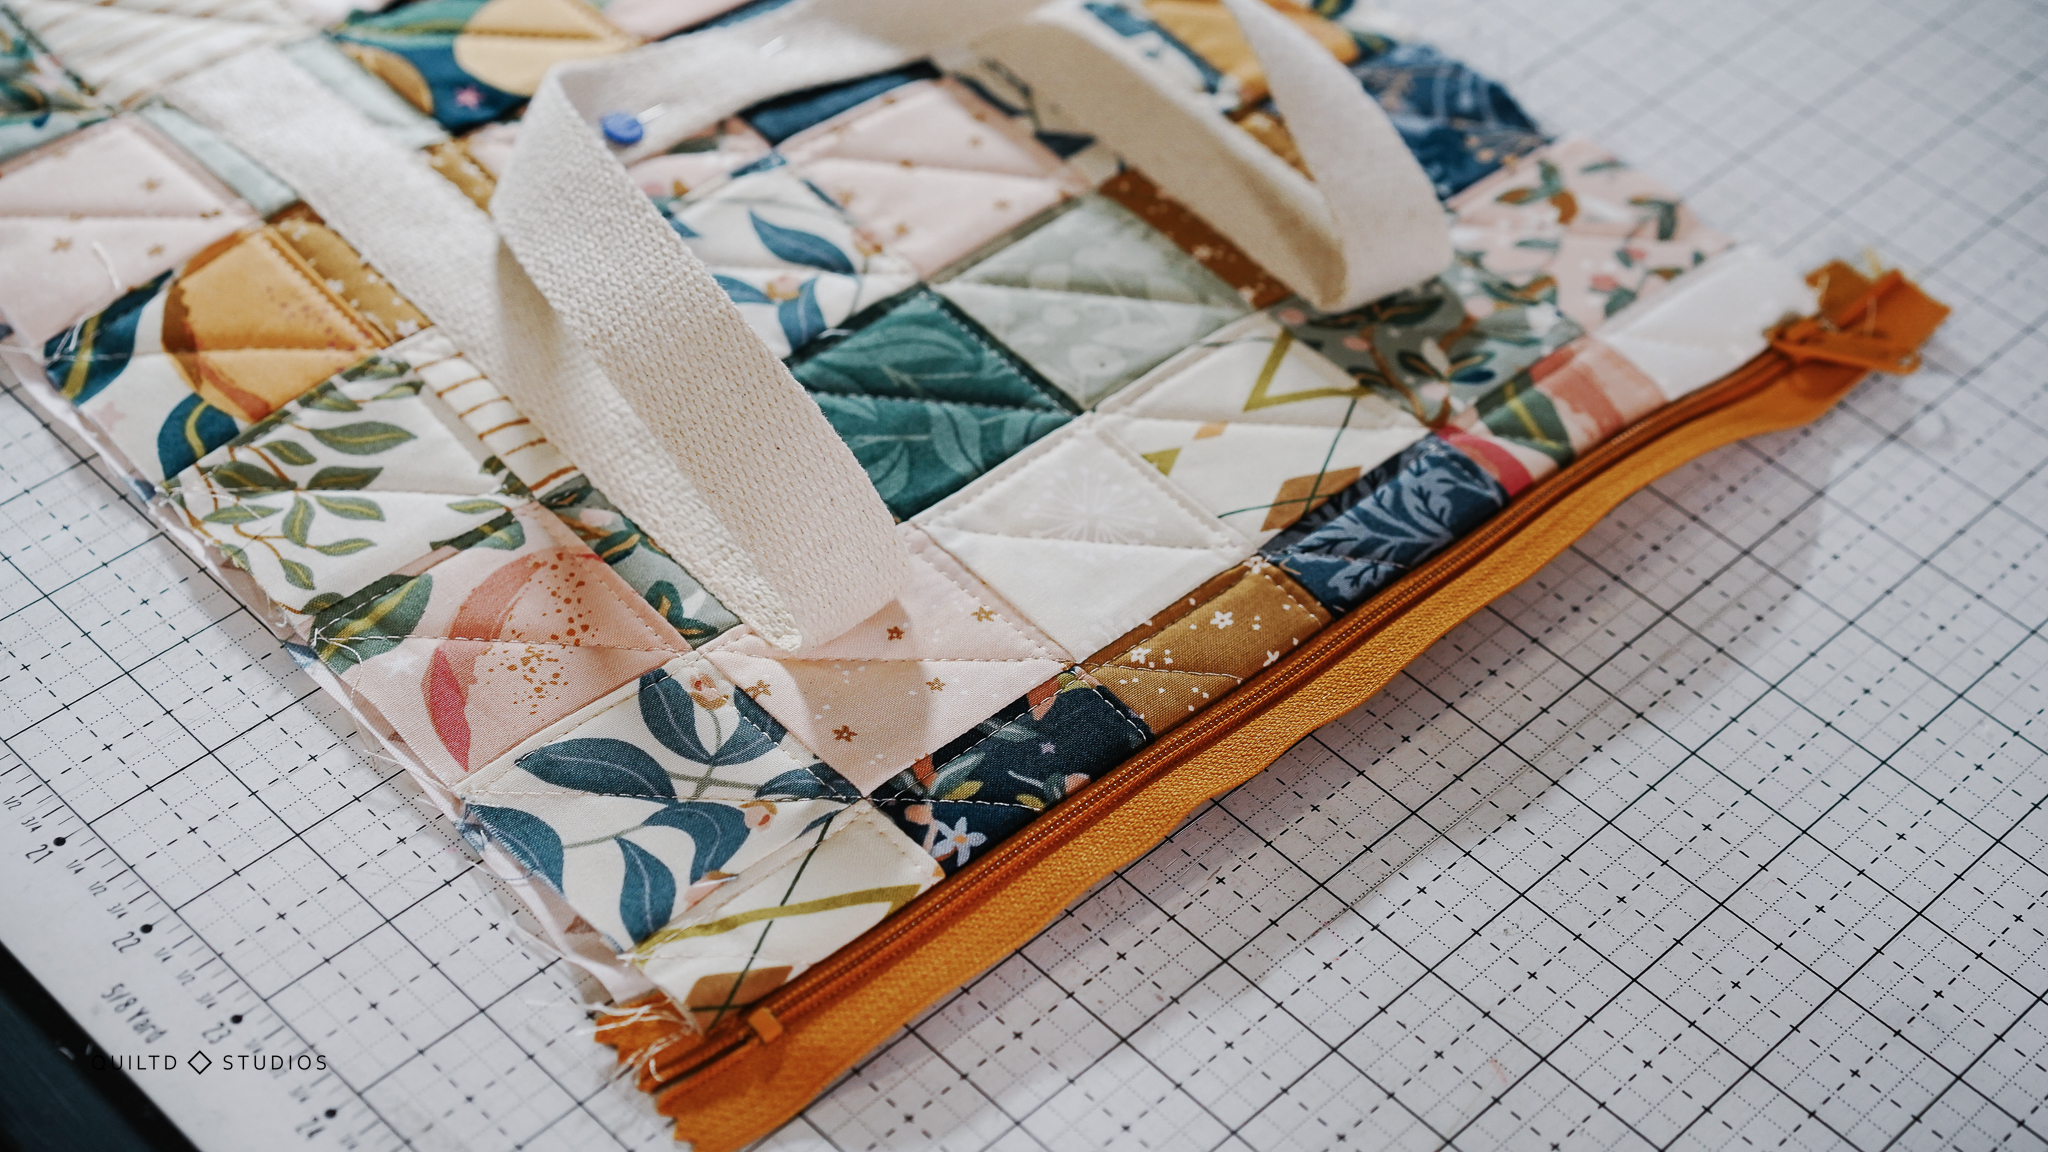
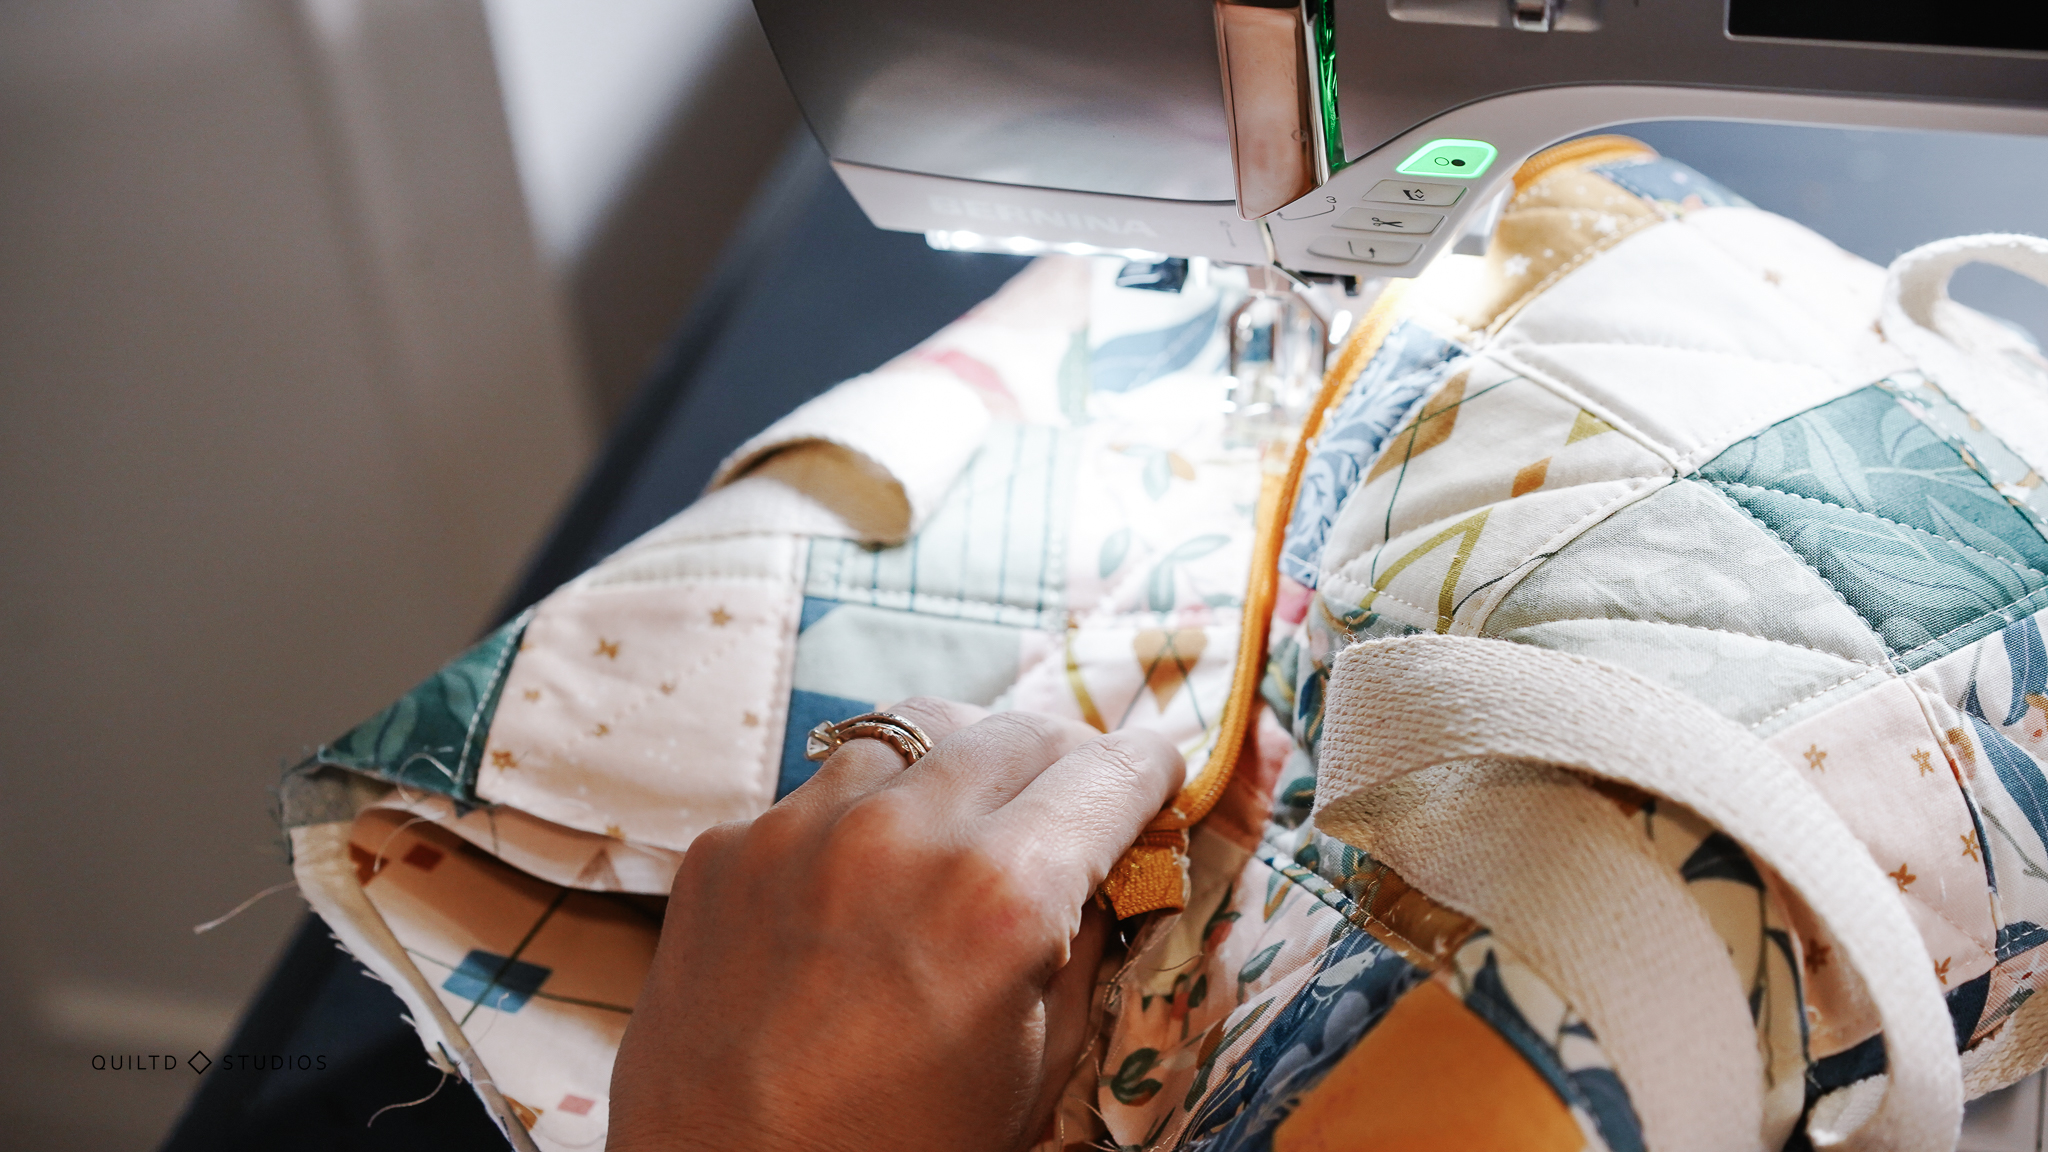
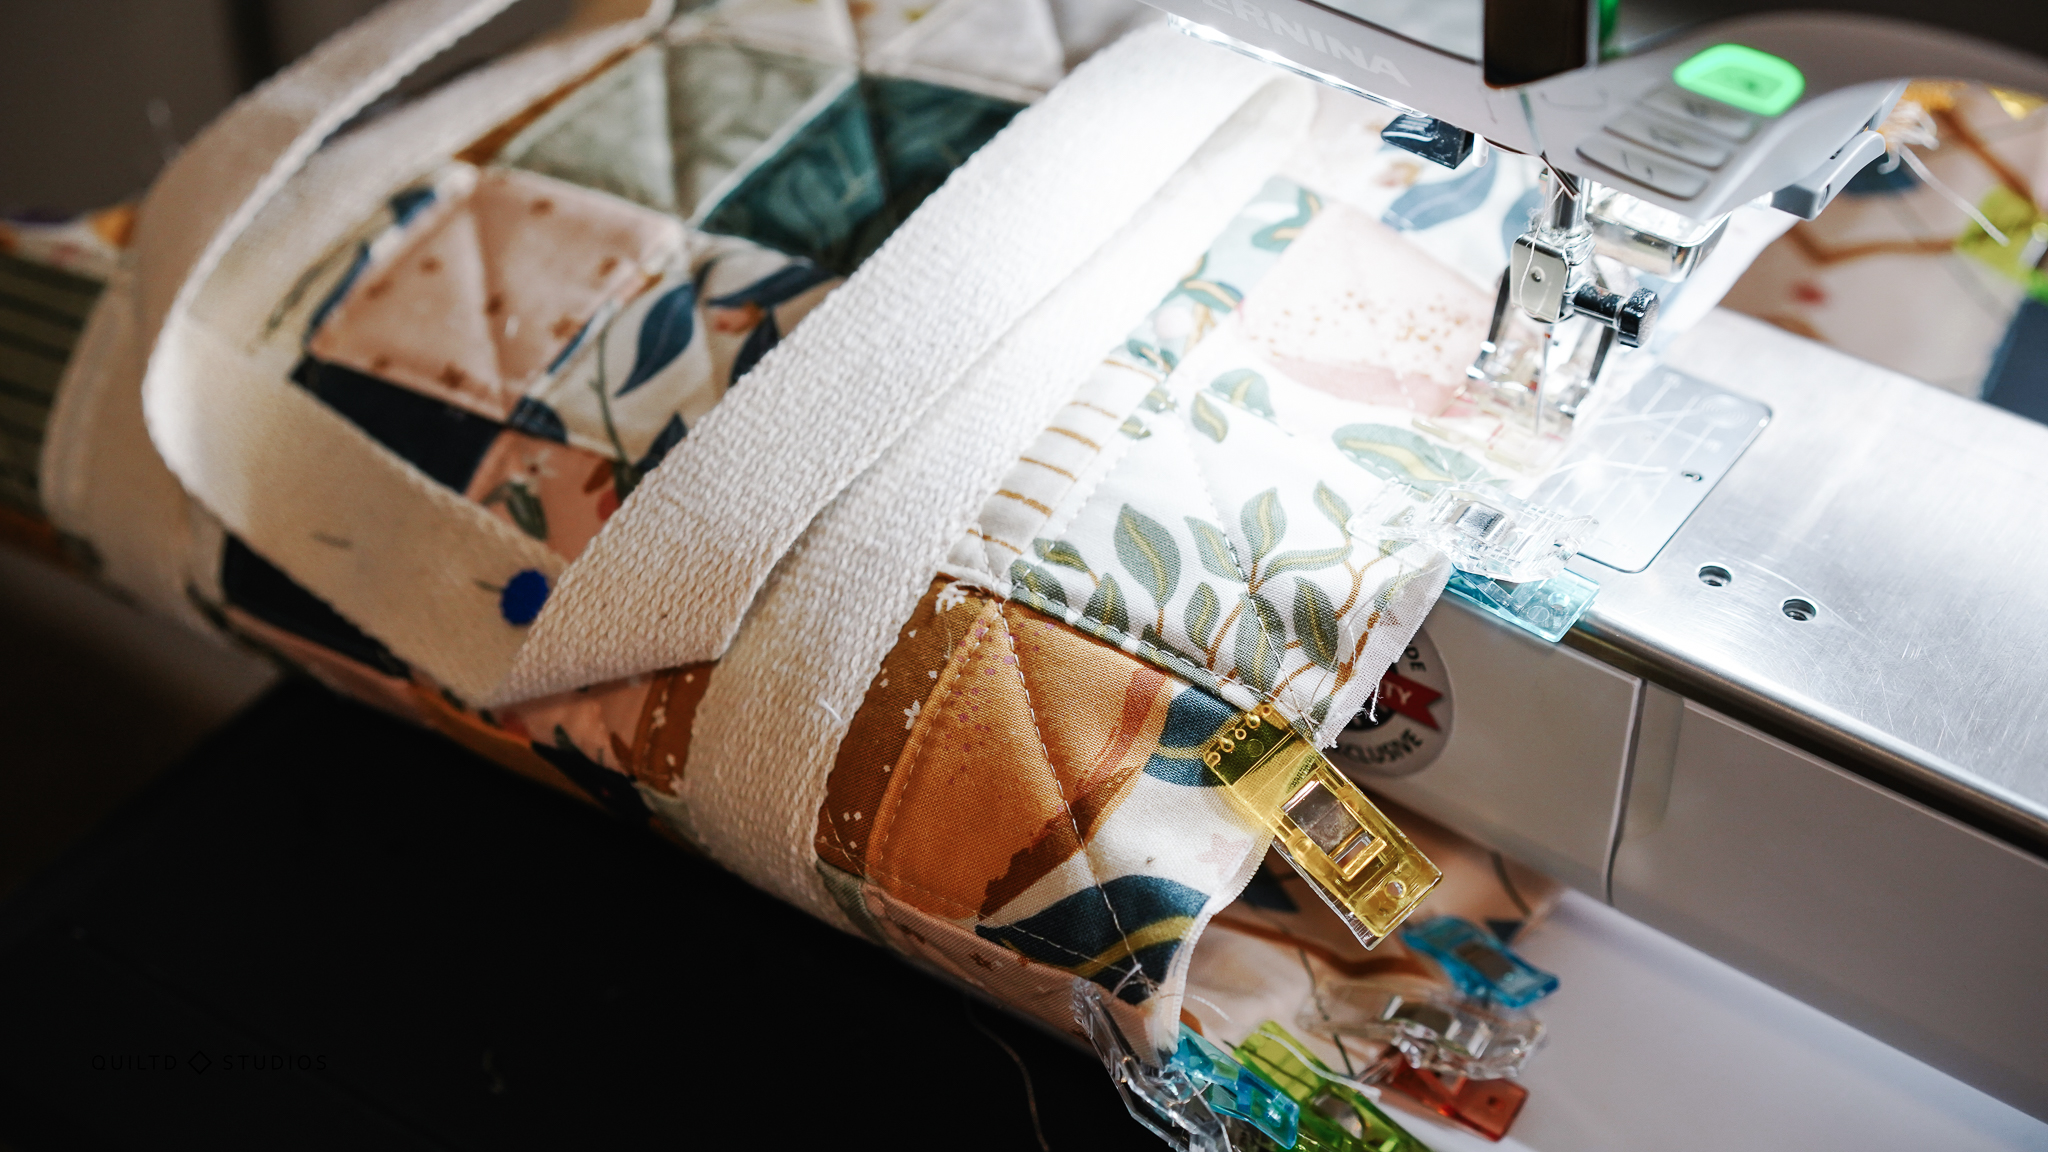
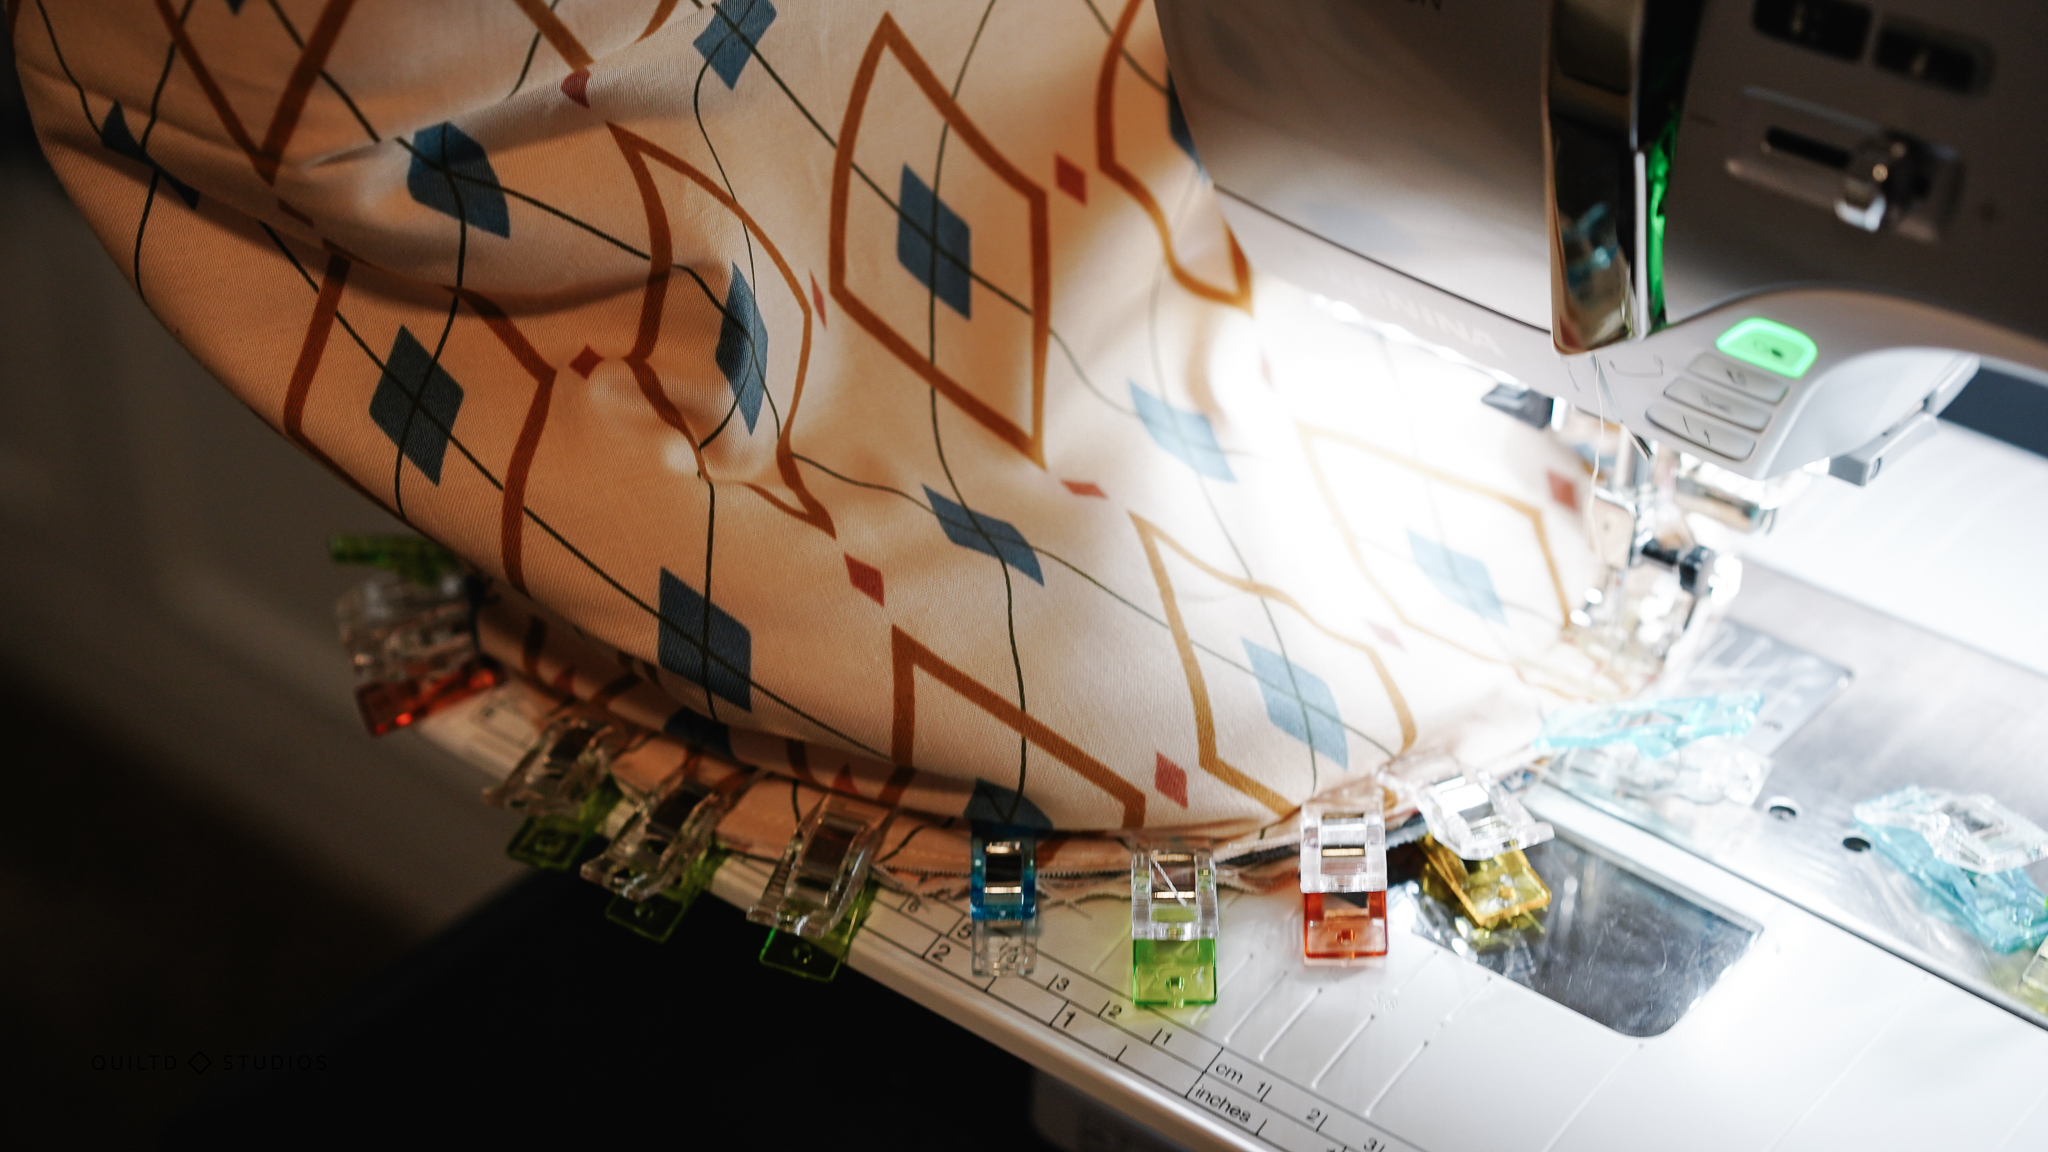
Installing the Zipper in the Duffel Bag
Center the zipper right side down along the top long edge of one side of the patchwork panel.
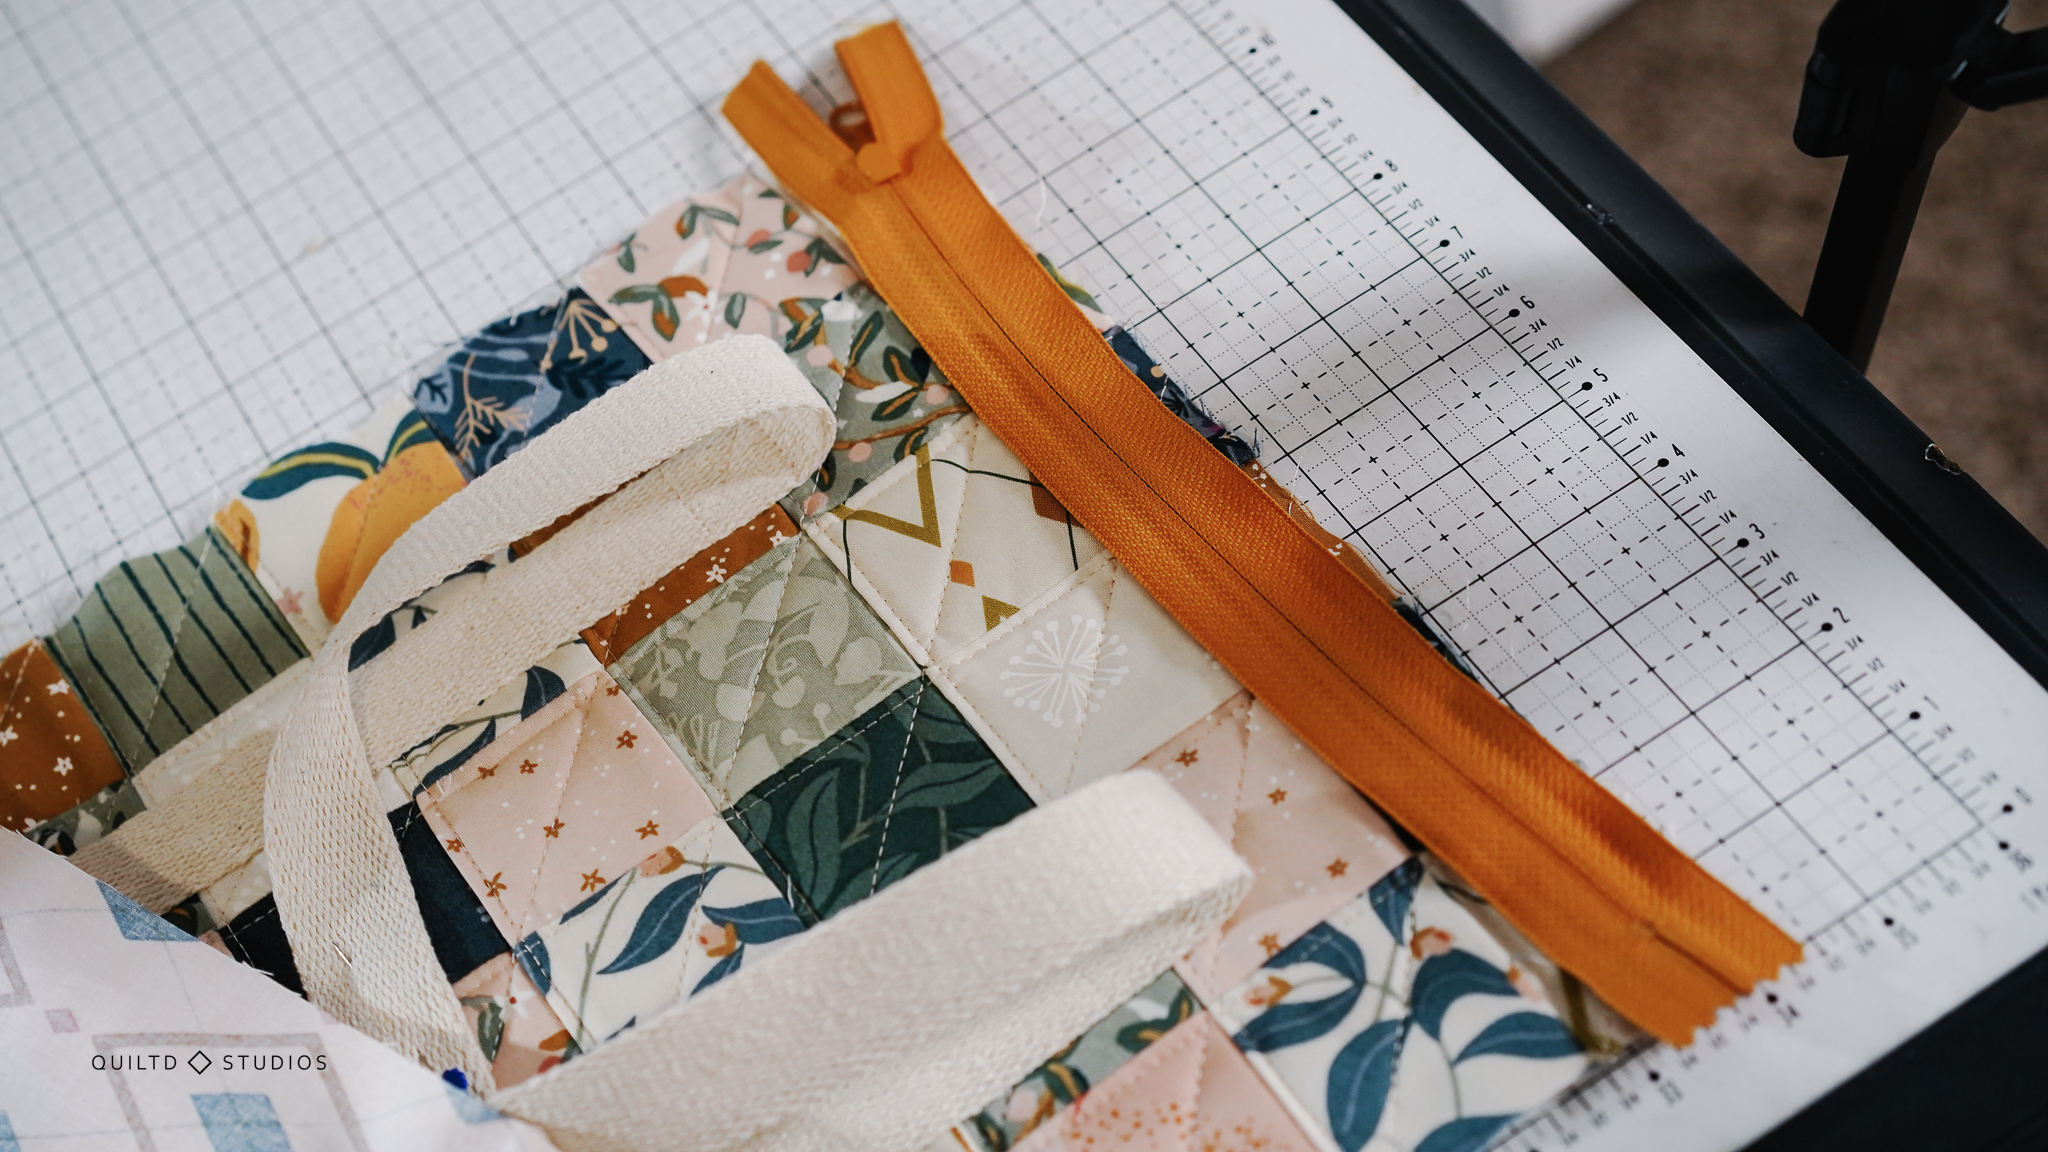 To make installation easier, I usually stitch back and forth on any ends of the zipper that aren't flush to pull them ends together and then baste my zipper to my outside panel first using a very narrow stitch.
Then layer the lining panel right sides together on top of the zipper and outside panel. Sew using zipper foot.
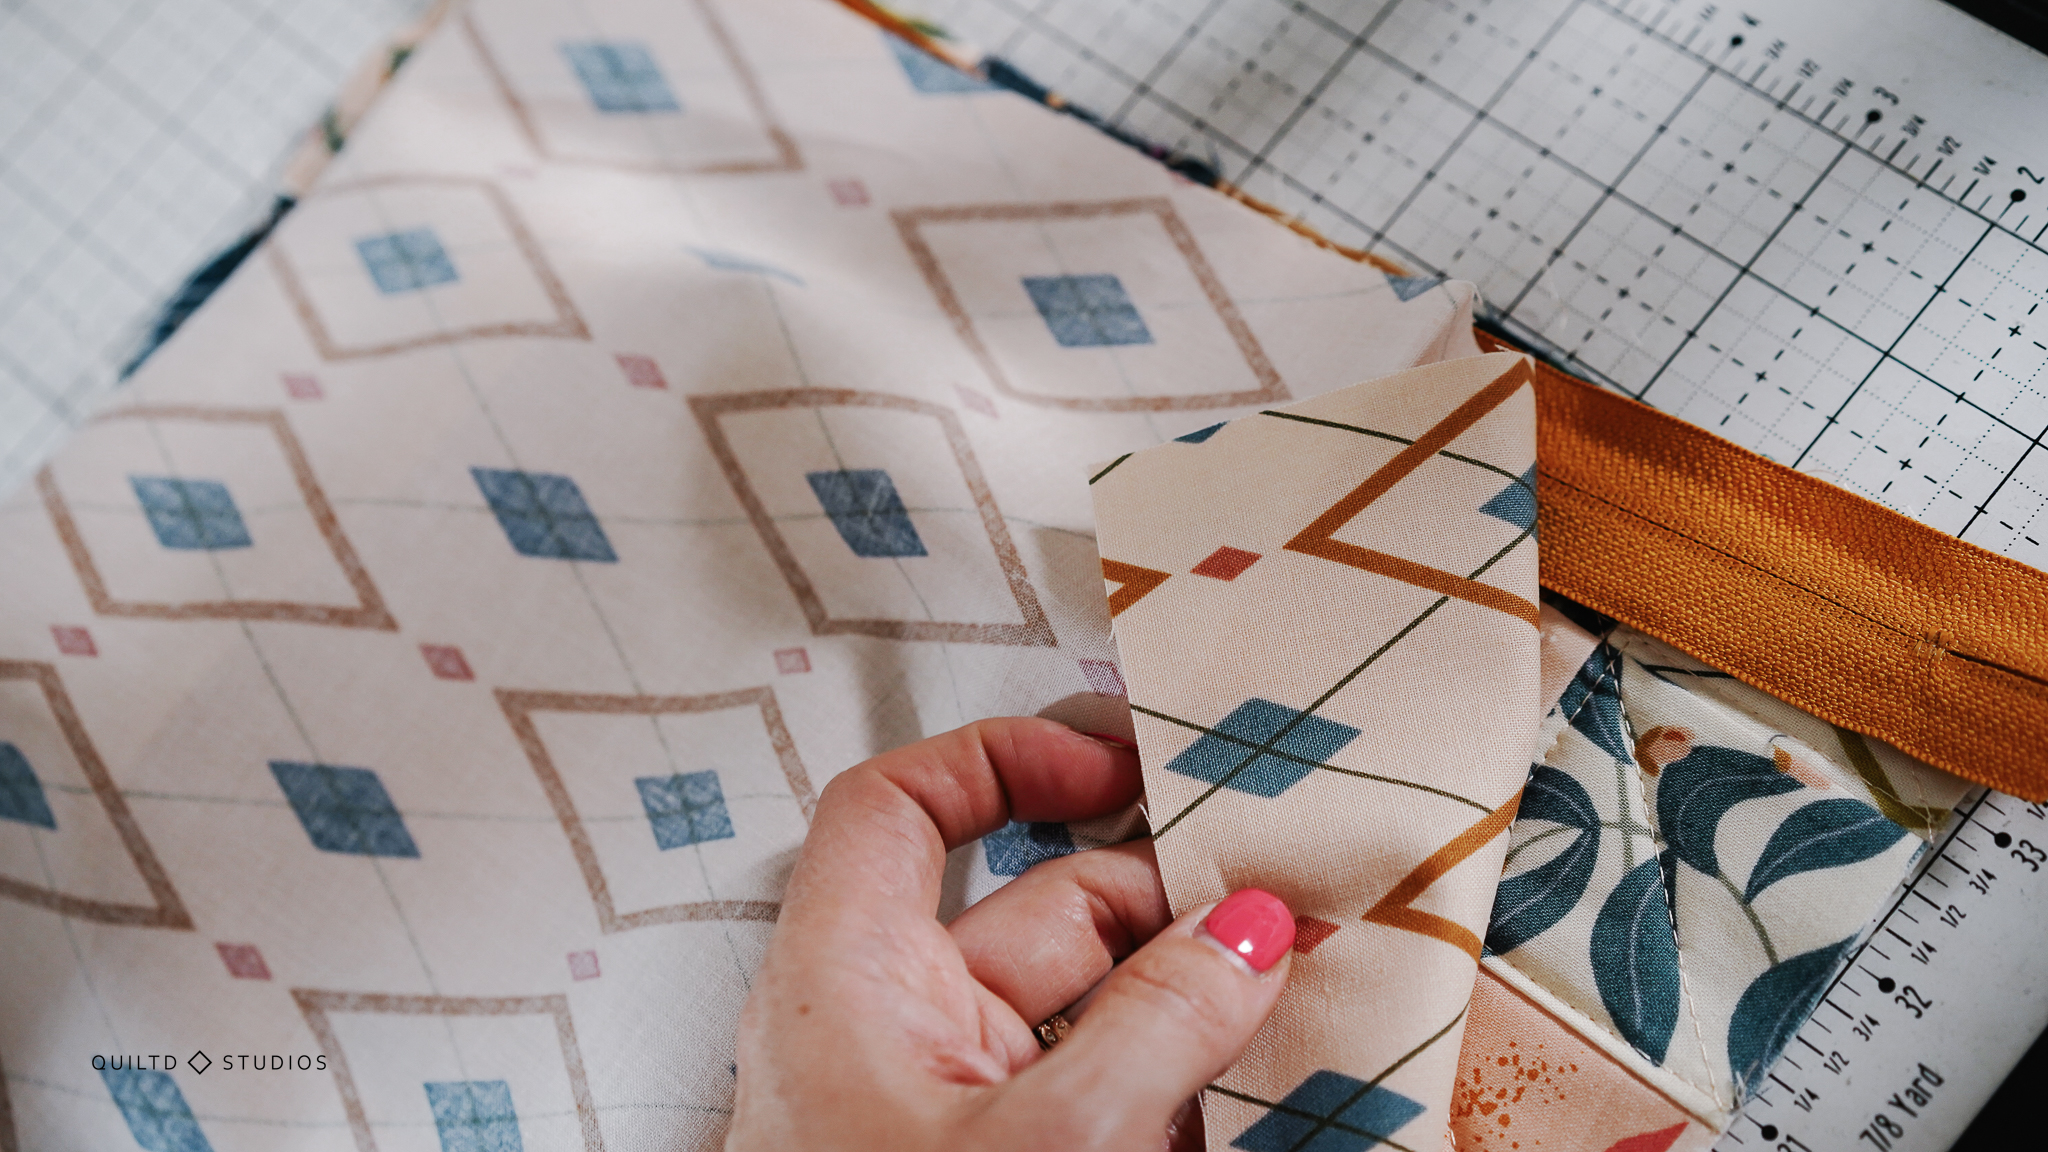
Flip open and press, then topstitch 1/8" away from the zipper tape.
I pressed mine flat before stitching, this helps it sit flat while top stitching.
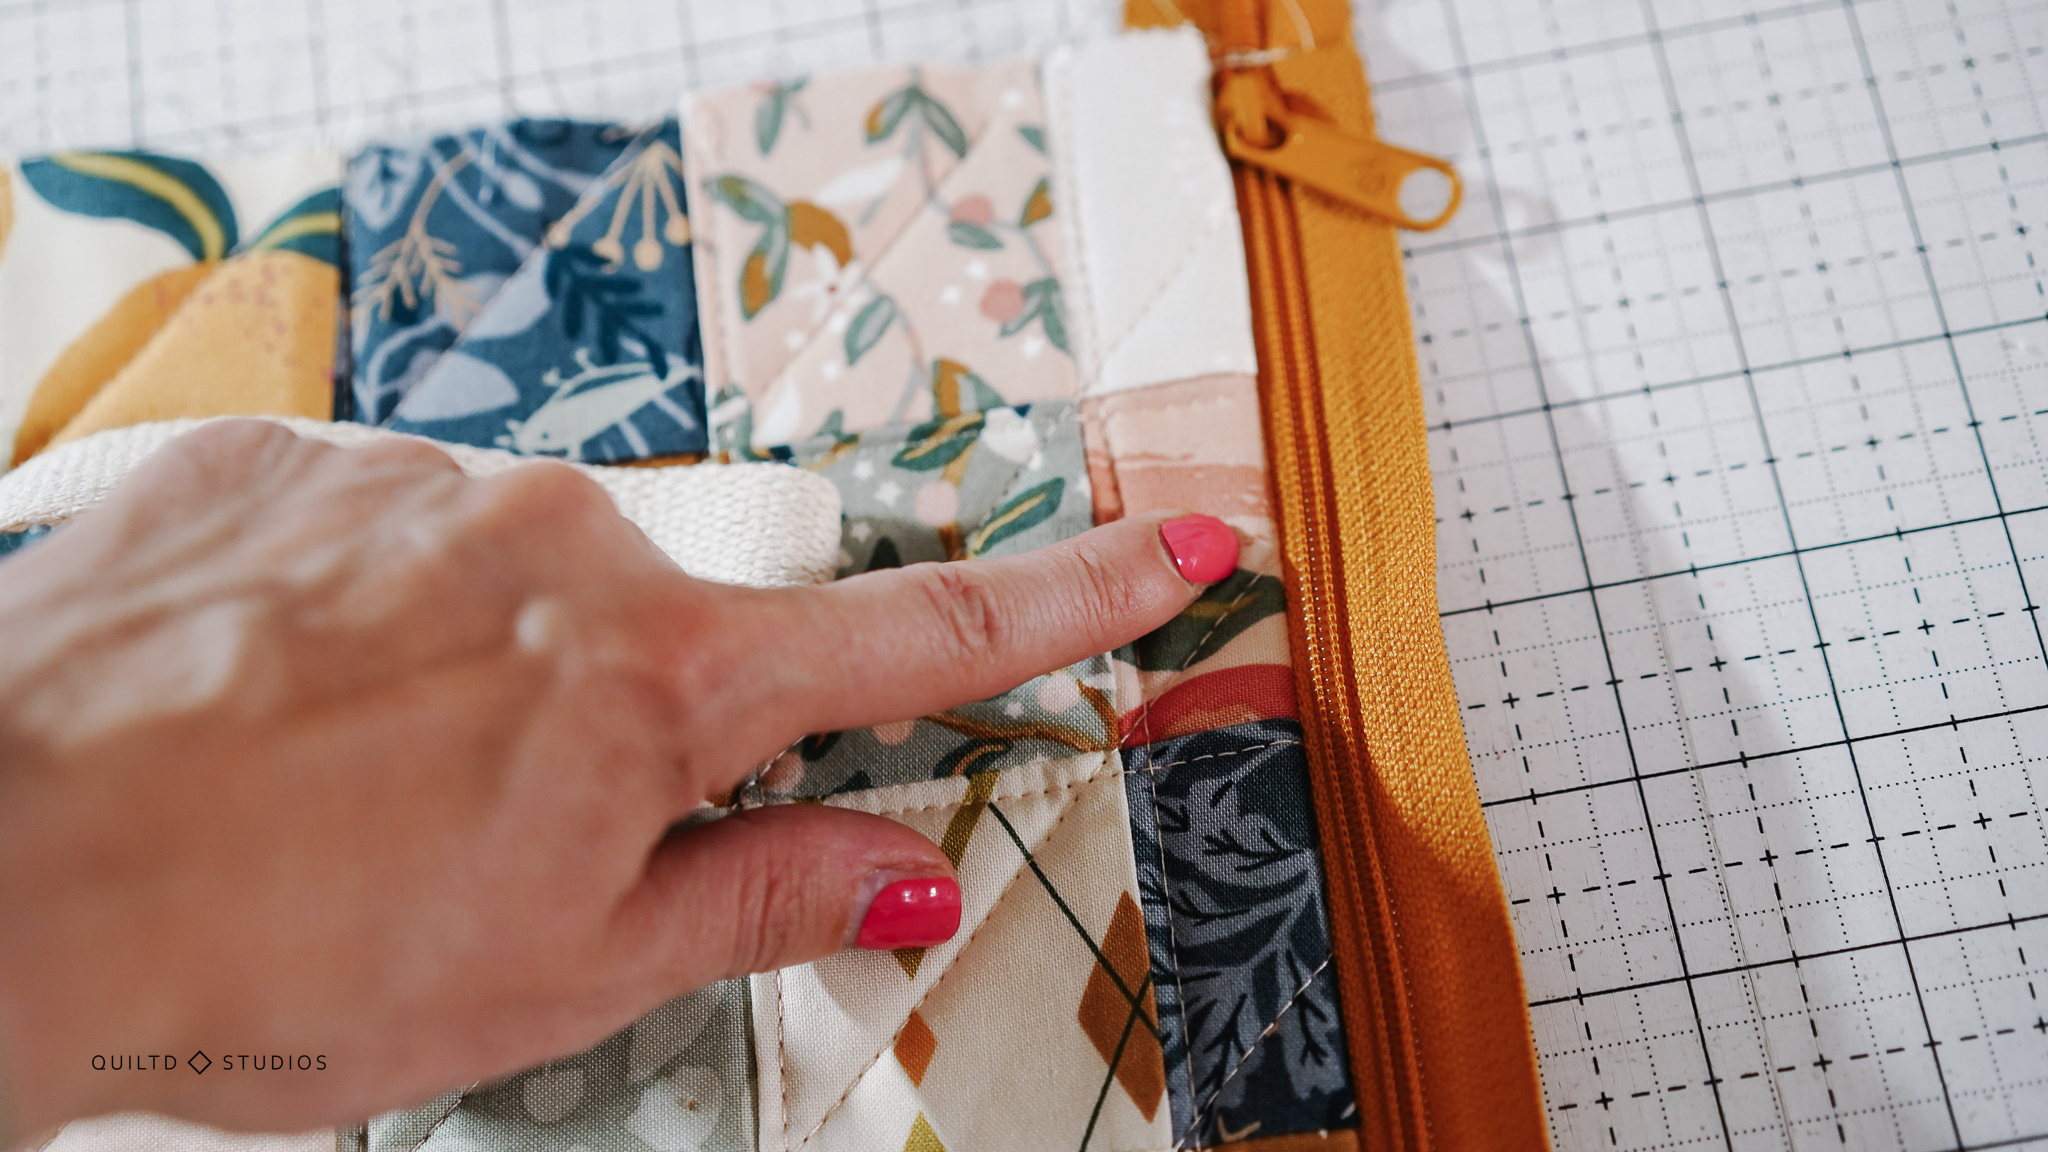
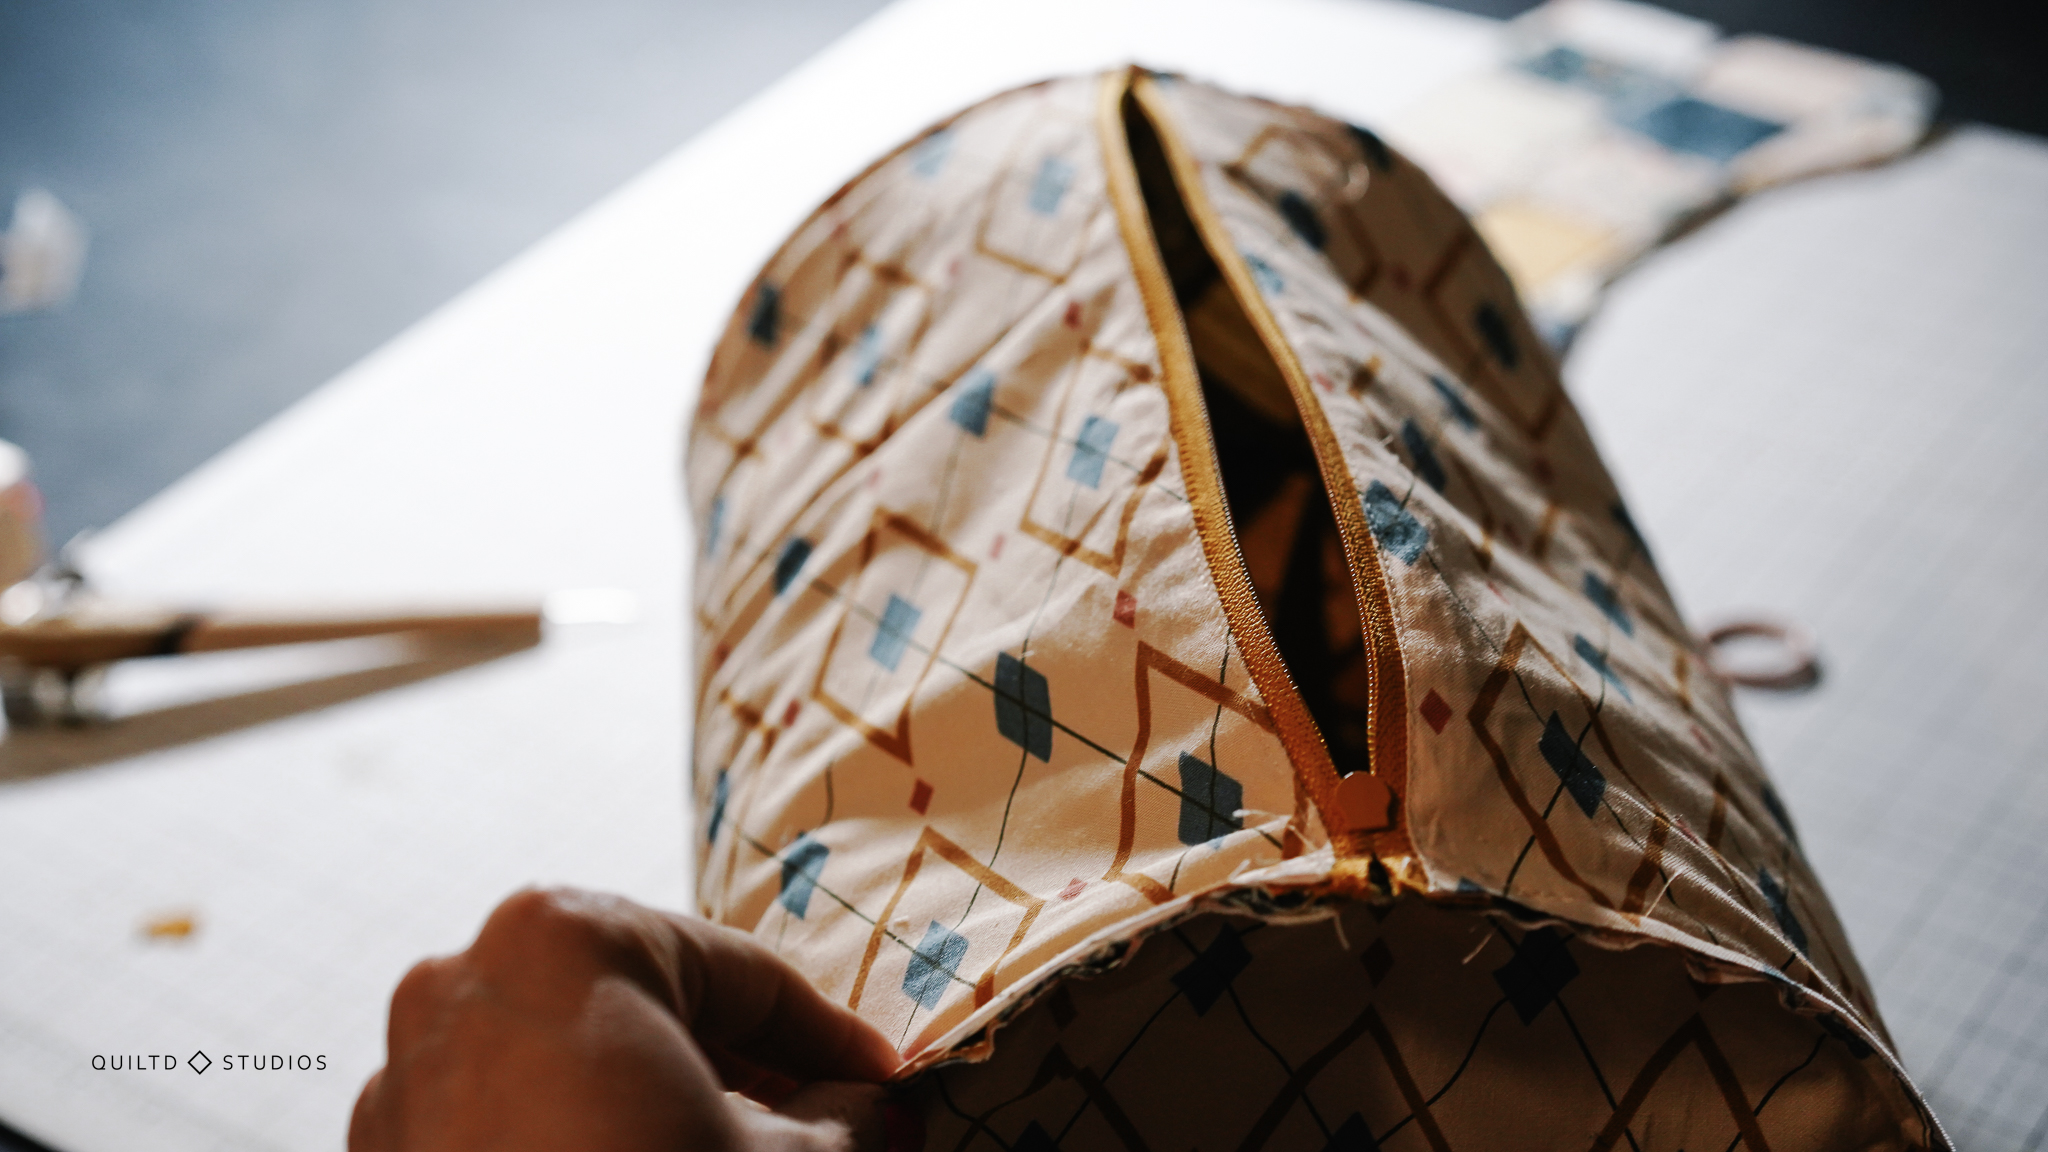
Pull the lining up, and sandwich the outside panel and lining over the opposite edge of the zipper tape edge.
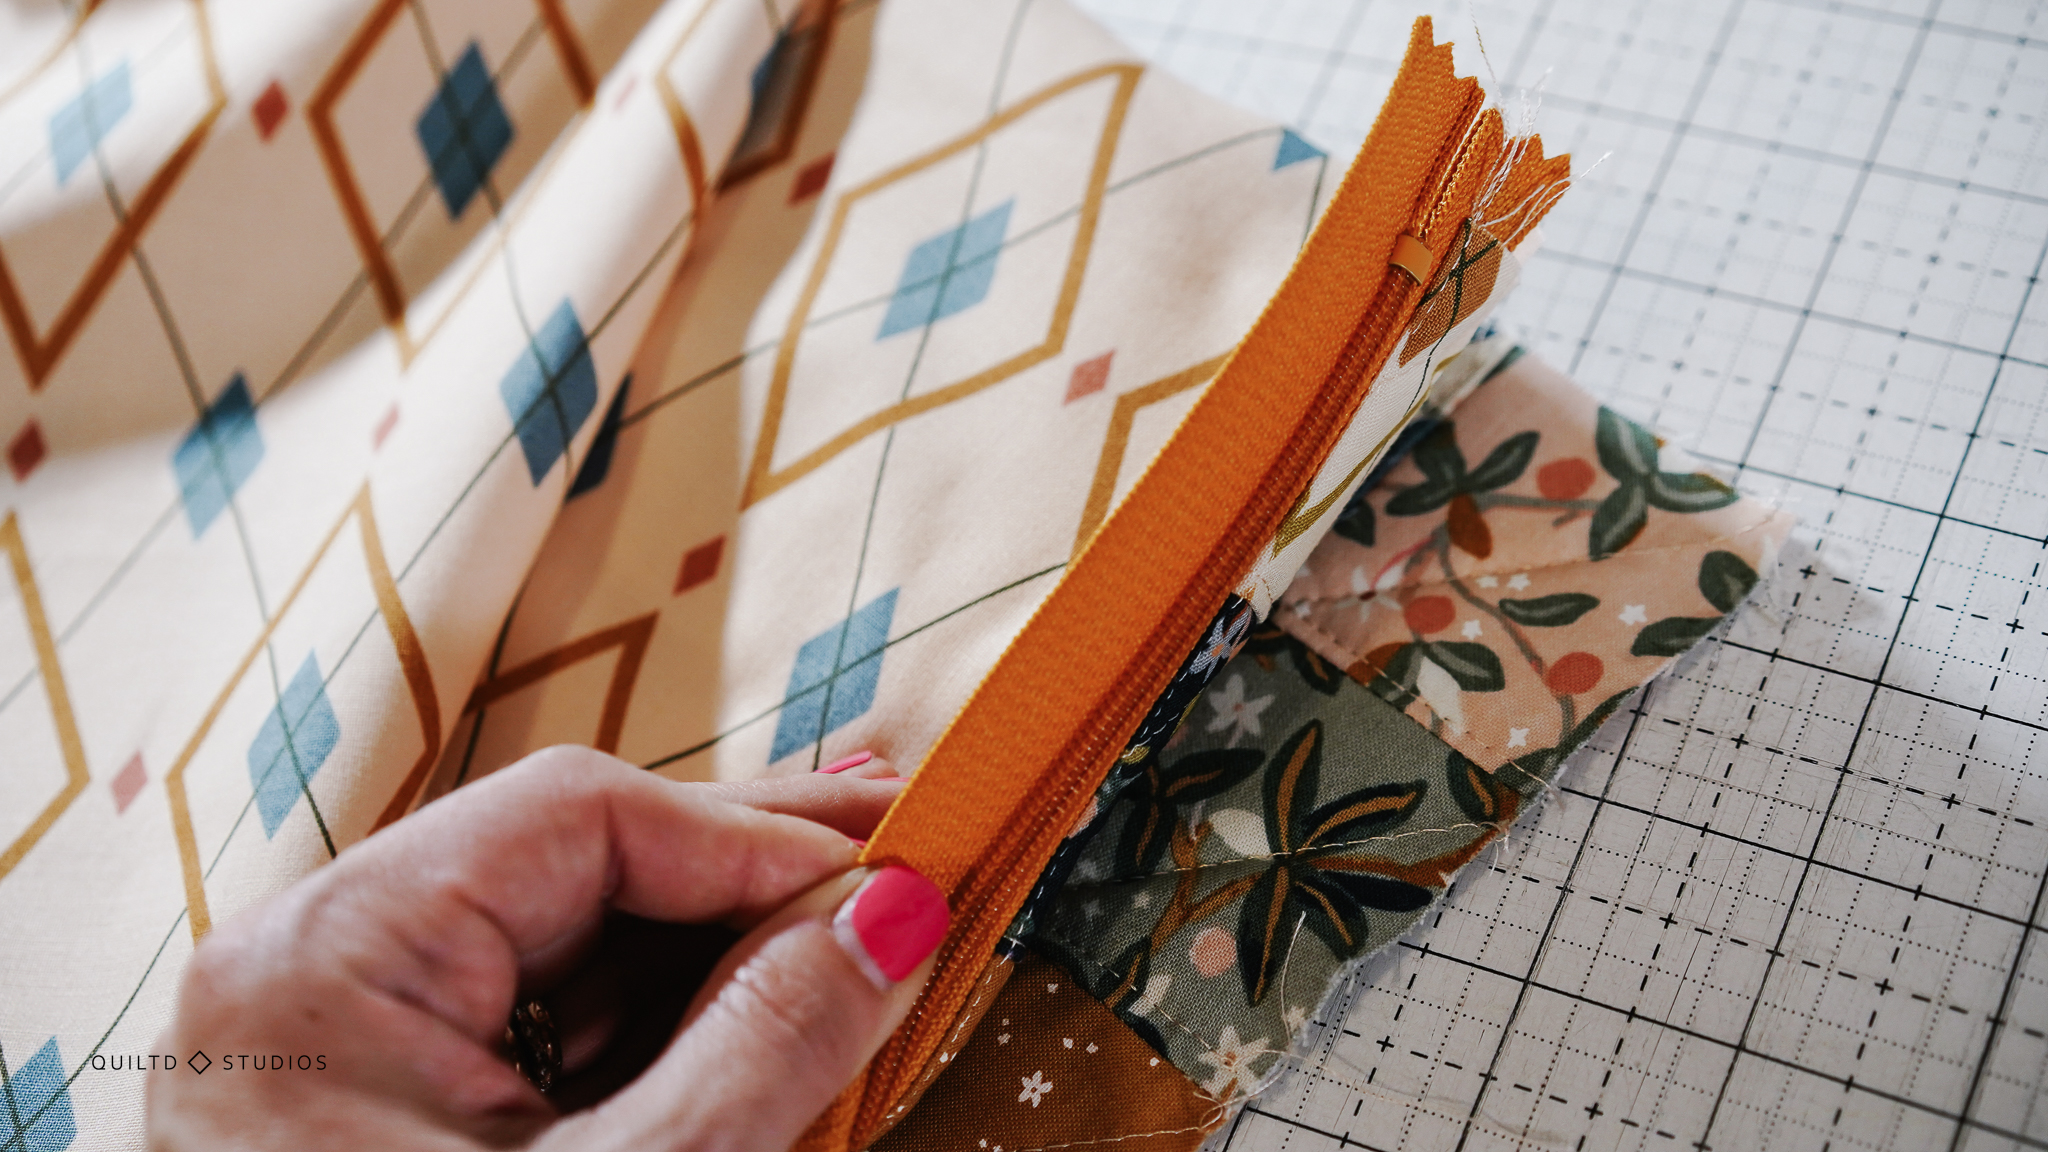

Again I baste in place first, then sew it using my zipper foot. Stop about an inch before the pull, lower your needle, lift your foot, pull the zipper pull behind your foot, then continue sewing.
Flip open and finangle your bag under to topstitch this side. It'll be a little awkward but nothing you can't handle.
You're almost done!
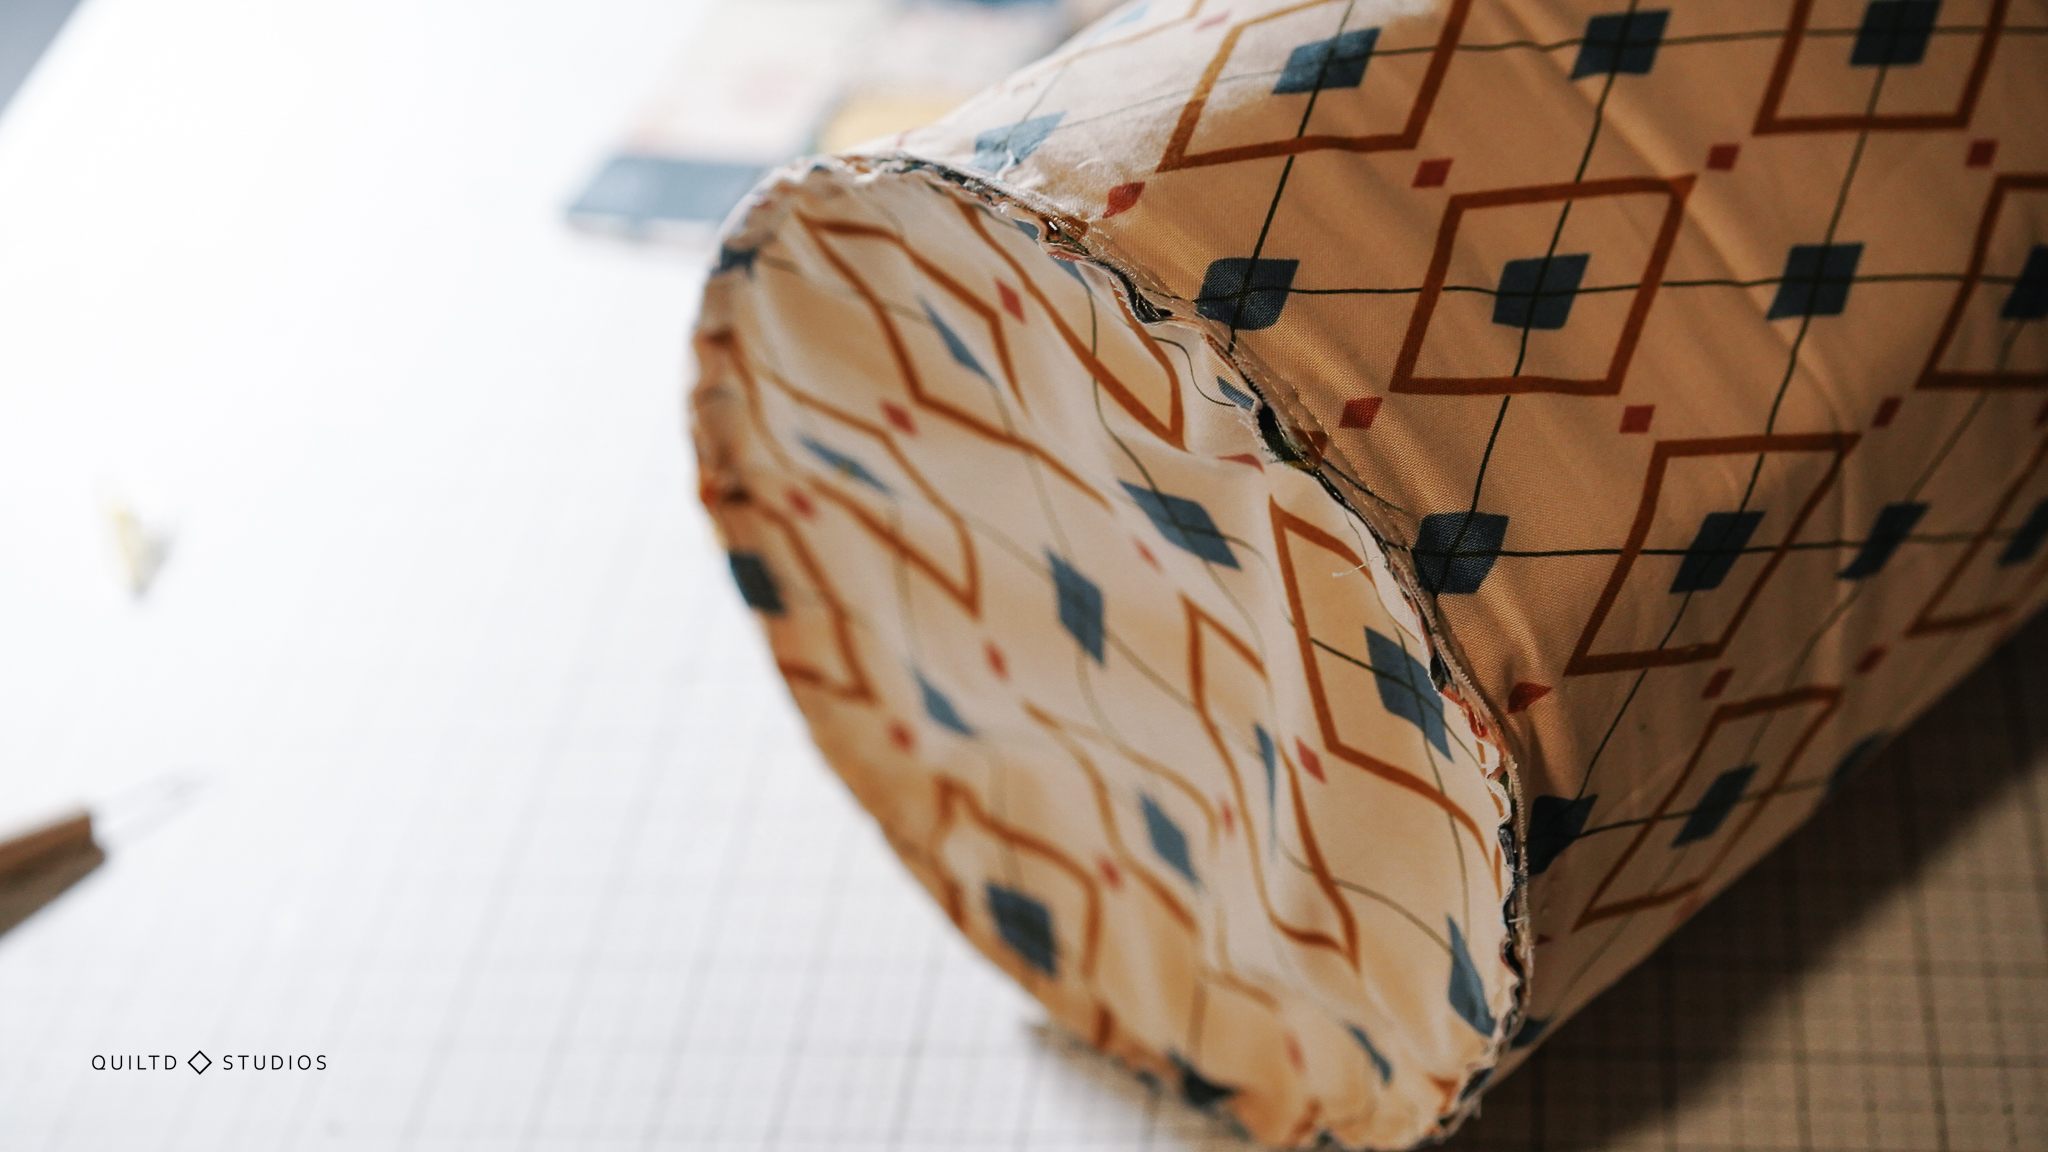
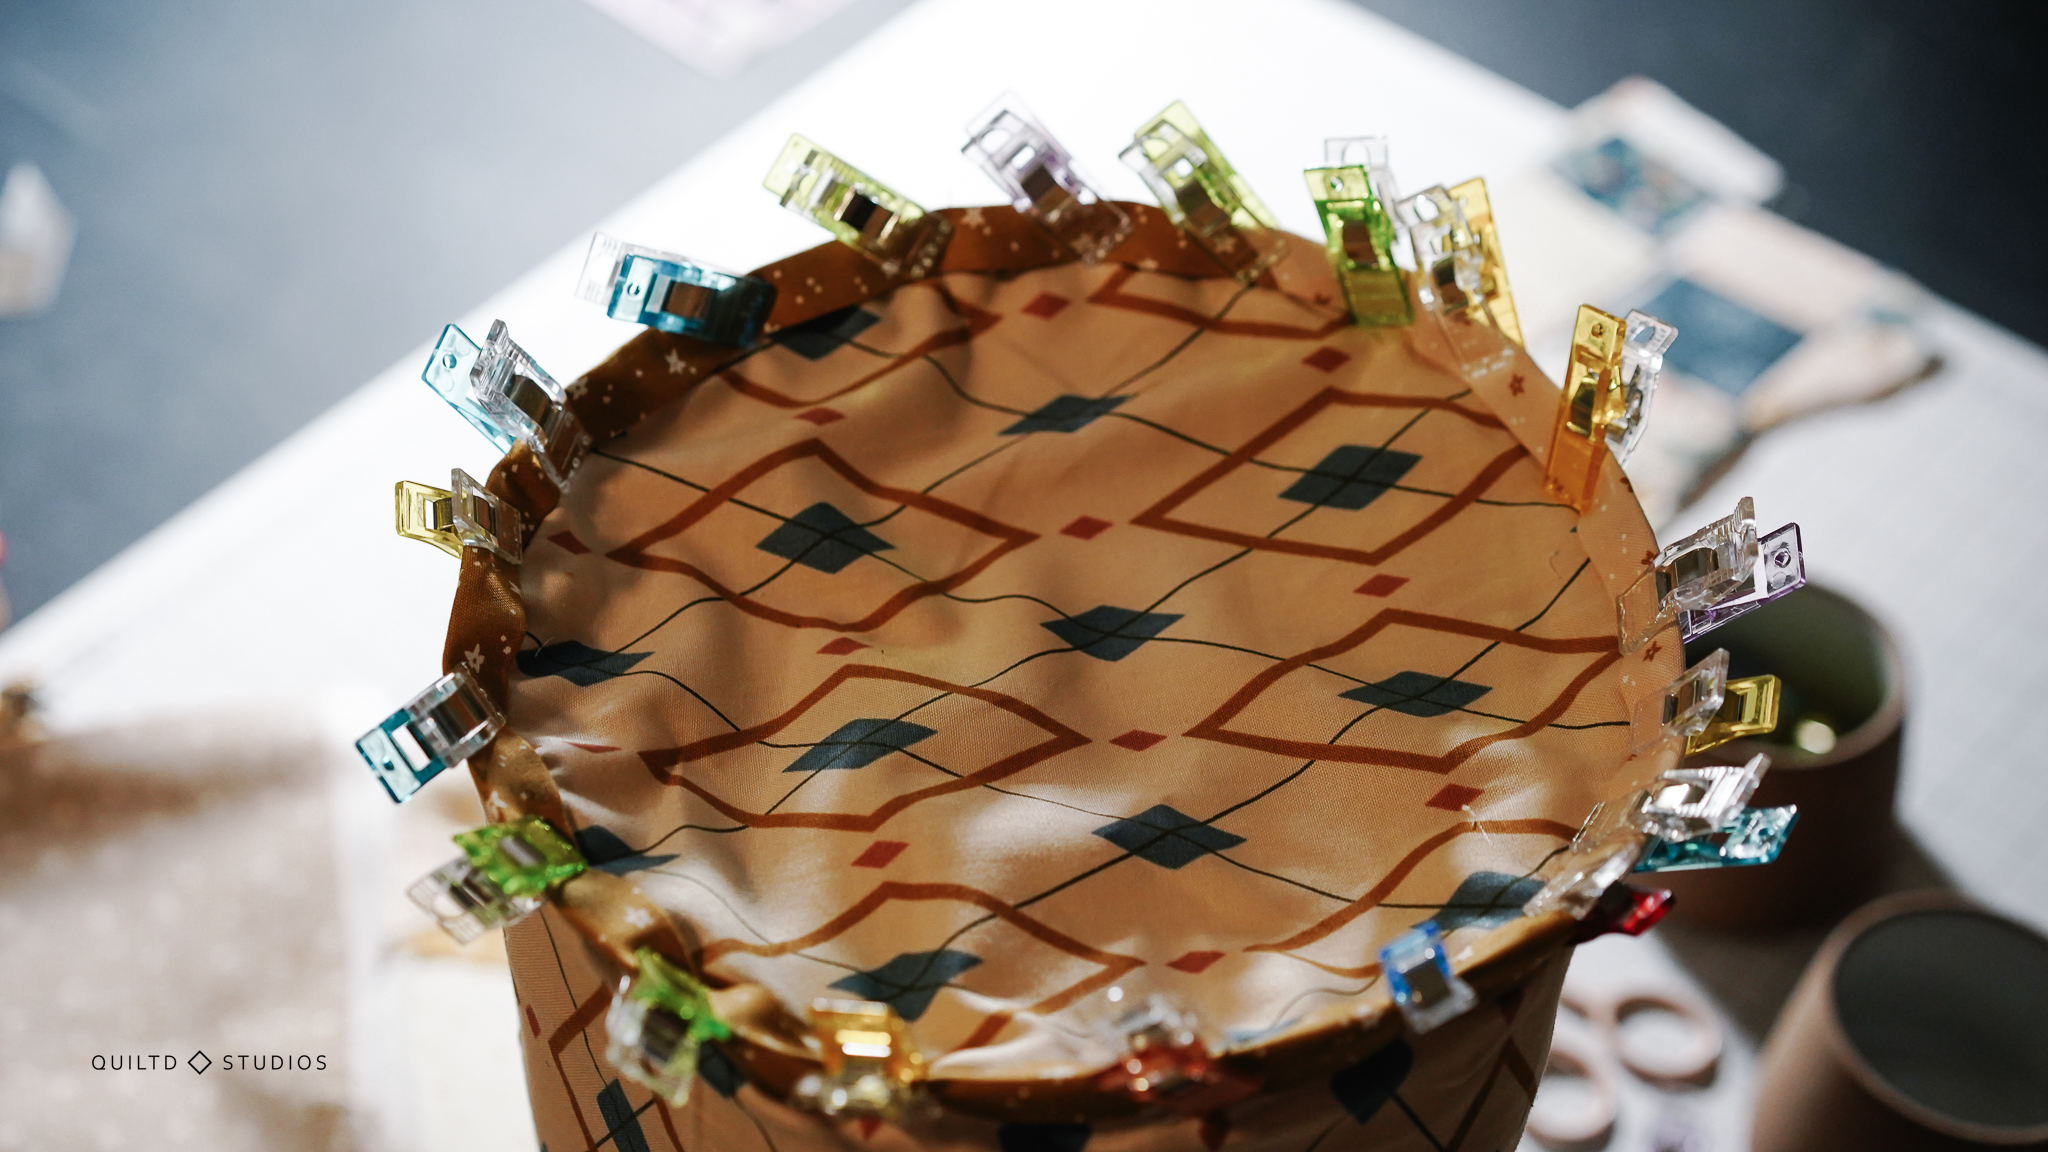
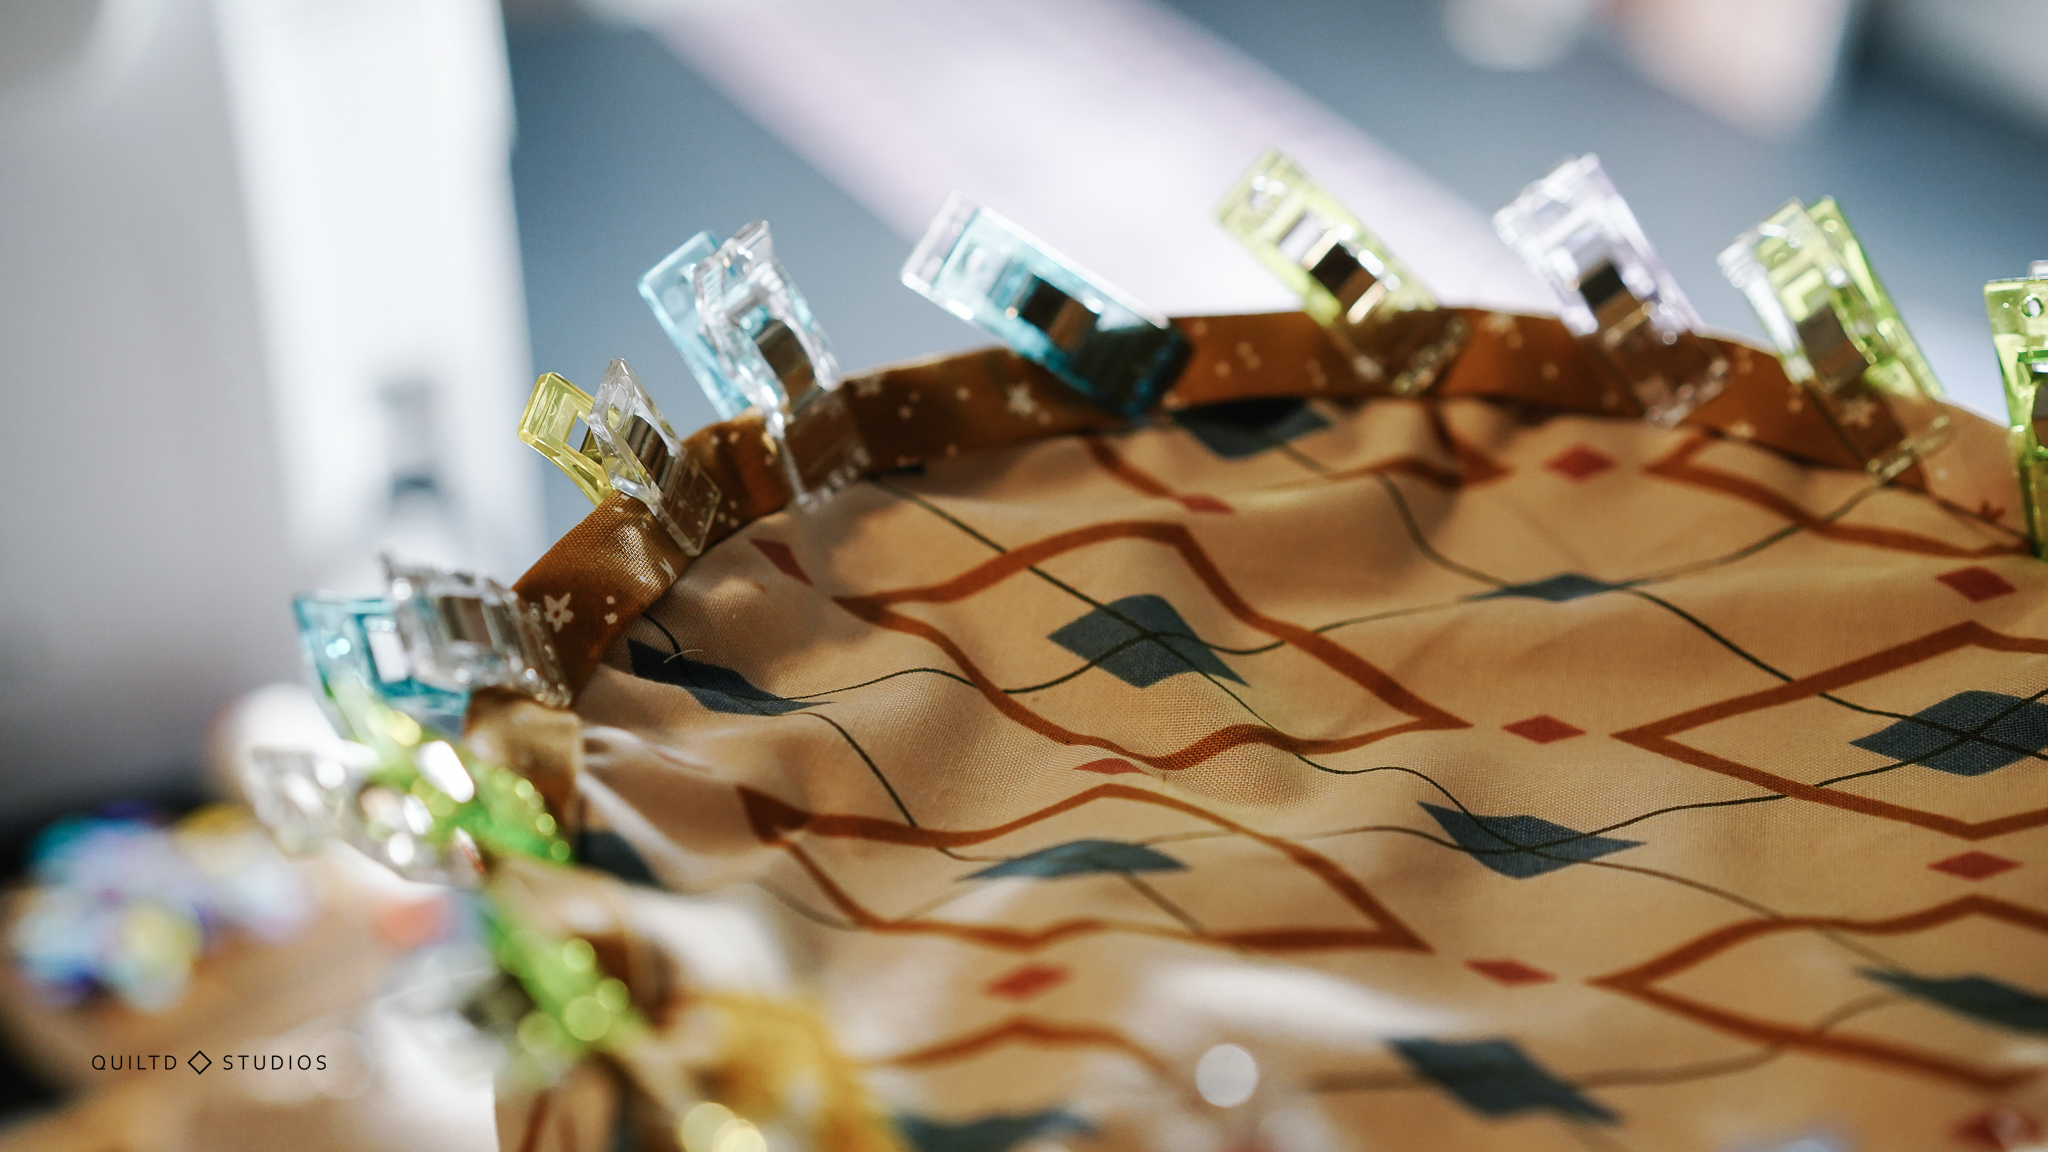
Attach the Round Ends
Let's attach the circle ends!
Baste the lining circle to the outside circles wrong sides together. I usually use a long stitch and do it with 1/4" seam allowance.
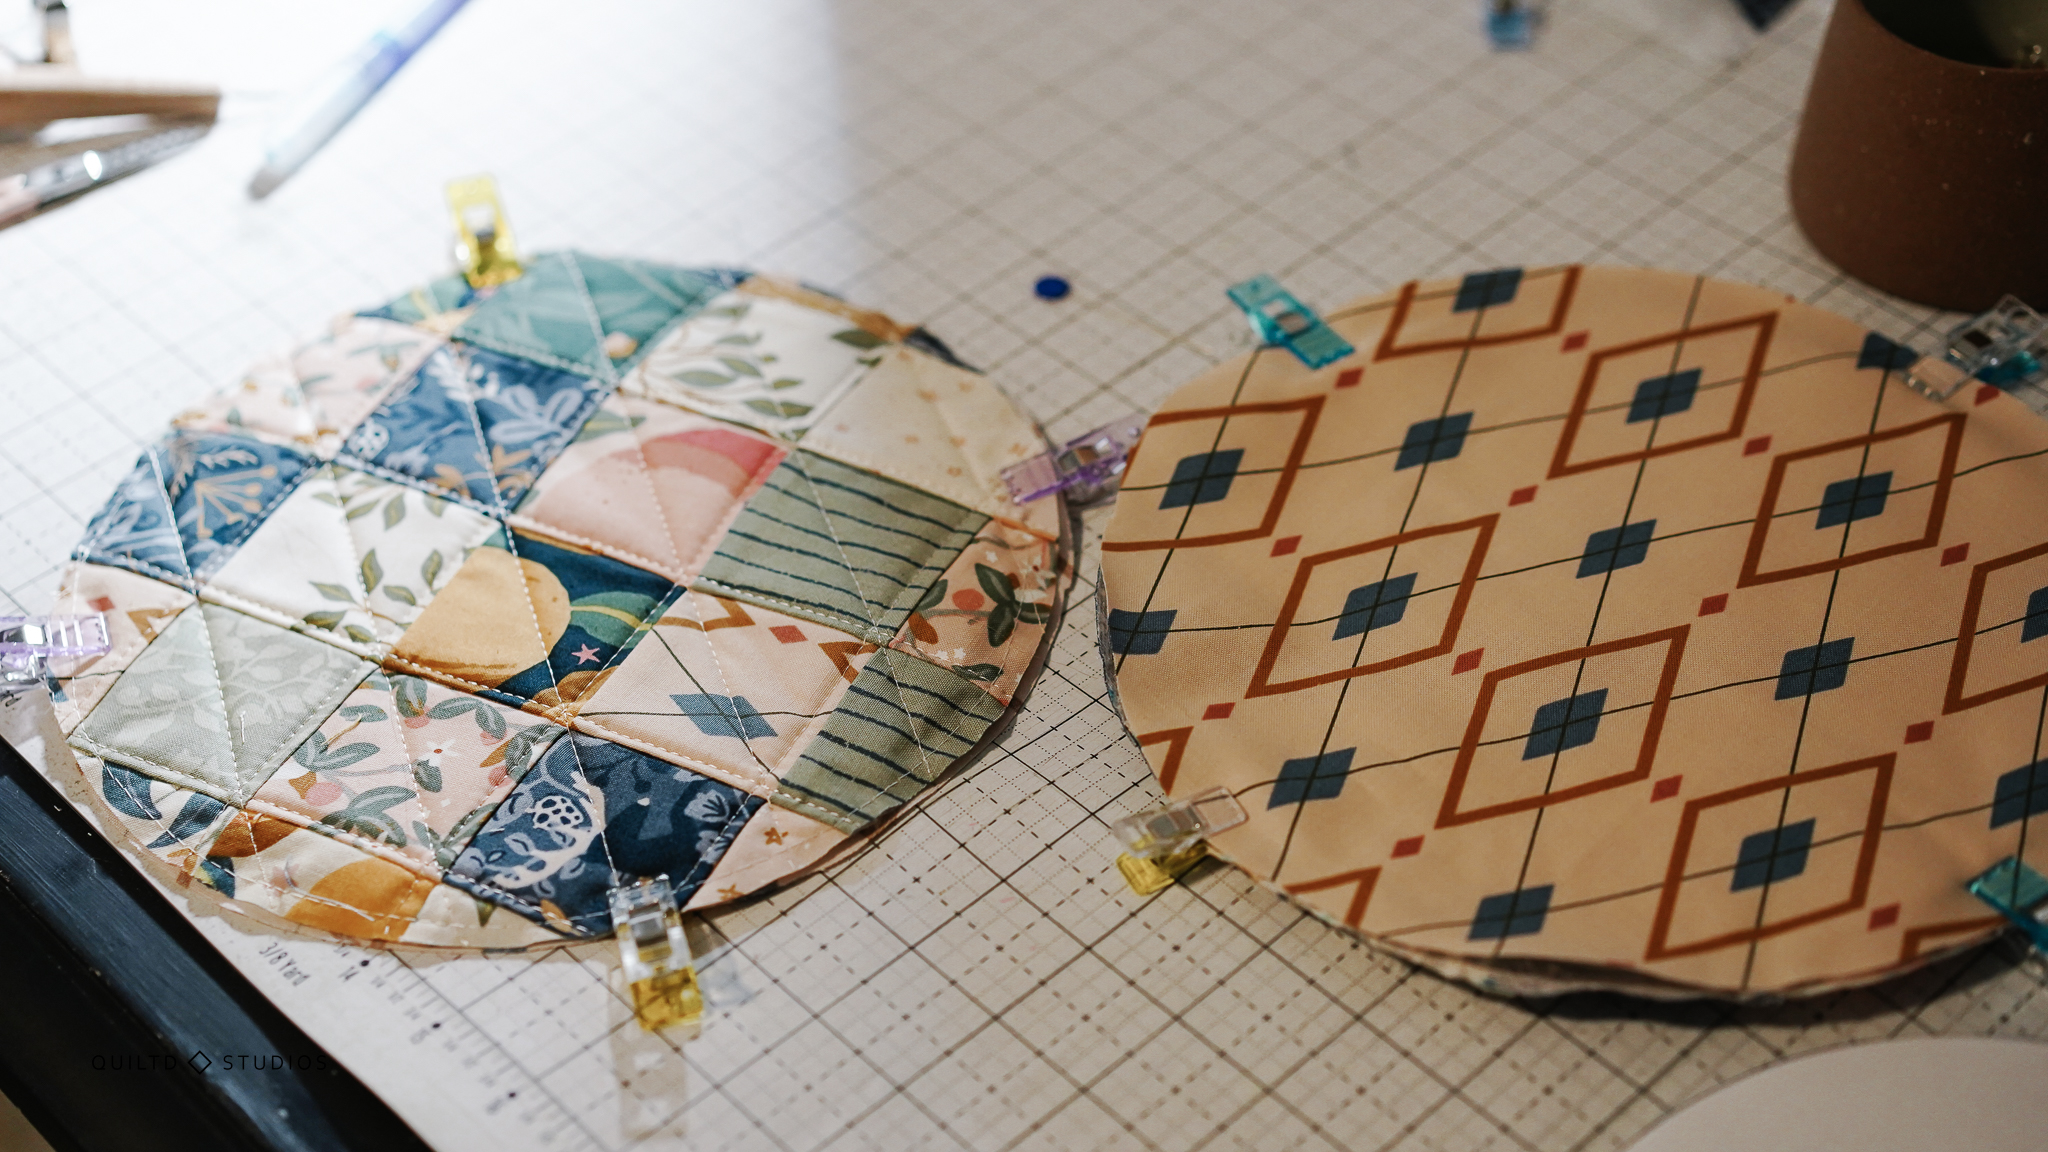
With right sides together, pin and align quarter marks. Baste stitch the bag edges together (the outer fabric and lining together).
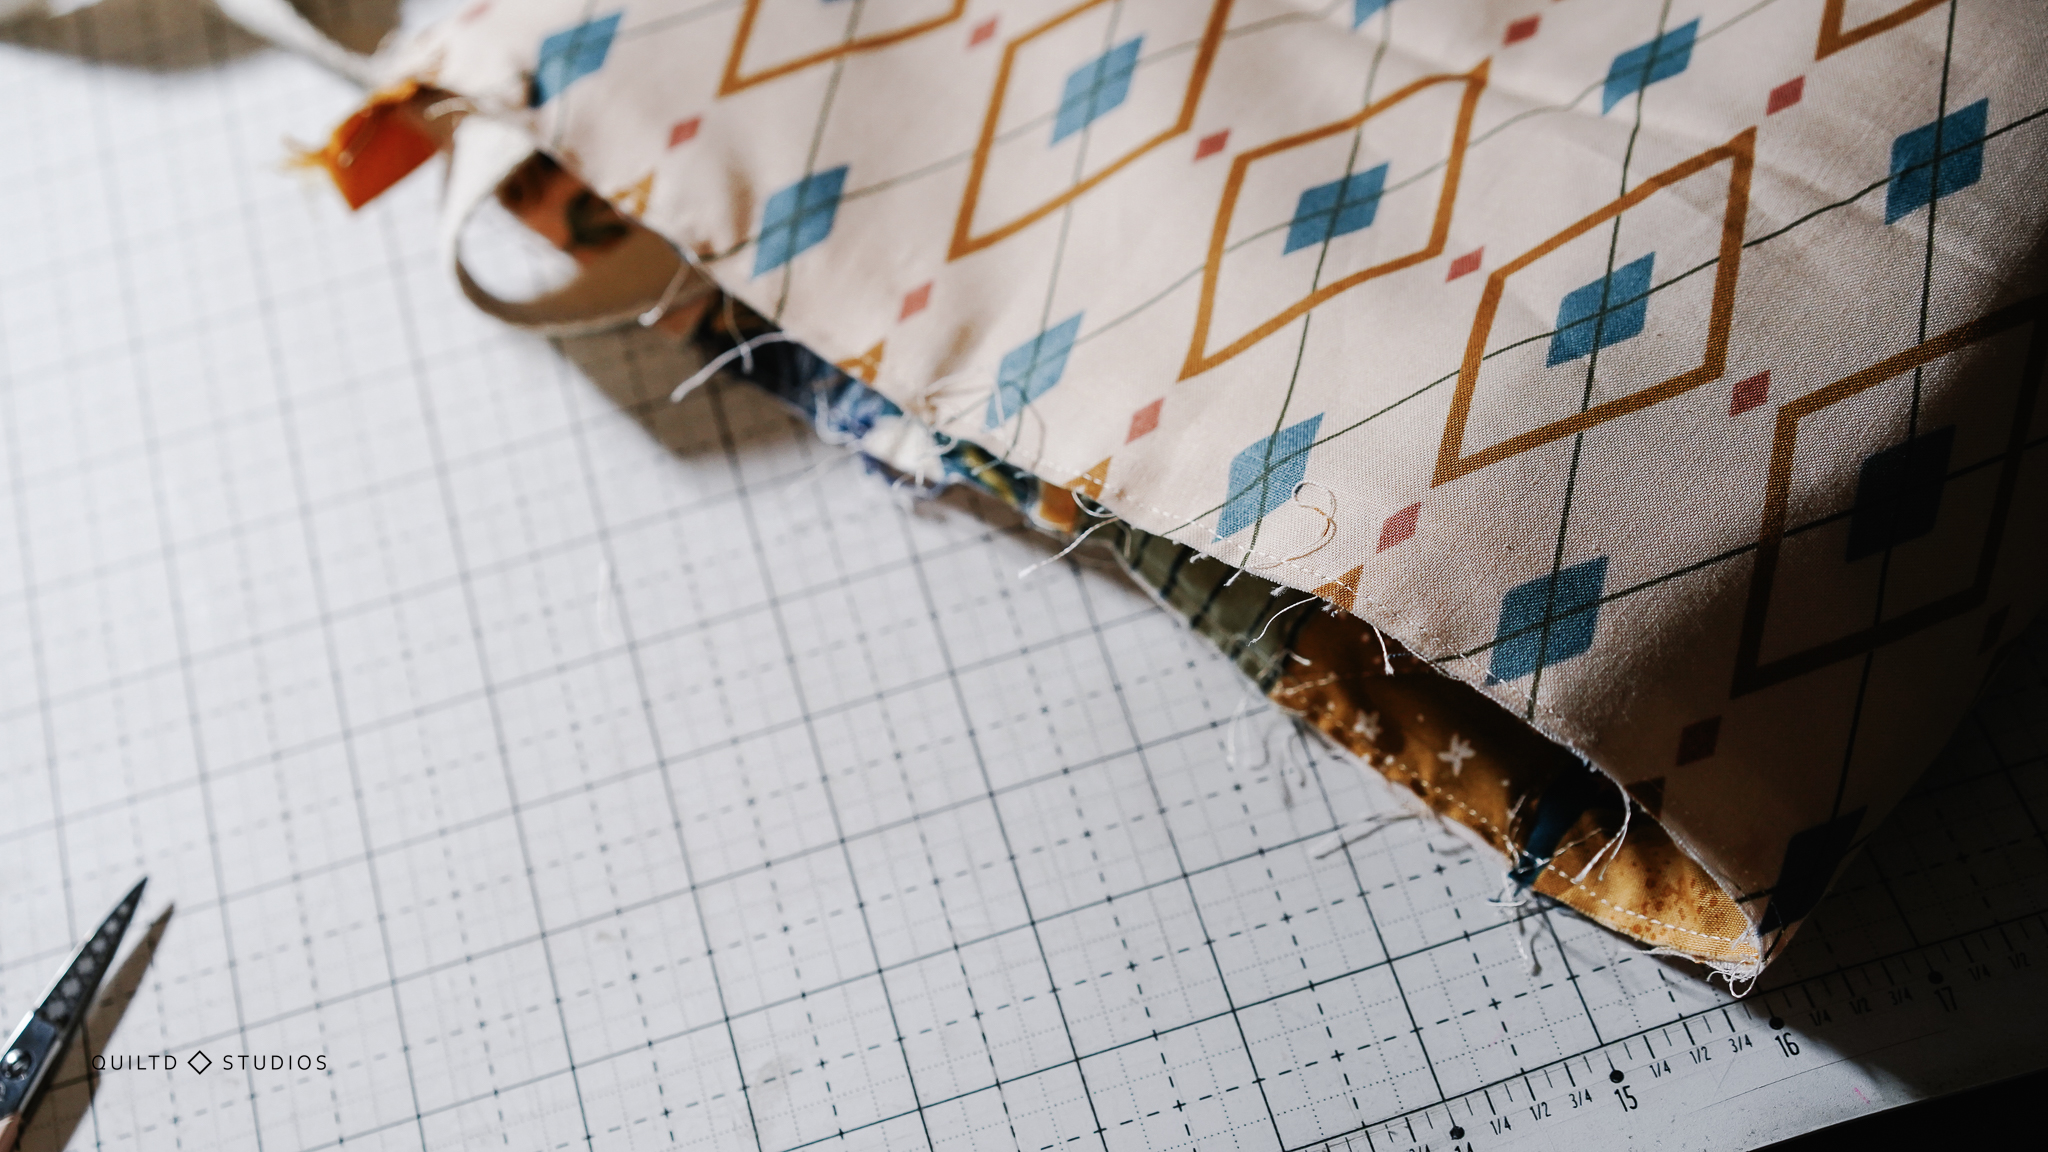
Fold your lining circles, your outside circles in half and mark, fold again to mark quarters. Then fold the bag in half so the zipper is at the top, mark the bottom, this will help us align everything.
Line up all of your marks and clip in place, remember this will be a 1/2" seam allowance.
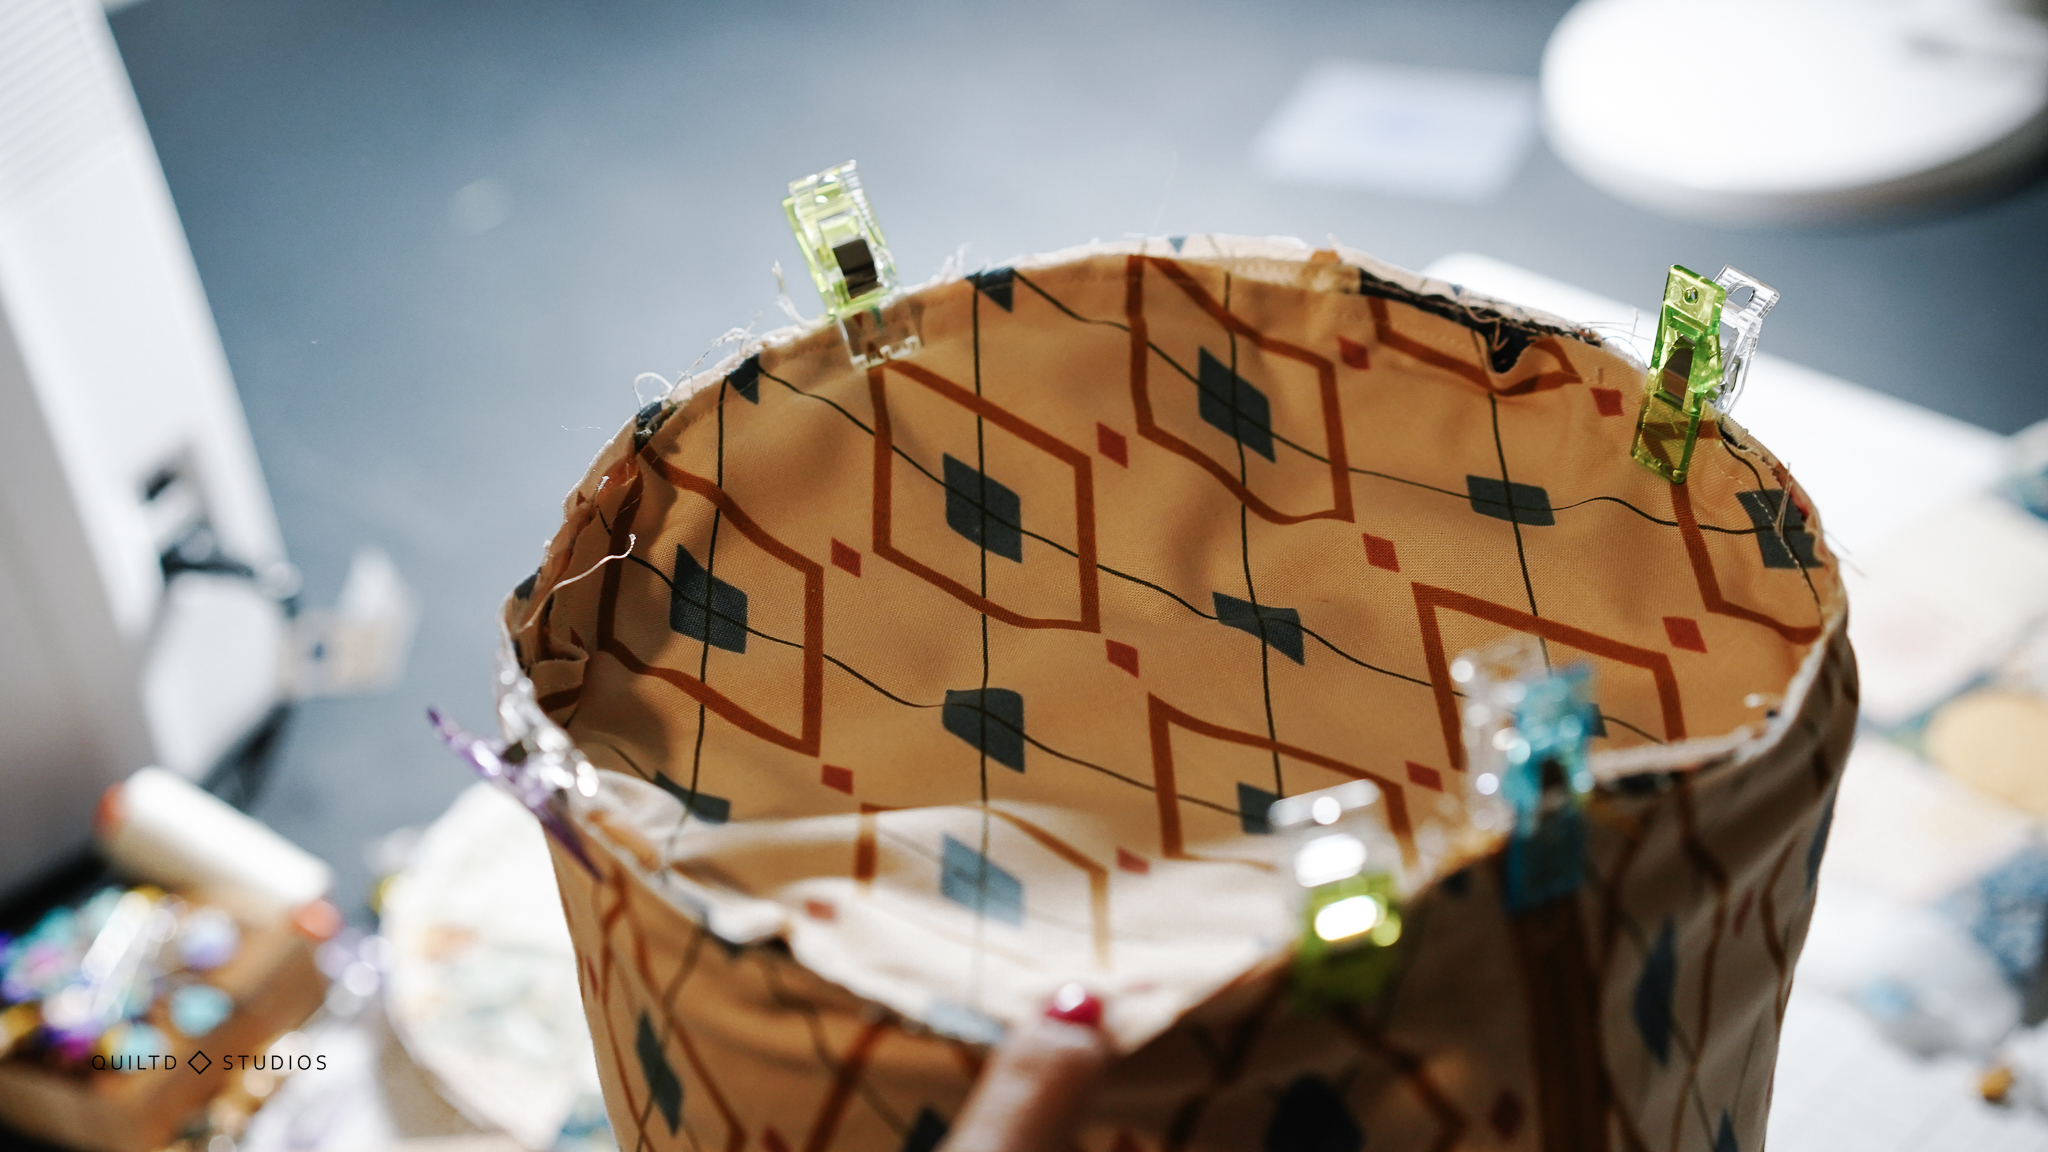
Clip curves if needed to ease around the edges, I didn't need to, however you might.
Stitch slowly around each circle using ½" seam.
Repeat with second circle and opposite side, leave the zipper open to help with turning.
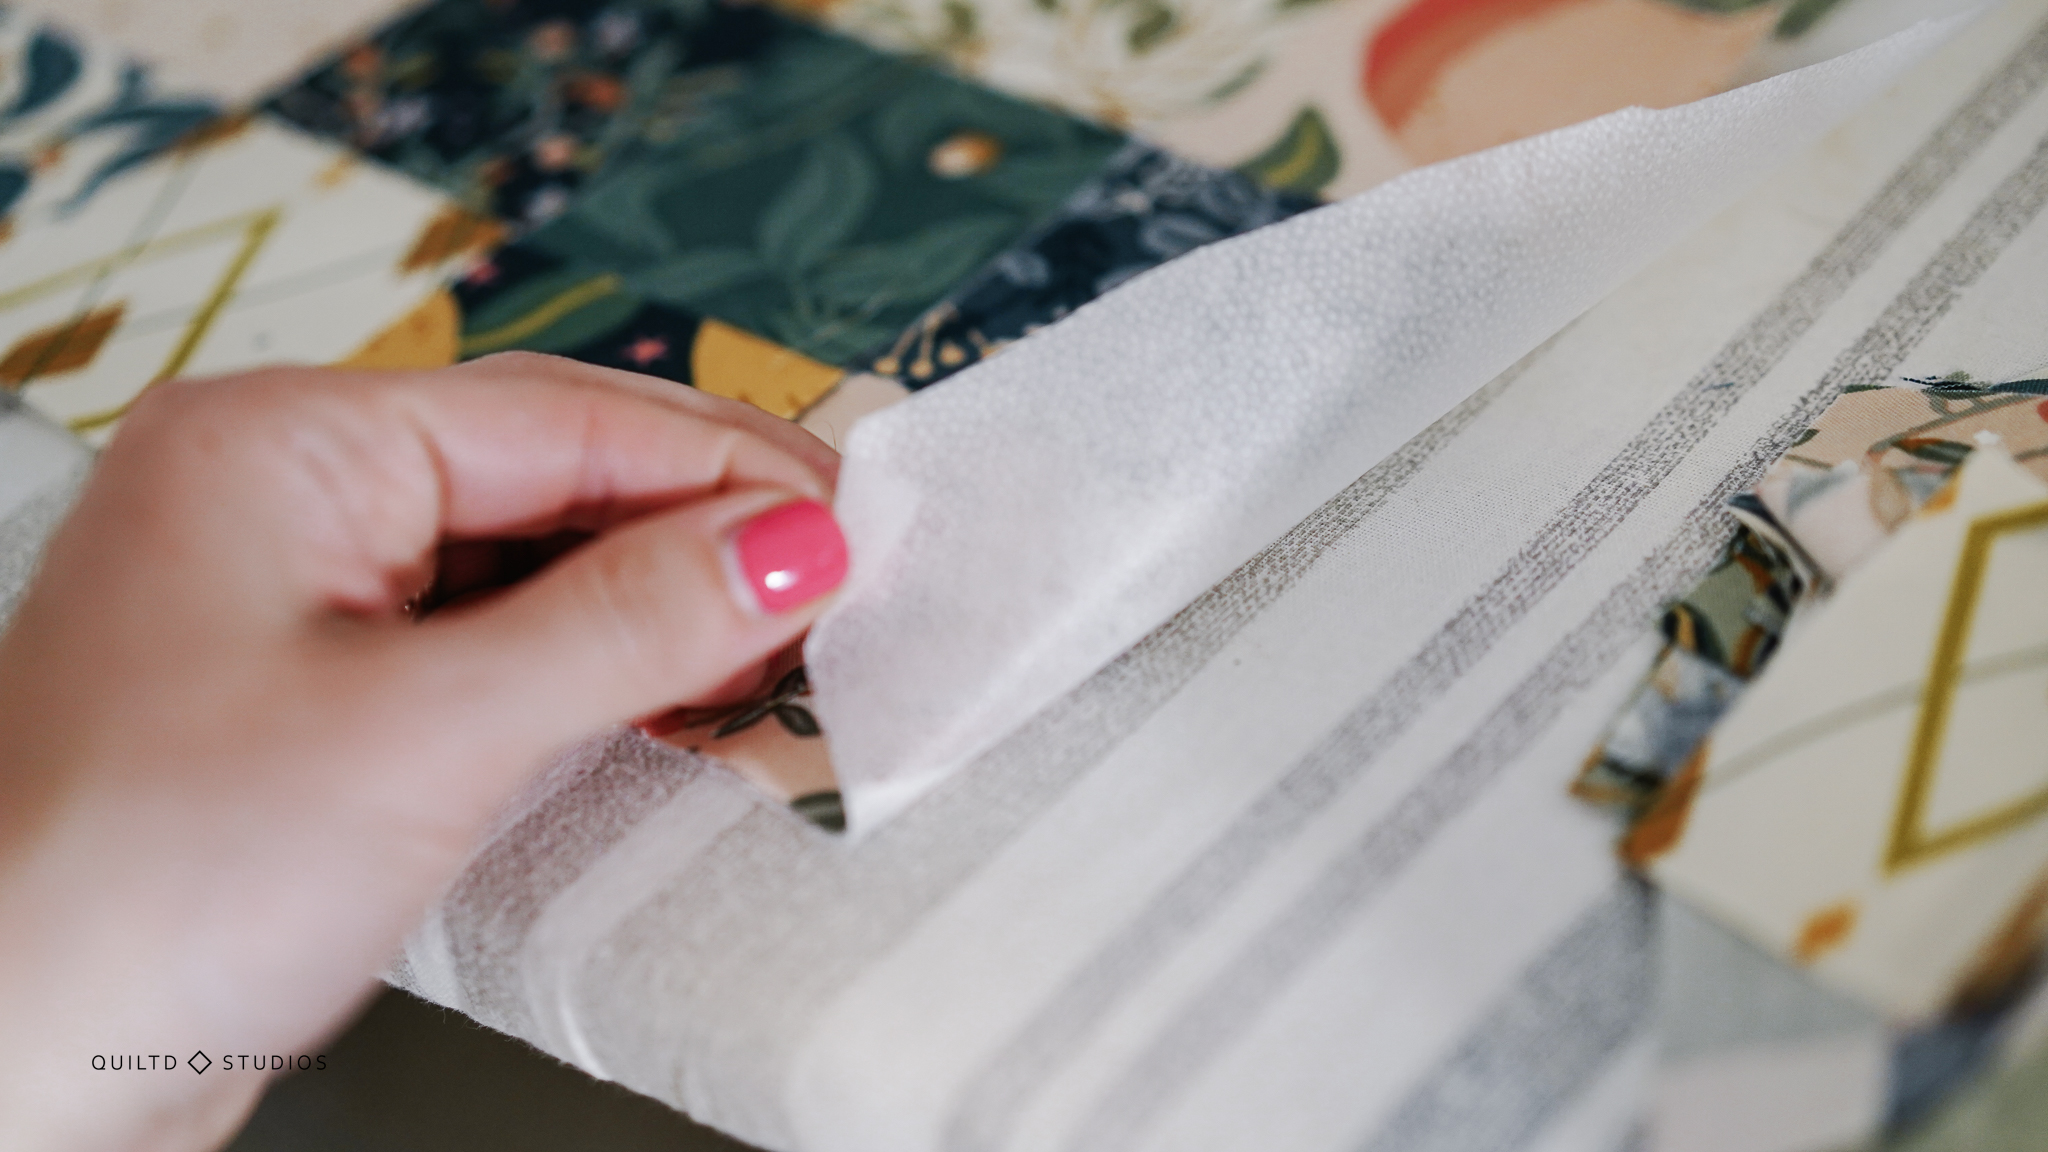
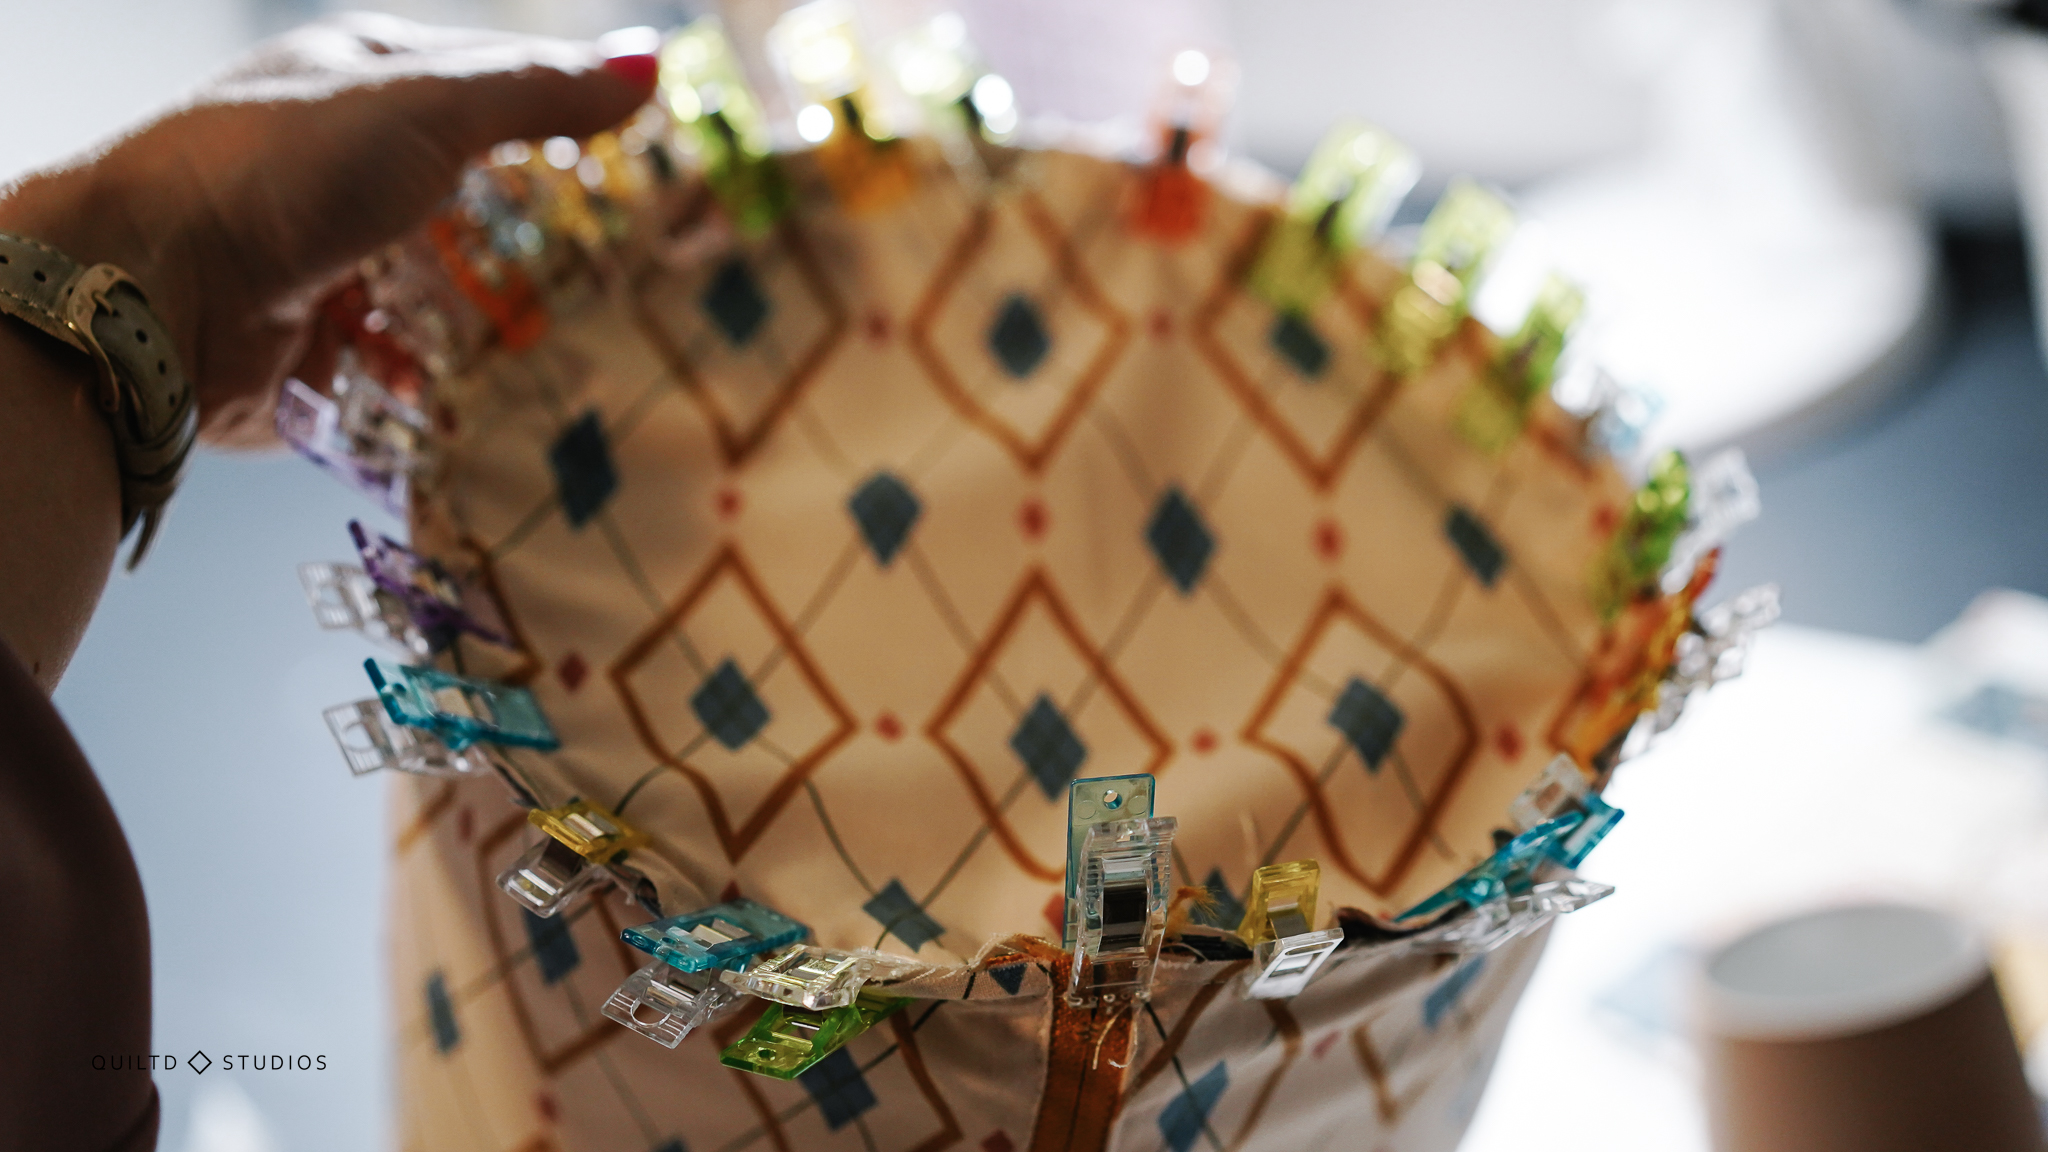
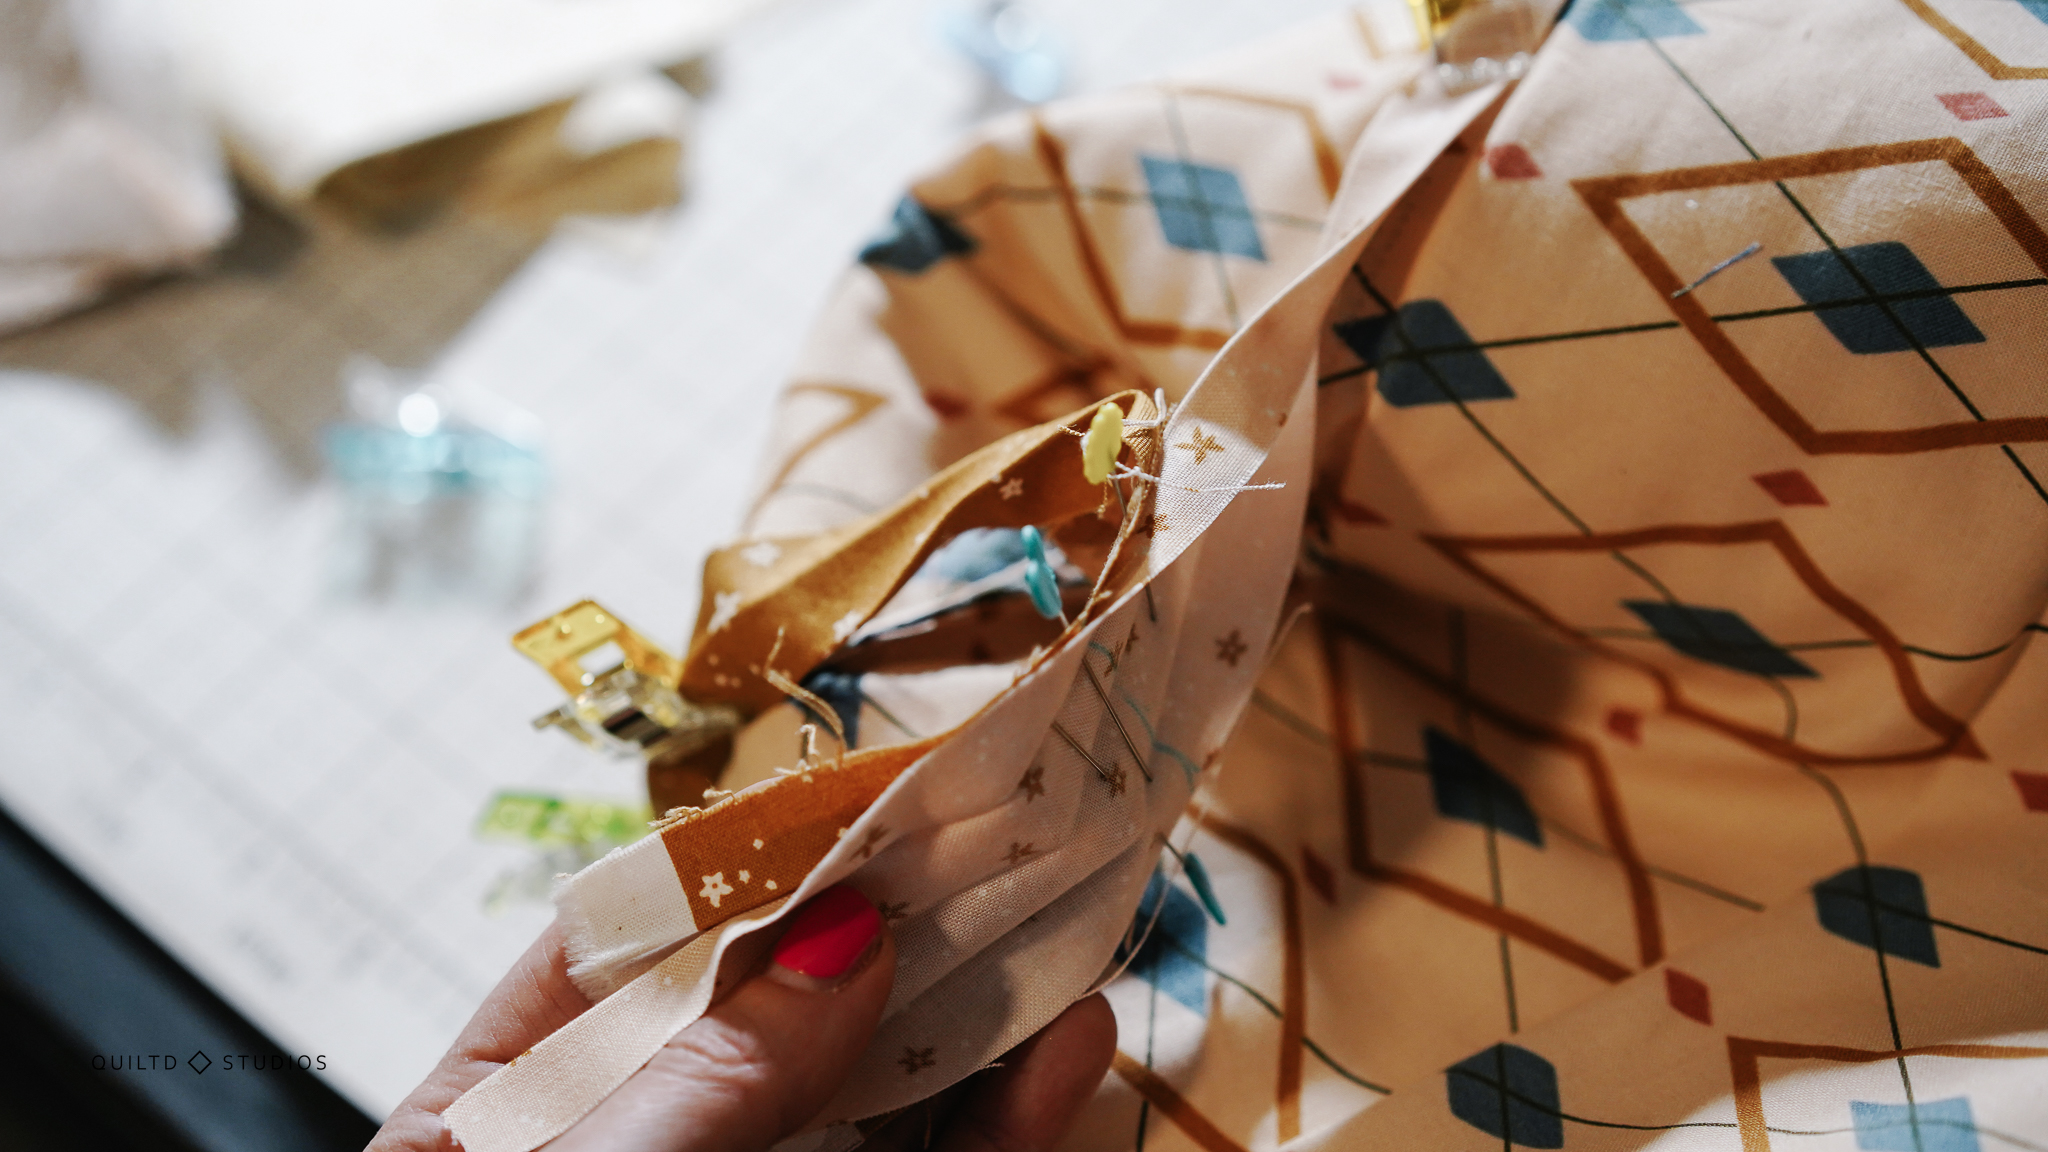
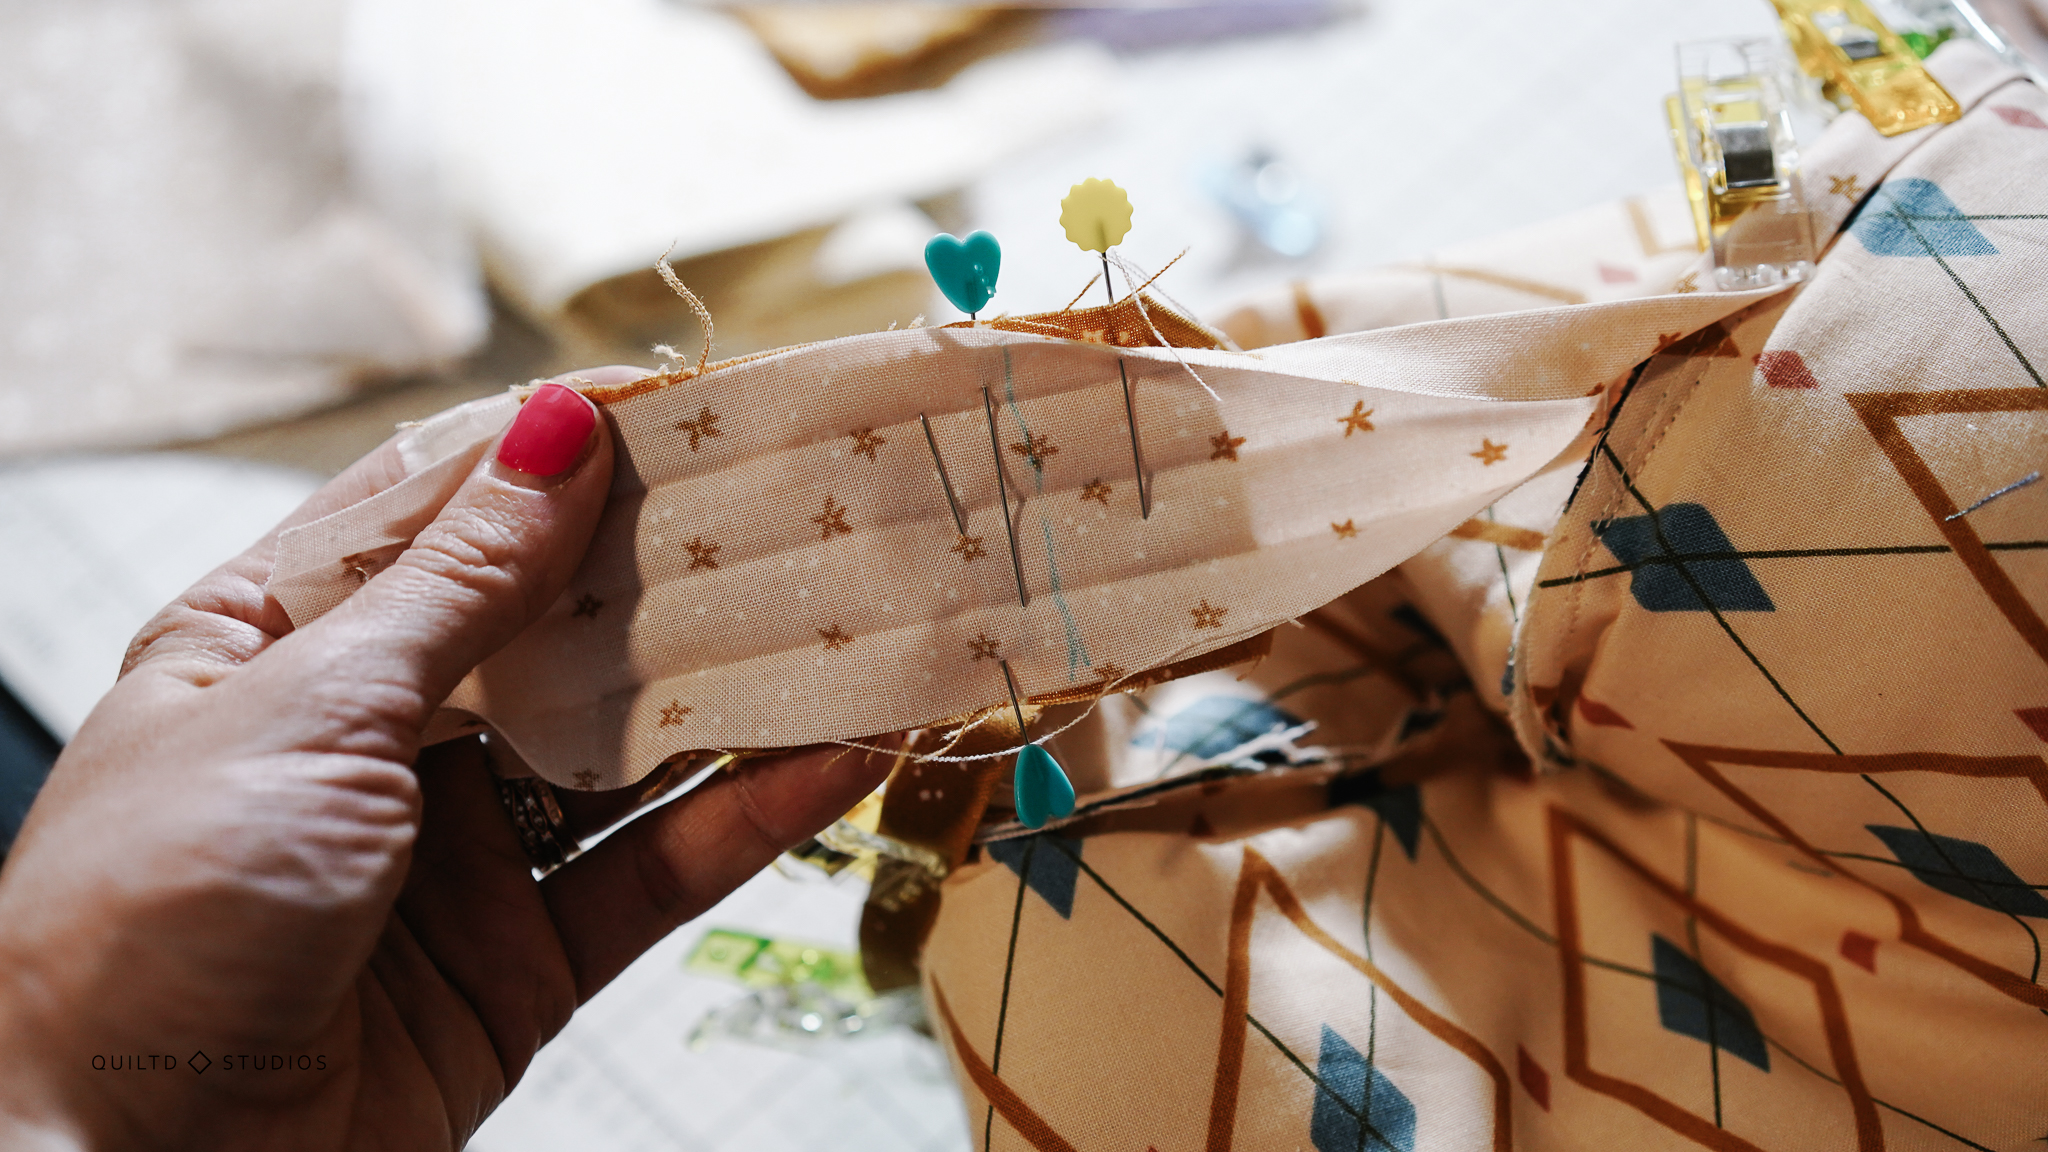
Last steps! Make your double fold bias tape, if it isn't premade, by taking a 2" strip and folding in half, iron it flat.
Open it up and fold both edges in to meet at the ironed line, press flat.
Trim your seams to be 1/4".
Open your binding and starting with a little tail, start clipping or pinning in place around the seam. This finishes our only inside seams and helps keep the circle shape.
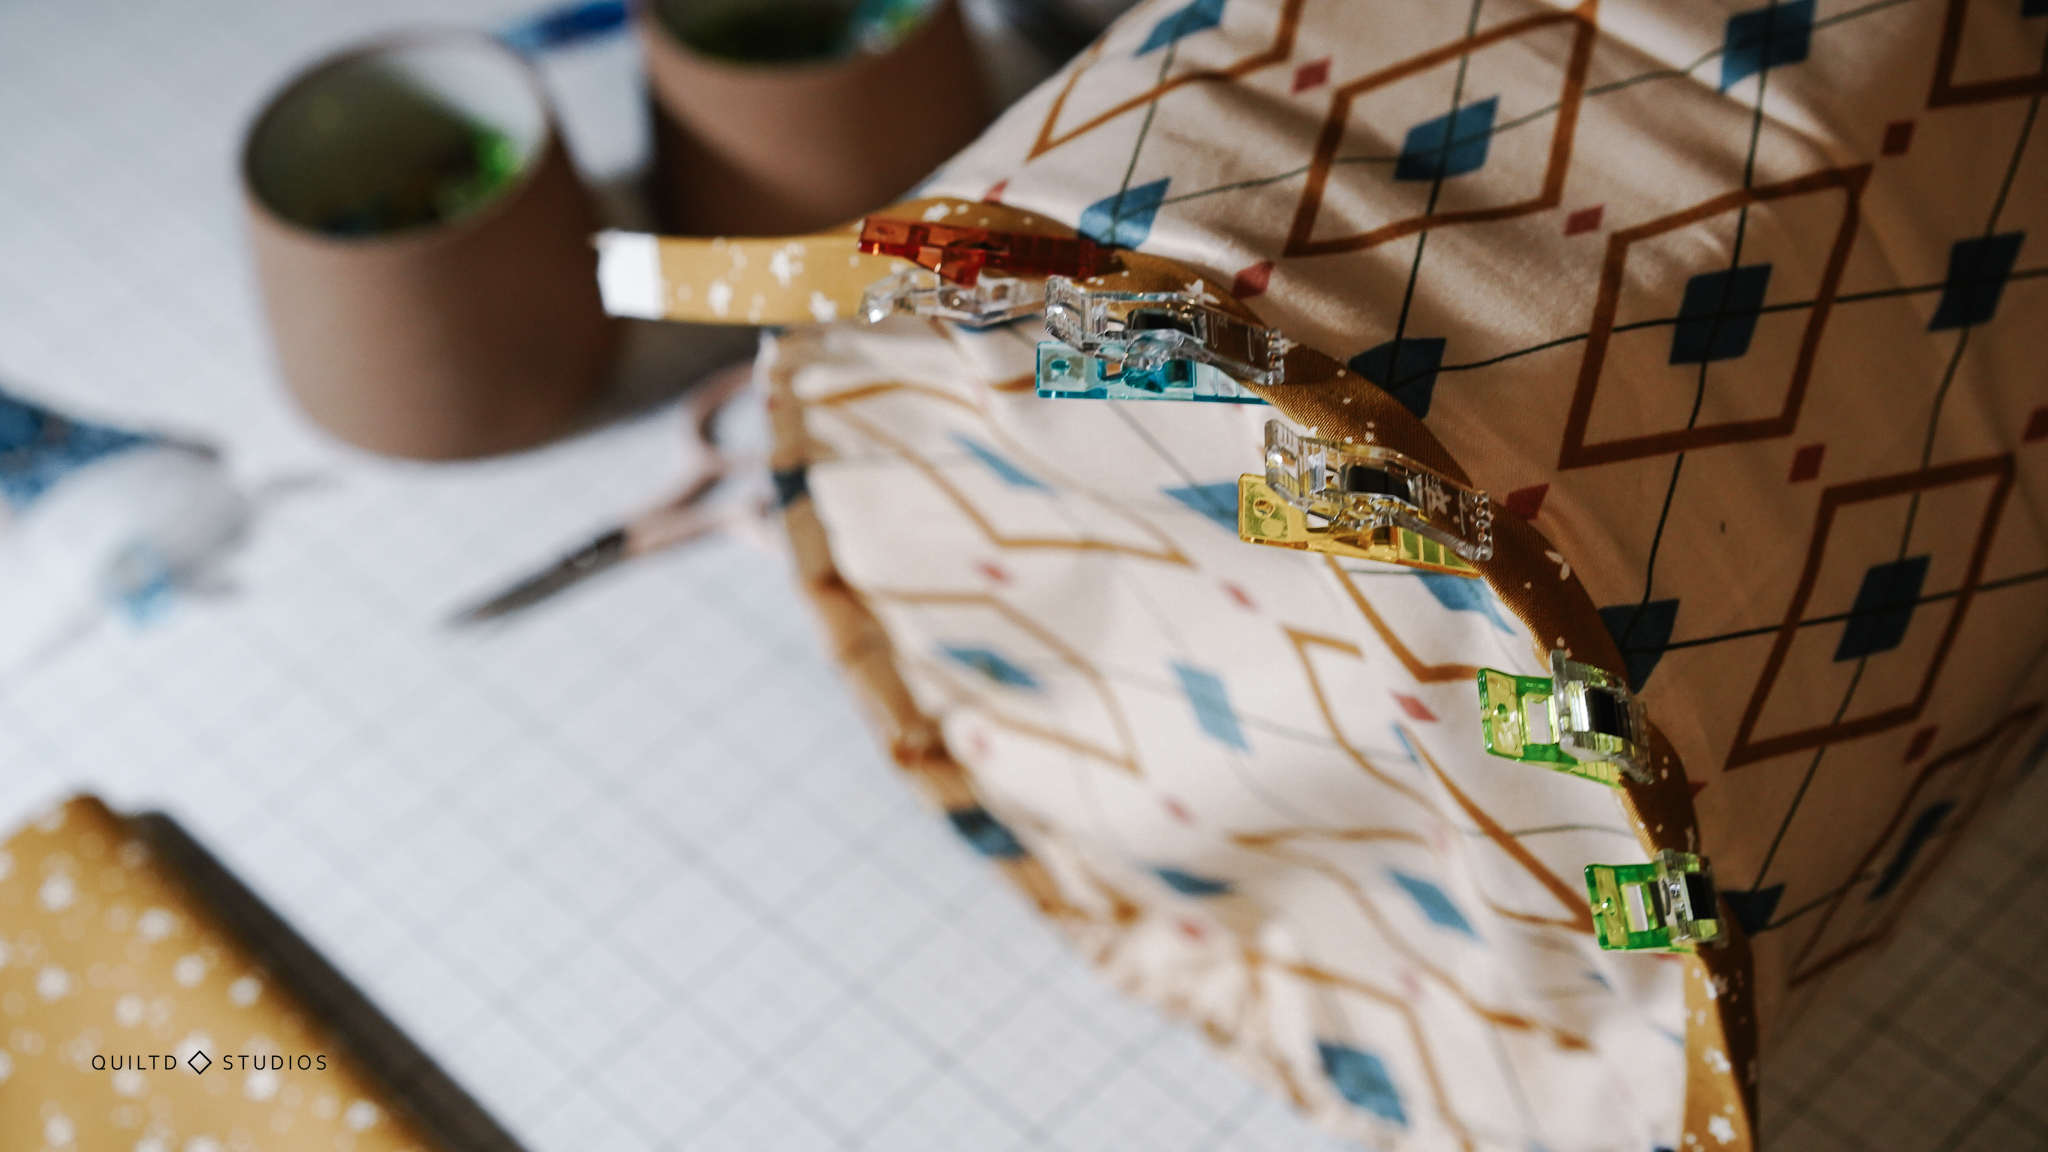
Sew the binding down so that both folded edges of the binding are caught (it can be a little difficult but you can do this!). Stop a few inches before completing and fold both edges up to mark a line.


Pull the ends together and sew down that marked line, check to make sure it's a perfect fit before trimming the excess.
Finish sewing the binding on. Repeat for the opposite circle side. 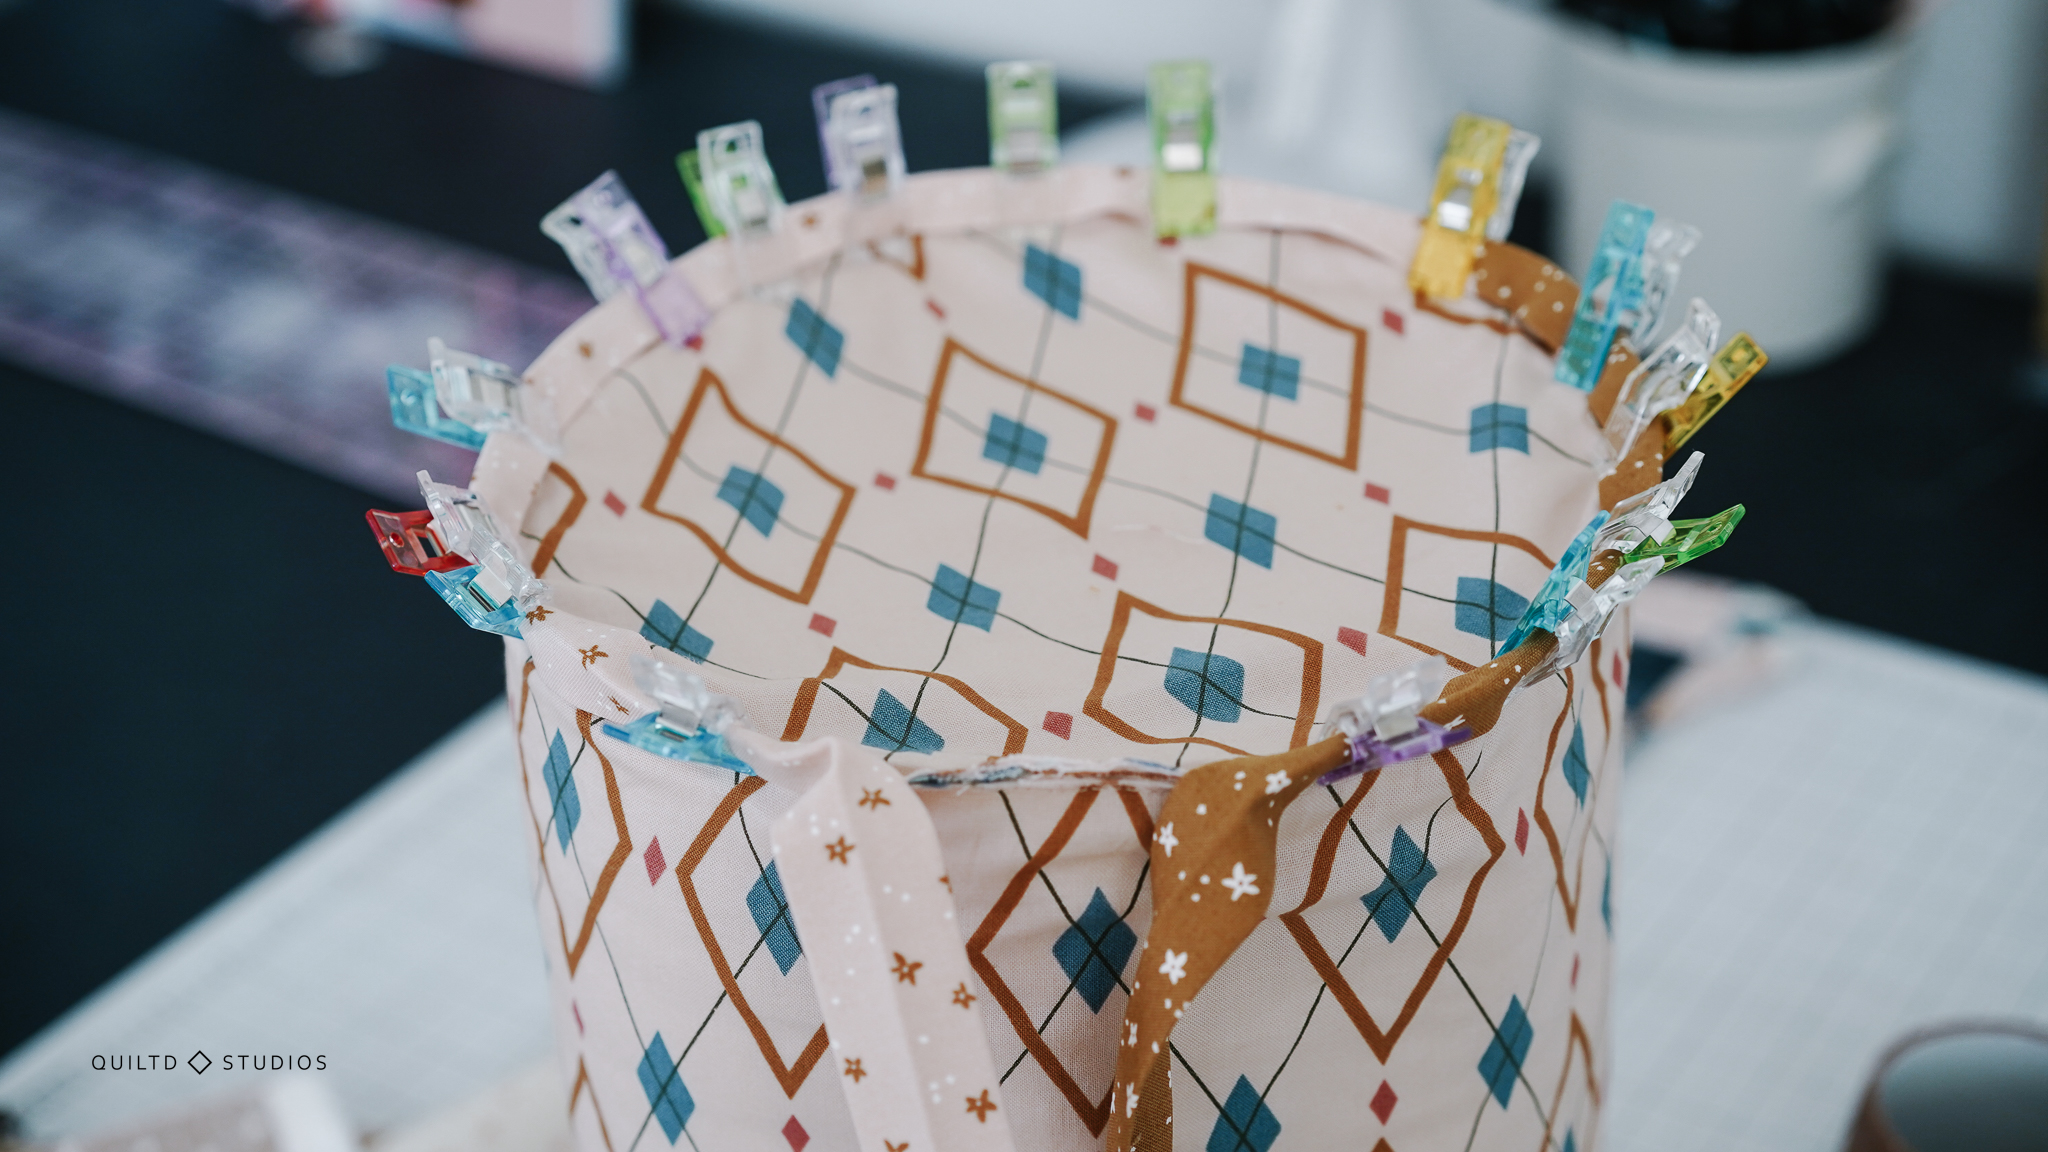
Optional: Fold your handles in half, mark a few inches from the center top point and fold in half (lengthwise) and clip in place. Sew about 5" to create a "handle in the webbing, or a more narrow area for your hand to fit on the handle.
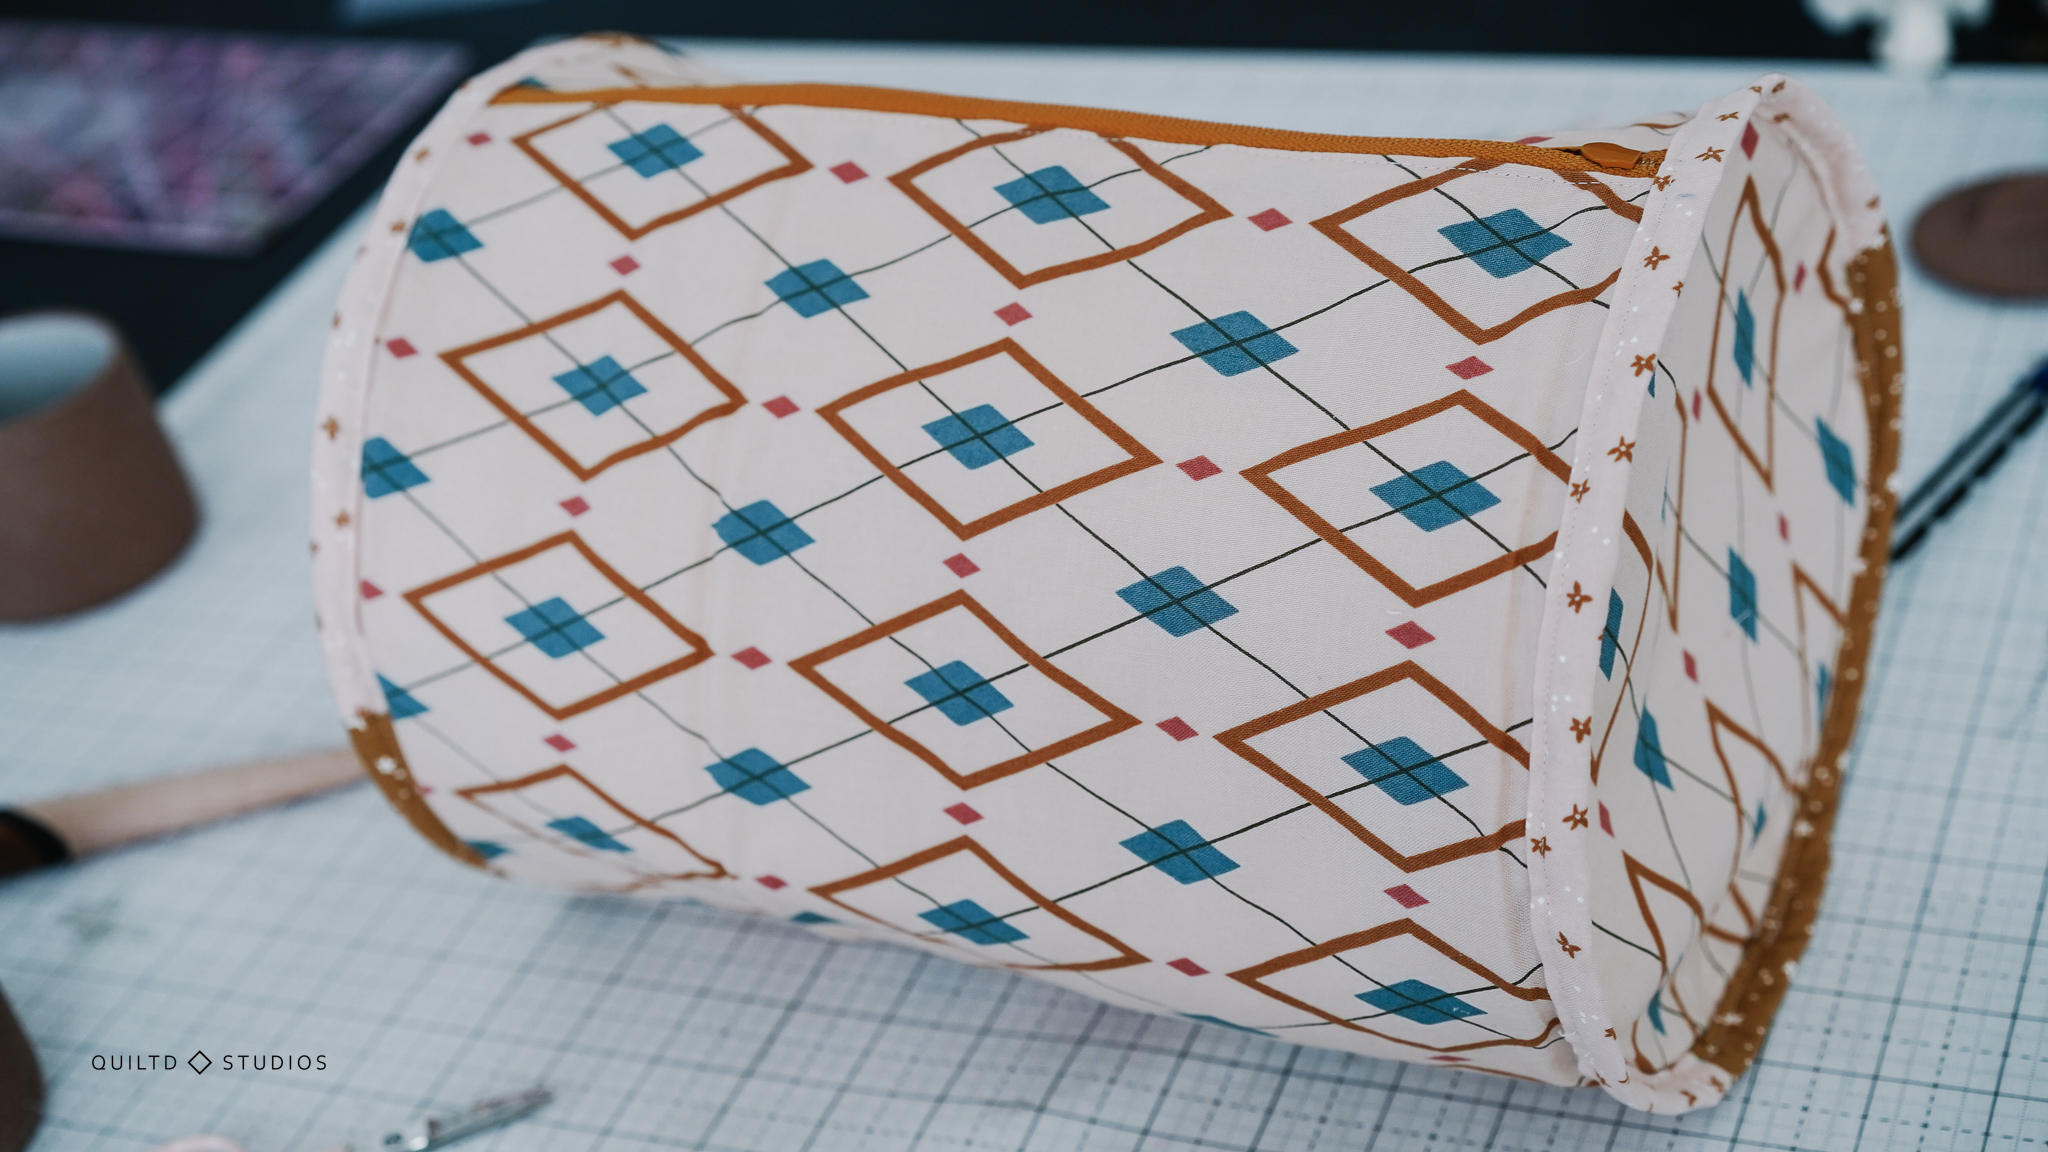
Your Round Trip Patchwork Duffel bag is complete!
I can't wait to see what you do with yours! Make sure to tag me on Instagram so I can see, or feel free to email me pictures, I love seeing your beautiful creations!
xox Jess
7 Quilt Blocks to Make Before You Die
Subscribe to get the FREE patterns! I scoured lots of quilting books, old patterns, databases, every quilting nook and cranny to figure out which 7 Quilt blocks were the MOST iconic, and I'm so excited to share them with you!!
Quiltd Studios | Blog

You love quilting, but you want more than just pretty patterns—you want quilts that feel timeless, elegant, and effortlessly you. At Quiltd Studios, I design quilt patterns, fabric collections, and sewing projects that bring beauty and warmth to the everyday—elevated yet approachable, modern yet timeless. So grab your favorite drink, some cute fabric, and let’s create something beautiful.